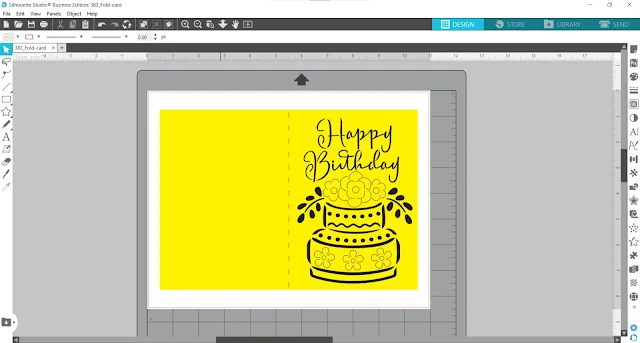
Cut out cards have at least two layers with what you see through the cut out being applied after the card is cut and allowing you to customize the look of the card.
This Happy Birthday cut out card from So Fontsy's Flowers and Flourishes SVG and Font Bundle is not only beautiful when it's put together, the file is set up so well you can simply open and cut! Plus, the designer even included PDF card instructions as well!
After importing the card design into Silhouette Studio, you'll see the design is already set up to both cut out and score down the middle of the card - without having to make any changes to it in Silhouette Studio!
The "score" marks in the middle of the card will actually cut a perforated line to fold the card in half (which is totally fine and what I did with my card). But, if you want to change that to an actual score line, check out this blog post about how to change a perforated line to a score line.

For best results, use a high quality, heavy weight cardstock between 80 to 110 lb. weight cardstock. The settings for the 80 lb. cardstock I used were the Silhouette Studio default settings for "Coverstock, Heavy", except I changed Passes from 2 to only 1 pass.
You should always do a test cut before cutting into your actual project, just to make sure you'll get those cut settings perfect without ruining your project.
After cutting, flip the entire cutting mat over and roll the mat away from the cardstock. This helps keep the cardstock from curling.
Hopefully, all the cut pieces stick to the mat, but if not, use a poking tool to poke them out, poking from the front of the card to the back. Remove any remaining cardstock pieces from the back of the card.
To attach a contrasting piece of paper that will show through the card cutouts, use 1/8-inch Scor Tape around the front edge of a piece of 4.75 by 6.75-inch glitter cardstock.
Fold the card in half along the pre-cut score lines.
For added dimension, slightly bend the petals of the flowers up. This also reveals more of the beautiful glitter cardstock underneath!
Then, embellish as desired! You can adhere sparkly sequins with a dot of Art Glitter Glue to random areas of the front of the card, and the Crystal Katana tool works great for picking up those small sequin pieces.
Get Silhouette School lessons delivered to your email inbox! Select Once Daily or Weekly.


.png)


Thanks for this pretty card tutorial! I would love to try and make those stickers! Can I get details on what kind of sticker paper that is! I’ve been looking for that frosty printable sticker paper!
ReplyDeleteThanks for this pretty card tutorial! I would love to try and make those stickers! Can I get details on what kind of sticker paper that is! I’ve been looking for that frosty printable sticker paper!
ReplyDeleteCheck out online labels! https://www.onlinelabels.com/products/ol177
DeleteWhat mat do you use for cardstock? It looks almost soft so that it's easier to roll like you're showing! Thanks for all the tutorials and help!
ReplyDeleteThis is the Silhouette mat. The trick is to turn it over and peel the mat off the design instead of the other way around!
Delete