Engraving on glitter acrylic doesn't always come out the way I wish it would. It's often more subtle than what I'd like due to the glitter itself. And in some lights it's nearly impossible to see.
The trick is putting a white toner transfer onto the glitter so it appears engraved, when it's actually not.
I'm using this funny Christmas ornament design from So Fontsy's Santa's Naughty List SVG Design Bundle.
To create the faux engraving we're going to print a white toner transfer on hard surface paper using the iColor 560.
Start by importing the file into iColor ProRip Essentials. The image doesn't have to be filled with white although it makes it does make it much easier if the file is already solid white.
Once the file is in ProRip Essentials select it and pull one corner in to scale the design down to the size you want.
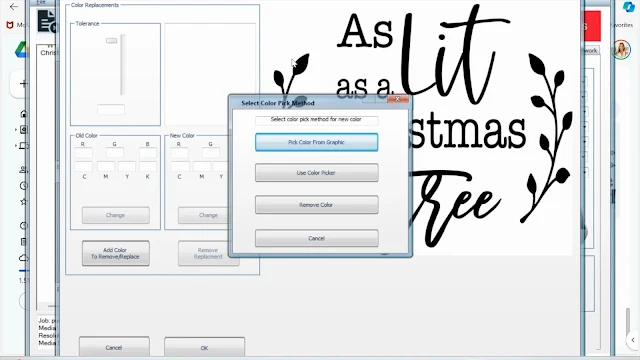
If your design is not already white you can use the Color Replace/Remove to change the color of the image. Select the design > right click > Color Remove / Replace. If you need help, his tutorial goes in depth on how to change, remove or replace colors in iColor ProRip Essentials.
TIP: I like to change the color of my design to white in a different program, like Silhouette Studio, before importing into iColor ProRip Essentials because even with the Color Remove/Replace option, there tends to be some areas along the edge that stay gray.
Once the file is whited out, we need to adjust the settings for overprint on Hard Surface paper. Because we are putting this transfer on the front of the acrylic, instead of the back, like I like to do when printing on clear acrylic sheets, we need to do an overprint.
Select the material as Hard Surface Premium Overprint. Select the Mode as Overprint.
Place a sheet of Hard Surface paper into the Bypass tray with the shiny side down. Click the print button to rip and print.
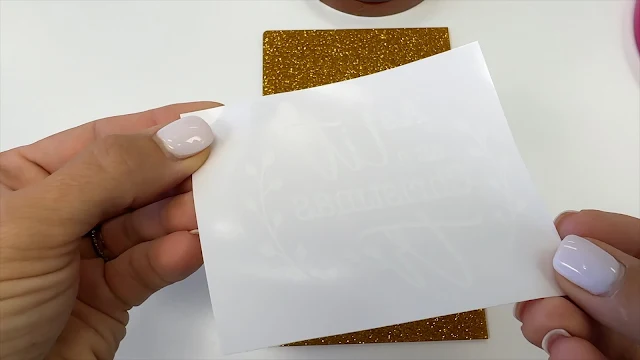
After the hard surface transfer has printed, it will be hard to see on the paper because it's all white, but don't worry it's there.
Grab your sheet of glitter acrylic and make sure any protective film has been removed. You also want to make sure your piece of acrylic is slightly bigger than your design so you can laser cut fully around it.
Use high temperature tape to secure the transfer to the sheet of acrylic so it doesn't move while heat pressing. Don't use too much tape though that it takes it difficult to remove the transfer sheet - you need to be able to remove it quickly.
Heat up your heat press to 290 then press, with the transfer side up, for 60 seconds.
When the time is up quickly move the acrylic sheet to another flat area and put something heavy and flat on top. I like to use this hack to prevent my acrylic sheets from warping when heated.
After about 30 seconds quickly peel off the transfer sheet, while it's still warm and then keep the acrylic under the flat, heavy item until it's completely cool.
Now you can get ready to laser cut the glitter acrylic. I'm using my xTool P2 CO2 laser.
Open xTool Creative Space and refresh the camera so you can see your acrylic sheet. Use the Close Camera view to get a good top down view of your printed material.
I'm just making round acrylic ornaments so using the Circle tool I can easily size and position it over the printed material. A second smaller circle creates a little hole for the ribbon.
If you wanted to contour cut this ornament, check out this video for how to add laser cut lines to pre-printed materials.
Set up your settings for laser cutting acrylic and...
...in no time your faux laser engraved glitter acrylic is done!!
I did a second glitter acrylic ornament where it's actually laser engraved so you can see the side by side and why I prefer to use to use the white toner transfers as faux engraving!
Want to get all the supplies to make these glitter acrylic printed laser items? Shop the full supply list below.


.png)


No comments
Thanks for leaving a comment! We get several hundred comments a day. While we appreciate every single one of them it's nearly impossible to respond back to all of them, all the time. So... if you could help me by treating these comments like a forum where readers help readers.
In addition, don't forget to look for specific answers by using the Search Box on the blog. If you're still not having any luck, feel free to email me with your question.