If you've struggled with how to size vinyl decals..that's about to end.
It's actually very, very easy to get perfectly sized vinyl stickers when you use this trick in Silhouette Studio. Read on for the why-didn't-I-think of that tutorial!
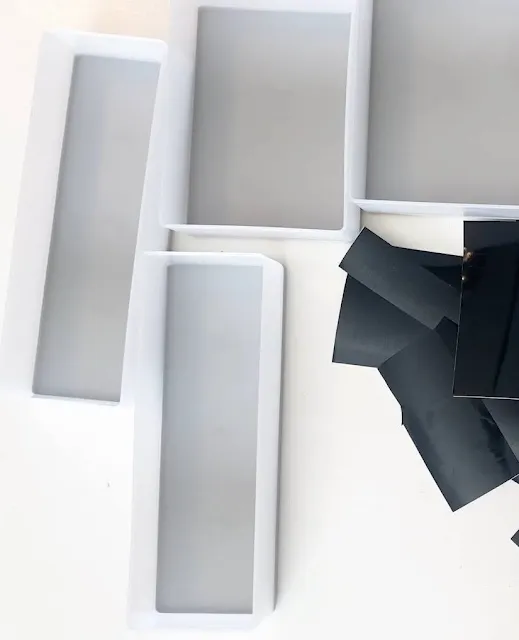
Grab the "thing" aka the surface where you're vinyl sticker is going to go along with a ruler or measuring tape.
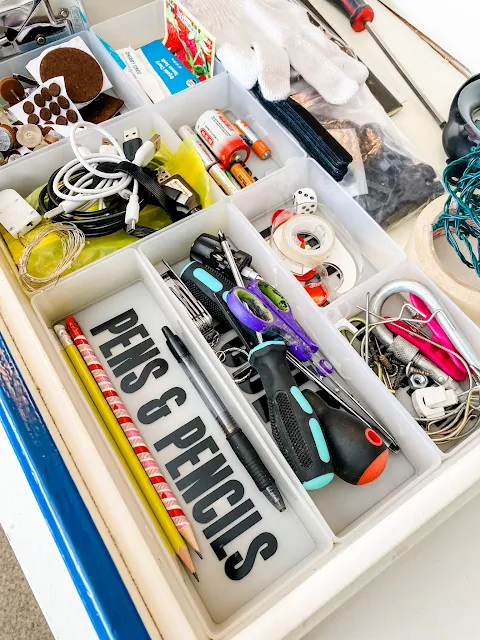
In this case I'm making vinyl labels for a junk drawer organizer. Each slot in the organizer is a slightly different size and each is going to get a vinyl decal in the bottom.
Start by measuring the length and width of your space. In this case, I measure each organizer slot.
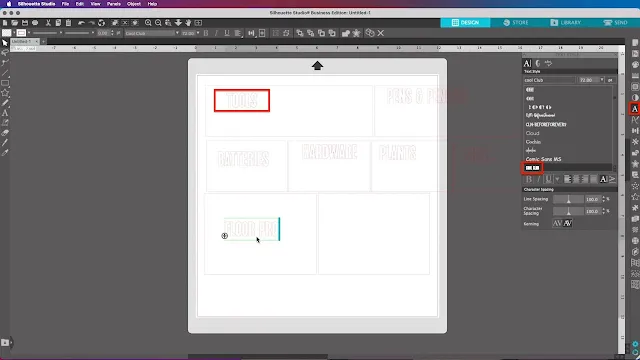
In Silhouette Studio use the Draw a Rectangle tool to draw out a rectangle or square in the exact same dimensions.
So here you can see I drew out a bunch of different rectangles in various dimensions. Each one represents a slot in my organizer. These rectangles are going to act as a sizing guide for my vinyl stickers.
You can size the boxes by pulling one corner until the length and width match your substrate. Or you can draw a box and then manually enter the dimensions into the scale boxes on the top menu bar.
Open the text tool and start a text box. Type out your word then change the font style. Don't worry about the size right now. I'm using the font Cool Club from So Fontsy's newest Font Bundle.
If you're doing a bunch of vinyl text labels like I am, once you have the font selected you can copy and paste into each of the boxes you drew out.
Double click into the text box to type out a different word.
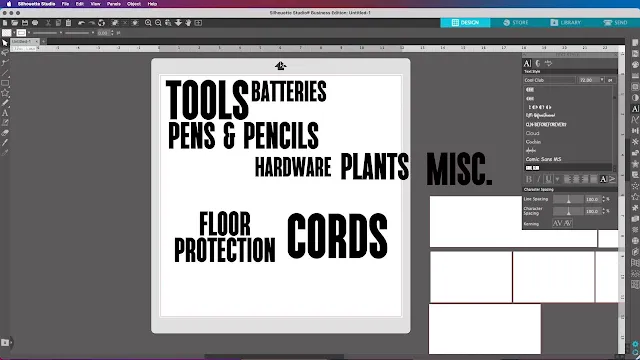
To size the vinyl stickers perfect, select one at a time and pull one corner so it fills the rectangle you drew. It's very unlikely the text will perfectly fit the rectangle both length and height so stop when it hits either the top and bottom or the sides.
For example the word hardware hits the sides of the box, but the word tools hits the top. That's the max size each vinyl decal can be for it's space.
I'm using text, but this works for designs as well.
After they're all sized you have two choices. You can keep the boxes you drew there and use them as weeding boxes or you can delete the boxes and then nest the text vinyl stickers to minimize the amount of vinyl you are using.
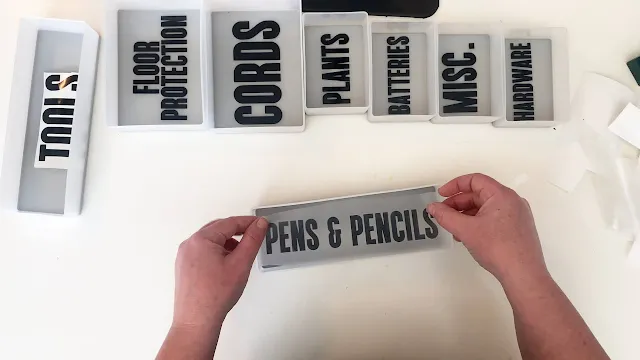
Whichever way you do, you can move forward with cutting and weeding the vinyl.
You'll see they perfectly fit in or on your surface by doing it this way!








.png)


No comments
Thanks for leaving a comment! We get several hundred comments a day. While we appreciate every single one of them it's nearly impossible to respond back to all of them, all the time. So... if you could help me by treating these comments like a forum where readers help readers.
In addition, don't forget to look for specific answers by using the Search Box on the blog. If you're still not having any luck, feel free to email me with your question.