If you're experiencing registration errors when printing and cutting clear stickers, this is a common issue - but one that's easily fixable.
The issues are usually due to a glare or the printing having a hard time gripping the material and then printing in the wrong spot. Both issues make it difficult for the registration marks to be easily read. Read on for how to fix Silhouette registration marks errors when printing clear stickers.
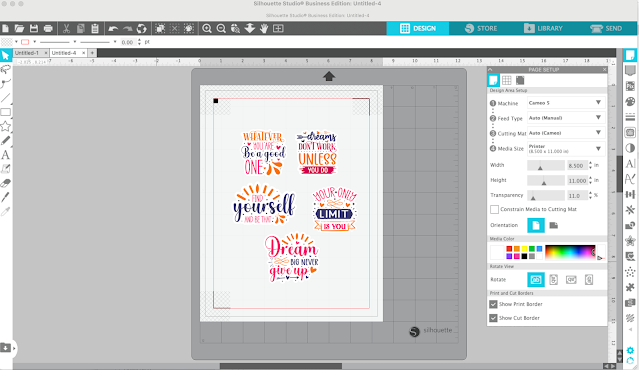
You're going to start in Silhouette Studio by setting up your print and cut sticker page like you normally would. If you're not familiar with how to setup the page for print and cut or are new to print and cut, here's a beginner Silhouette sticker tutorial.
This set of motivational stickers that I'm using can be found on So Fontsy.
My suggestion is to set the Registration Marks to the default position. Go to Page Setup panel > Registration Mark tab > Restore Defaults to do this.
Fixing Registration Errors when Printing Clear Stickers
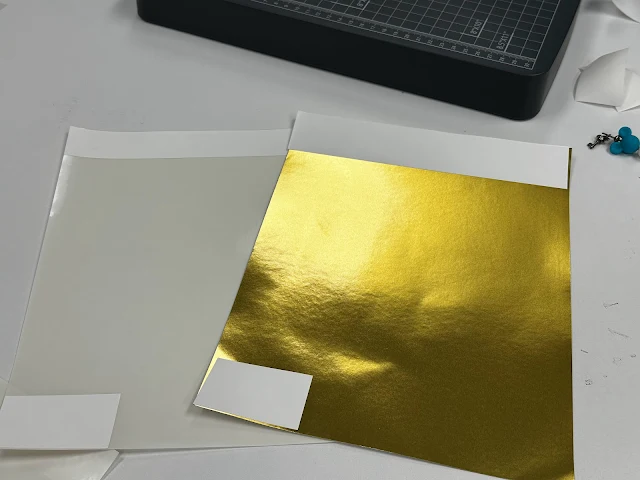
Before you print, grab a sheet of clear sticker paper (this also works for gold and silver sticker sheets) and a sheet of matte sticker material. I always use Online Labels sticker sheets.
Cut the matte sticker sheet into strips that are about 1.3" wide. You'll need one strip that's the full 8.5" long and another that's maybe 2-3" long.
Remove the liner of the matte sticker material strip and stick the long strip along the top edge of the clear sticker sheet. Take the smaller piece and put it in the bottom left corner.
Now, instead of printing directly on the glossy sticker material, your registration marks will print on the matte material rather than the clear sticker sheet. This does two main things:
- It makes it easier for the printer to grab the sheet (because the rollers can get a better grip on matte material than glossy or clear)
- It makes it easier for the registration marks to be read because the matte material doesn't get the overhead glare.
Before you print, make sure that all of your sticker designs are well away from the registration marks and hashed areas otherwise the sticker images may actually partially print on the matte material. To help you visualize this, I marked off the area in red here.
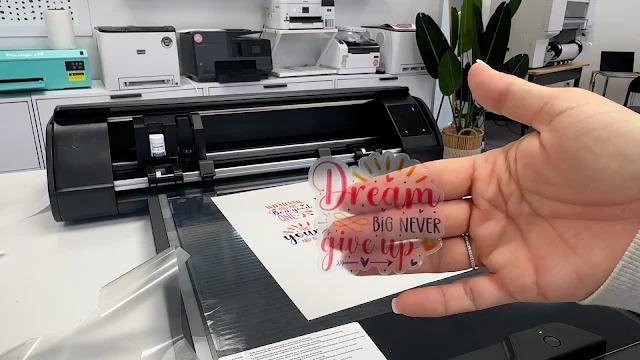
Place the sheet of sticker material into the printer and then move forward printing from Silhouette Studio and cutting like you normally would with your Silhouette CAMEO or Portrait.
The registration marks will print on the strip at the top and bottom corner making it much easier for them to be found by the CAMEO.
I recommend setting your cut settings for clear sticker paper to a Blade depth of 2 with a force of 14.
When the cutting is done you can remove the clear stickers you printed from the larger sheet.
I used the Silhouette CAMEO 5 with the ES mat here to print and cut, but this fix for registration marks works with all Silhouette cutting machines and whether you're using a cutting mat or ES base.


.png)


No comments
Thanks for leaving a comment! We get several hundred comments a day. While we appreciate every single one of them it's nearly impossible to respond back to all of them, all the time. So... if you could help me by treating these comments like a forum where readers help readers.
In addition, don't forget to look for specific answers by using the Search Box on the blog. If you're still not having any luck, feel free to email me with your question.