You can turn your drawing into SVG files pretty easily using Silhouette Studio.
The best part is you don't even need a Silhouette cutting machine to do it! Follow along to learn how to convert a drawing into an SVG.
How to Import Images or Photos into Silhouette Studio
To begin, use your camera to capture a clear, shadow-free picture of your drawing. It's easiest if the drawing was done in marker or dark pencil on line-free paper.Transfer the photo from your camera or phone to your computer, and then open Silhouette Studio. In the software, drag and drop the file into the design area.
Note: This post may contain affiliate links. By clicking on them and purchasing products through my links, I receive a small commission. That's what helps fund Silhouette School so I can keep buying new Silhouette-related products to show you how to get the most out of your machine!
How to Trace a Drawing to Add Cut Lines
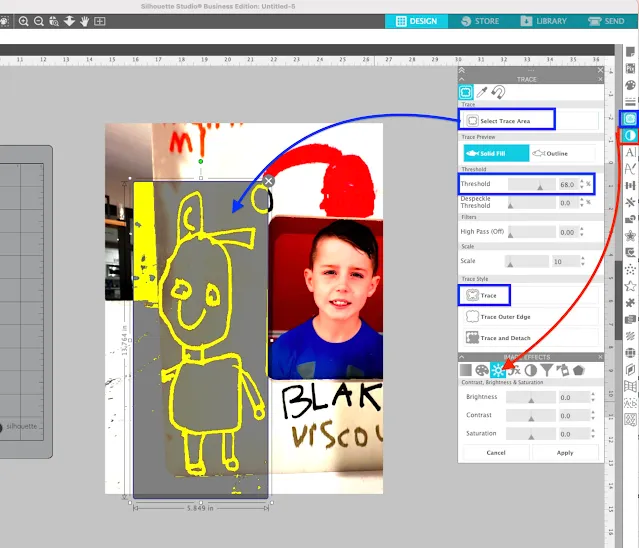
To convert the image into an SVG file we need to vectorize it, which is done in Silhouette Studio by using the Trace tool.Open the Trace tool from the right sidebar and Click "Select Trace Area". Use your mouse to draw a tracing selection box around your drawing.
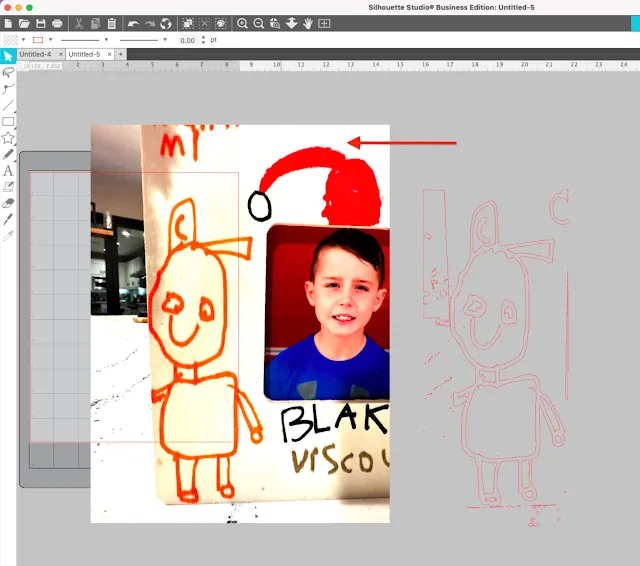
Adjust the Threshold until the entire outline turns yellow, then select "Trace".
TIP: If you're having a hard time getting the drawing to trace you can try to adjust the image color by using the Image Effects tool. (Shown in Red)
Move the original photo to the side and you can then delete it.
How to Delete Unwanted Cut Lines or Clean Up a Bad Trace
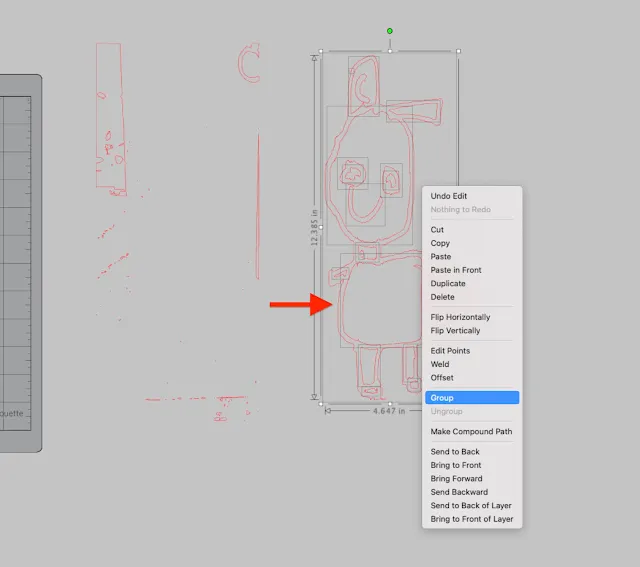
If you end up with extra cut lines or "static" you can right click > Release Compound Path and delete the unwanted trace/cut lines.
Select the cut lines you want to keep > right click > Group > right click > Make Compound Path.
I usually go one step further and fill my design with a solid color just so I have an easier time "seeing" what it will look like when cut.
How to Smooth Trace Lines and Reduce Edit Points
Now it's time to clean up the cut lines to make it easier and faster to cut. This means reducing the number of edit points by smoothing out the cut line.
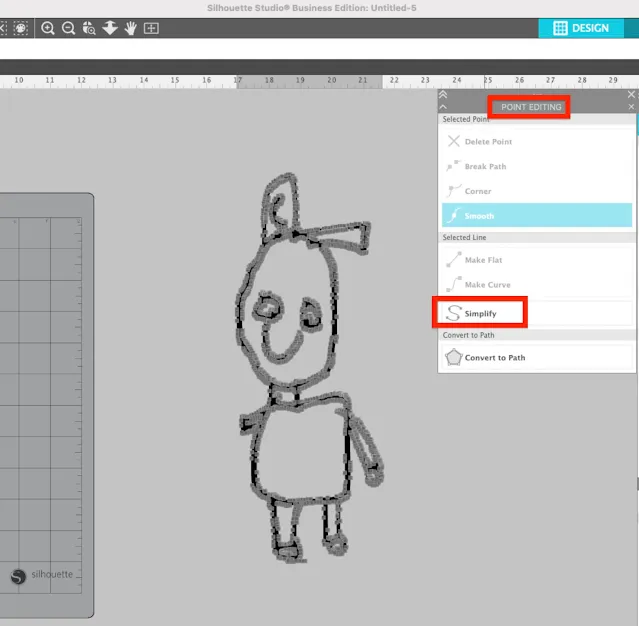
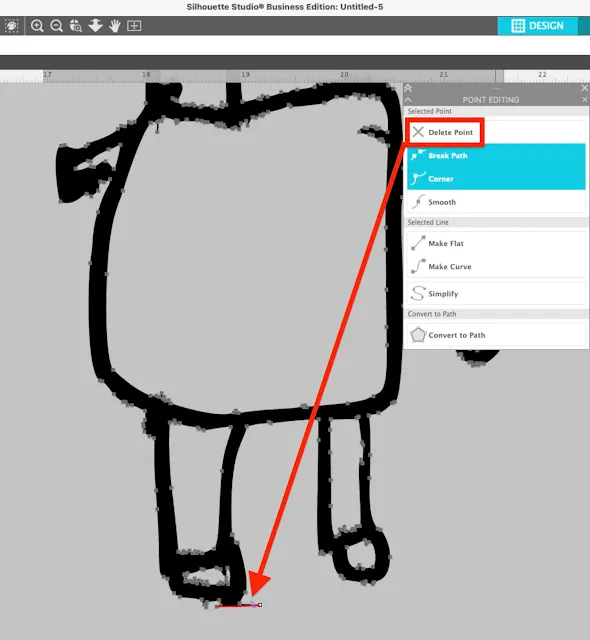
Double click the design and you'll get the Point Editing panel along with what's likely a lot of small gray edit points along your design's cut lines (aka Path).
Select "Simplify" from the Point Editing panel to reduce the number of cut lines.
If you have stray edit points, you can also select them individually or as a group by holding down Shift, and then click "Delete" on your keyboard of "Delete Point" in the panel.
How to Save a Drawing as an SVG File
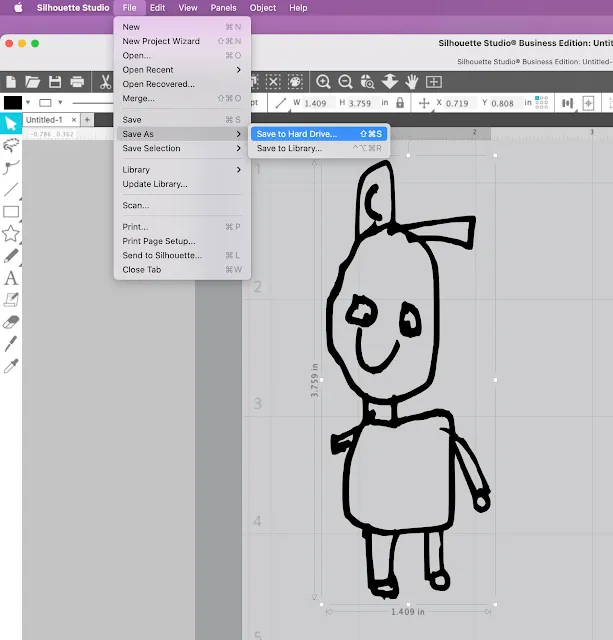
To save the drawing as an SVG, select the design then go to File > Save Selection > Save to Hard Drive.
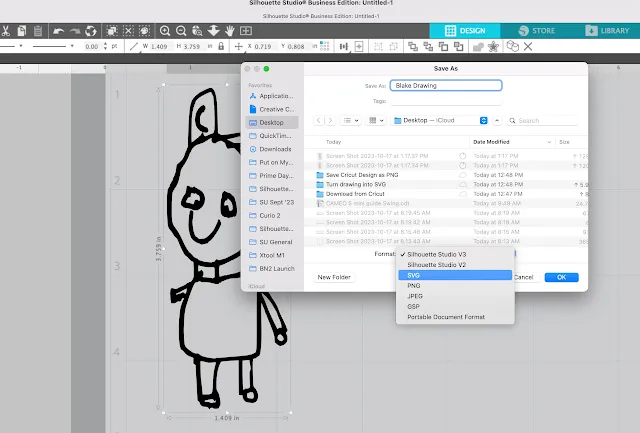
Change the file type to SVG. Remember, if you want to export it as a PNG, JPEG or SVG you will need Silhouette Studio Business Edition - the one time paid upgrade.
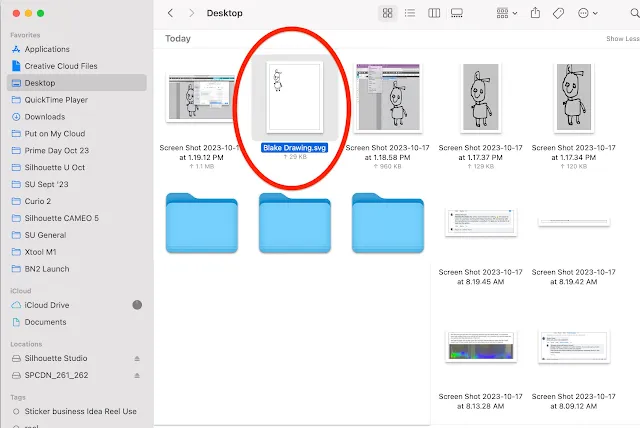
The drawing will now be saved to your computer as an SVG file that can be opened in other software programs and used in many different ways.
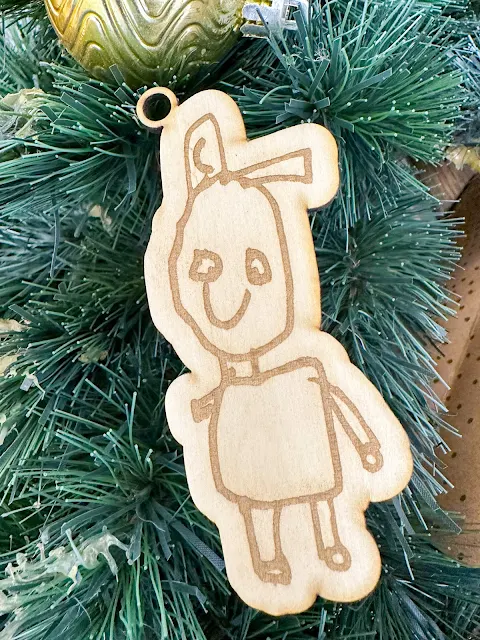
I used it to quickly make a little laser cut and engraved ornament or keychain on my xTool P2 laser.
You can find a quick video on making the hand drawn ornaments here with Silhouette Studio and the xTool P2 laser. This can also be done with the xTool M1 craft laser.




.png)


Just a quick hint, if you select the drawing and cut lines, and do a SAVE SELECTED you can save as a SVG but have nothing of studio page just you're drawing in the SVG. All of you at Silhouette School Blog are so wonderful. Everyone of your posts is so helpful. Happy Holidays
ReplyDelete