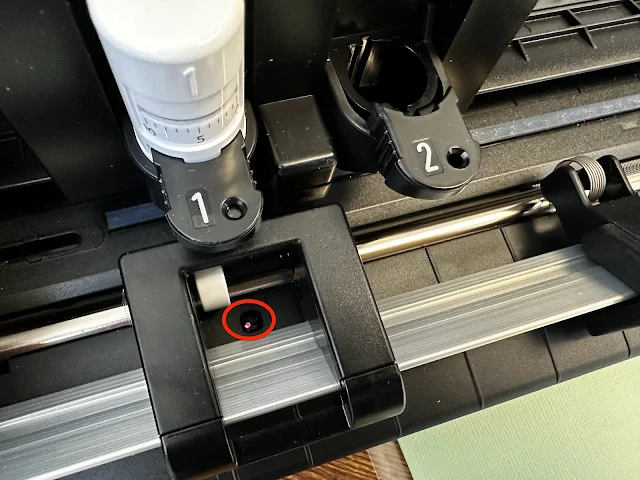
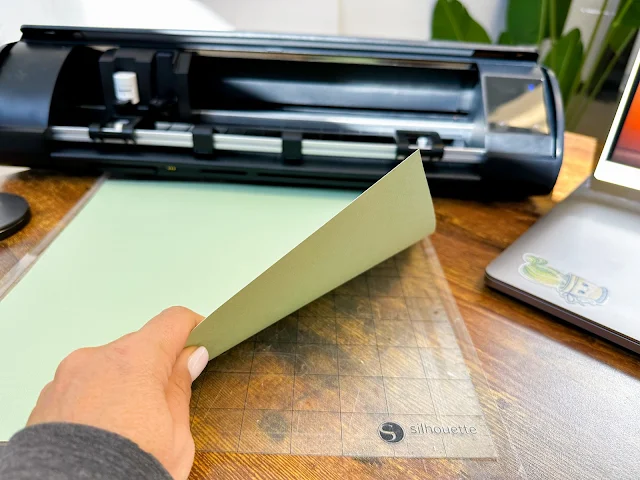
Like the CAMEO 4, the CAMEO 5 machines have a mat and material sensor that will detect when to pull the mat into the machine and under the rollers. In order to take advantage of the auto load (circled in the image below) you'll need to make sure you go about loading the CAMEO 5 mat in the correct sequence of steps.
Remove the protective cover from the cutting mat to expose the adhesive gridded area.
Place your material on the mat within the gridded area and be sure it's stuck down well. Make sure there are not wrinkles or bubbles.
If your material is heavy or the mat is not real sticky, use a scraper tool or brayer to push across the material to secure it to the cutting mat.
If you are using the 12" Silhouette cutting mat, the right roller should be positioned in the far right gripped area along the roller bar.
With your Silhouette CAMEO 5 powered on, press the small up arrow on the control panel. The arrow should begin to flash.
The front of the mat should be gently up against the CAMEO 5 rollers covering the auto load sensor.
In a few seconds the rollers will begin to move and grab the mat pulling it into the machine. Both sides of the mat should be pulled in at the same time ensure it's loaded straight.
You can find more Silhouette CAMEO 5 beginner tutorials here.


.png)


No comments
Thanks for leaving a comment! We get several hundred comments a day. While we appreciate every single one of them it's nearly impossible to respond back to all of them, all the time. So... if you could help me by treating these comments like a forum where readers help readers.
In addition, don't forget to look for specific answers by using the Search Box on the blog. If you're still not having any luck, feel free to email me with your question.