If you're looking for an inexpensive and robust sticker sheet design software, look no further than Silhouette Studio.
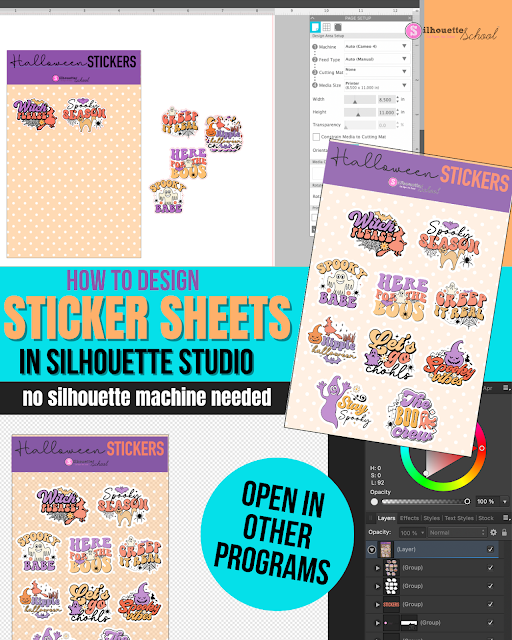
Even if you don't have a Silhouette machine you can use the software for designing sticker sheets. If you do have a Silhouette you can of course also print and cut.
Read on for how to use the Silhouette software to design sticker sheets. I have a separate tutorial on how to print and cut sticker sheets with a Silhouette machine.
I would highly suggest getting Silhouette Studio Business Edition before you begin designing sticker sheets. The one time $50 Business Edition upgrade will be necessary to export the sticker sheet design to print and cut on another machine like Cricut, Siser Juliet, or even something like an iColor 250.
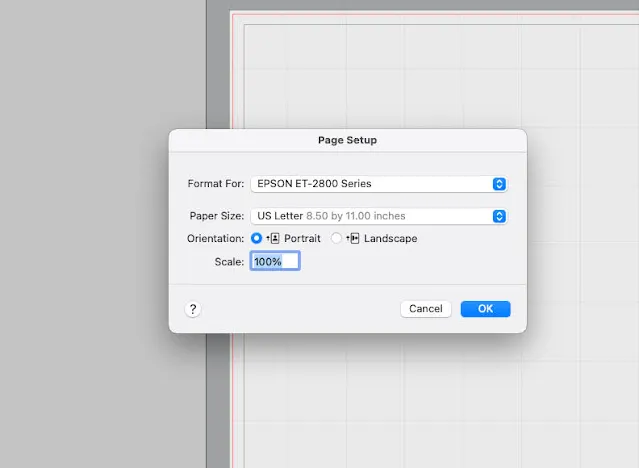
Open Silhouette Studio and immediately go to the File menu to select Print Page Setup.
Select the printer you plan to print on and then select the material size.
The material size is the most important selection because it will determine how your work space will be setup. If you are using 8.5" x 11" sticker sheets, like I am from Online Labels, select that size. Save and close the selections.
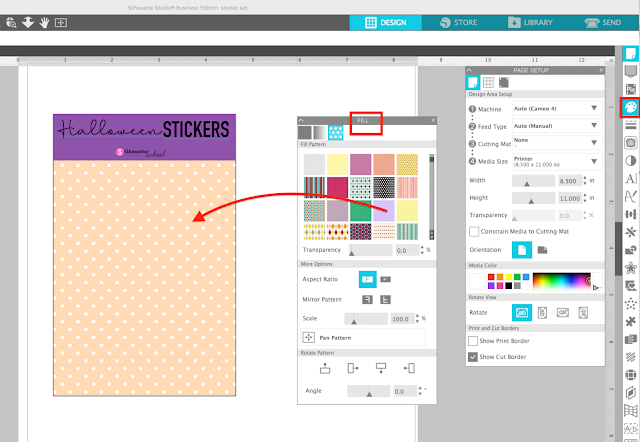
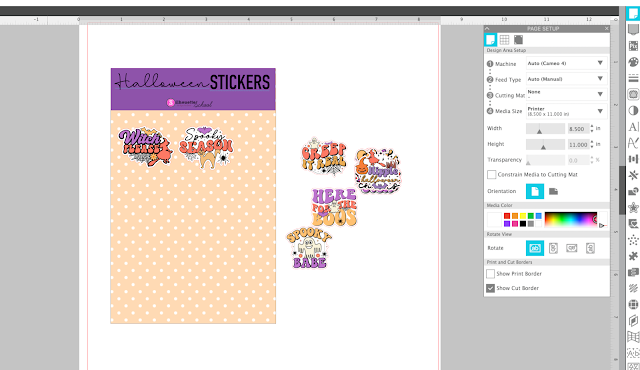
From the Design area of Silhouette Studio open the Page Setup panel. Change the machine to "None" and change the Cutting mat to "None." Change the Media Size to "Printer."
Check the box for Show Print border. Show Cut Border will not be accessible to check since you have the Machine set to "None."
You're now ready to begin designing the sticker sheets. In this example we are going to design 4x6" sticker sheets.
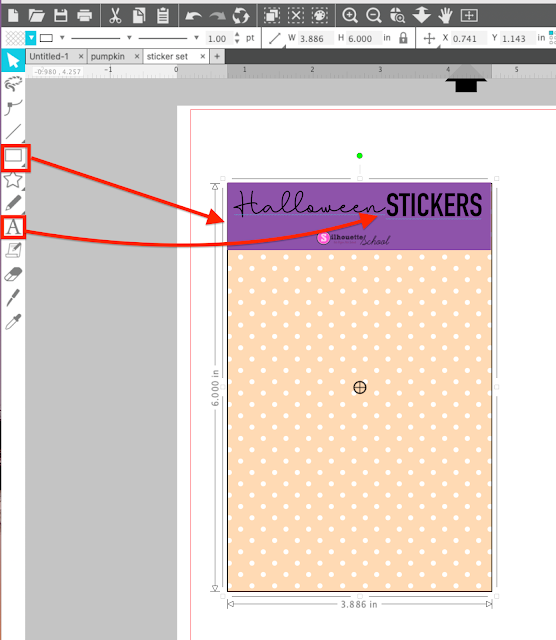
Use the Draw a Rectangle tool on the left sidebar and draw out a rectangle that's 4" x 6". You can manually enter the dimensions along the top Quick Access Tool Bar when the rectangle is selected. This is going to be the border of your sticker sheet.
If you want some kind of banner at the top of your sticker sheet, maybe with your logo or a description of the stickers, you can create that using the Drawing, Flexi Shapes, and Text tools.
You can also fill the background of the sticker sheet with a pattern using the Fill Pattern tool. I changed the color of the pattern using the Image Effects tool.
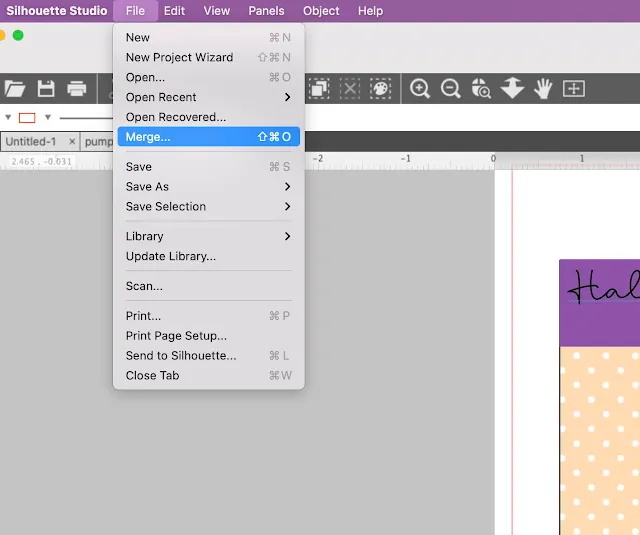
Now you can import your sticker designs. Go to File > Merge and locate the PNG sticker design file.
Mine are all part of one Halloween sticker set from So Fontsy but are in separate folders so using File > Merge will bring them into the same work area individually.
Once they're all in the design area you can select them all and bulk scale/re-size.
Position them on the background of the sticker sheet.
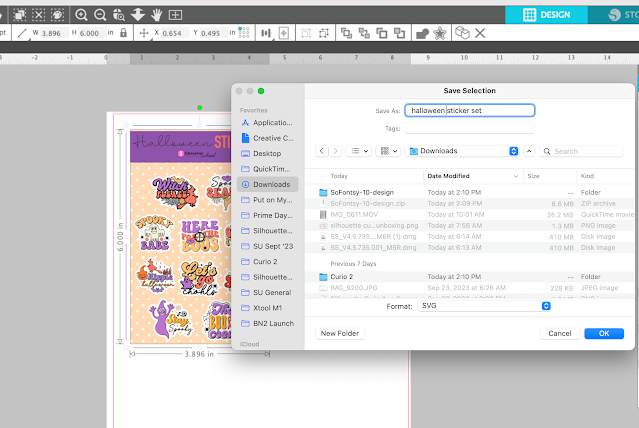
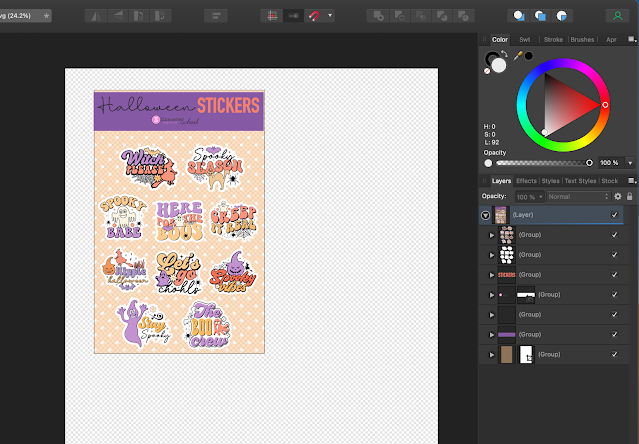
Now you can get ready to either print and cut from Silhouette Studio or export the entire file to open in another program. Go to File > Save As > Save to hard drive and export sticker sheet design file.





.png)


Oh my Goodness!! Been using Silhouette for last 9 years, and I only JUST learnt about the Image effects tool and the merge function!!! Thank you so much!
ReplyDelete