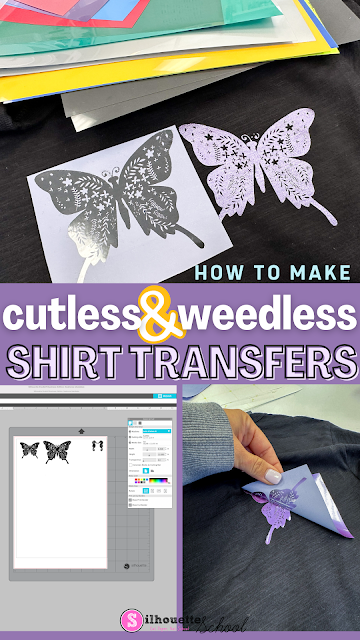
If you struggle with weeding small HTV designs...self weeding transfer paper may be the answer you've been looking for.
I absolutely love Presto transfer paper. Not only is it self weeding, but the small details it picks up is unbelievable!
Plus, major points for the fact that I can print directly from Silhouette Studio to my laser printer to use it! Read on for how to use Presto instructions and tips!
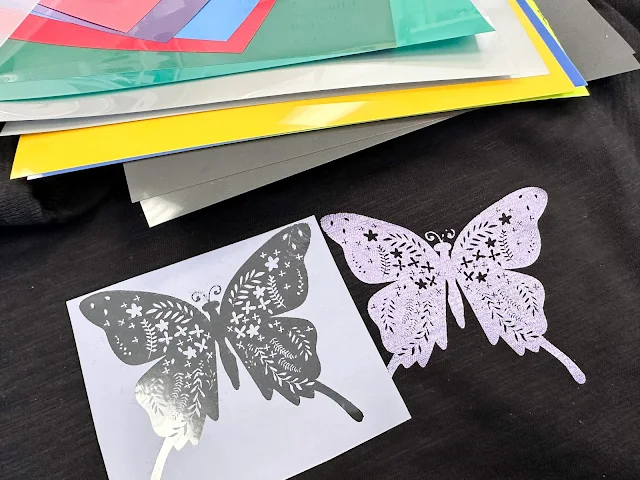
iColor Presto 2 Step is a no cut, no weed transfer material that allows you to make laser printer transfers. Think of it like a sheet of HTV that requires no cutting and weeds itself. This material is ideal for single color transfers that would be challenging to cut and weed on HTV like mandalas or small lettering or dots or distressed designs. If you're having trouble even conceptualizing that...don't worry, I'll explain.
The Presto transfer papers comes in single color sheets which means it's ideal for single color designs and requires a laser printer to be used. Aside from that you'll just need a heat press.
I am using my Uninet iColor 560 White Toner Printer but any laser printer should work as long as you have black toner. The iColor 560 is a super versatile laser printer however, I'm not using the white toner in this situation which means I can use my MAC for everything and I can print directly from Silhouette Studio. So many wins!!
How to Set Up Designs to Print on Presto 2 Step Paper
The first step is to set up your design and you can do this in Silhouette Studio on either a MAC or a PC.
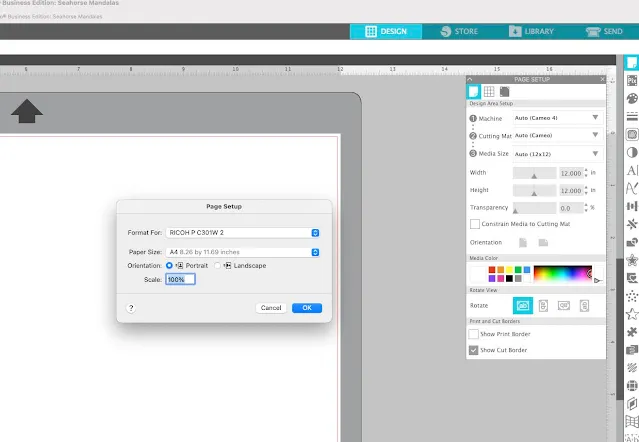
Start in Silhouette Studio and from the File > Print Page Setup menu change the menu to your laser printer and select "A4" as the paper size.
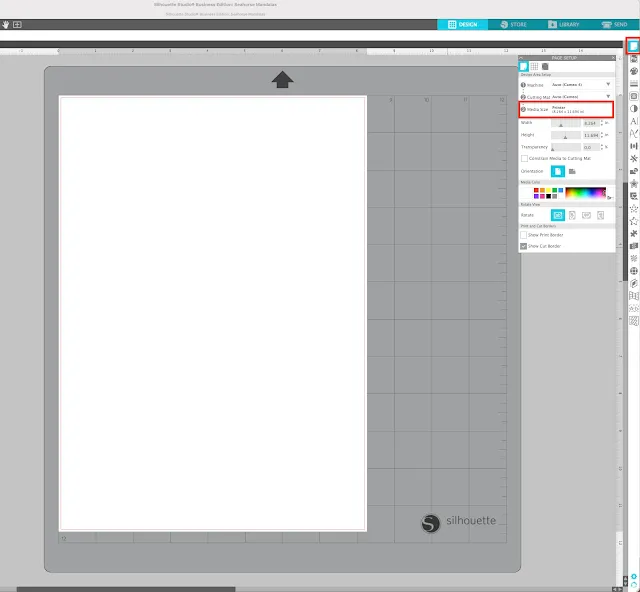
From the Page Setup panel change the media size to "Printer".
Now open your design, size, mirror (Right click > Flip Horizontally) and fill with solid black. Don't worry, if you don't want your design to end up in black, you just need to print with black toner. This is key.
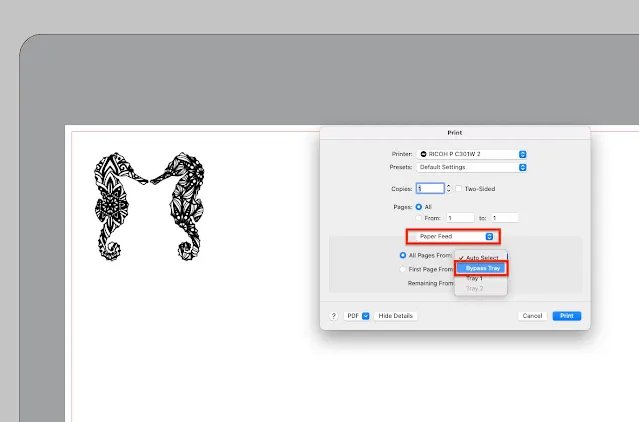
When you're ready go to File > Print.
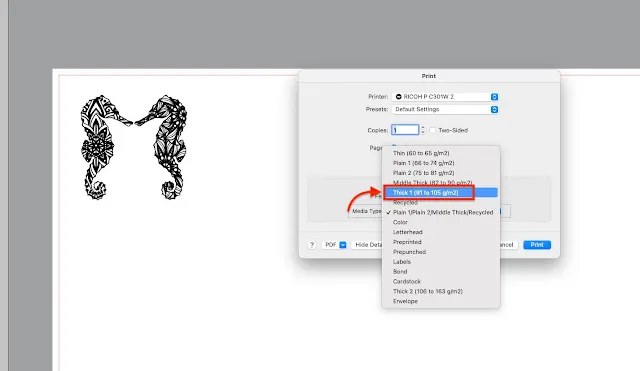
From the Paper Feed dropdown select the location where you are going to load your Presto paper. I'm using the bypass tray.
Using iColor 560 as a CMYK Laser Printer
If you're using an iColor 560 White Toner printer as a standard laser printer (like I am), make sure to put the black toner in the front position and move the Cyan to the back - totally removing the white cartridge for now.
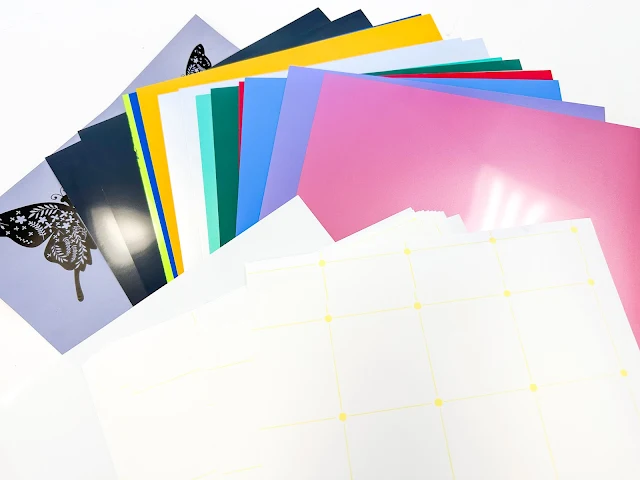
Grab a sheet of iColor Presto paper in the color that you want the transfer to be. There are more than 20 colors including neons and metallics.
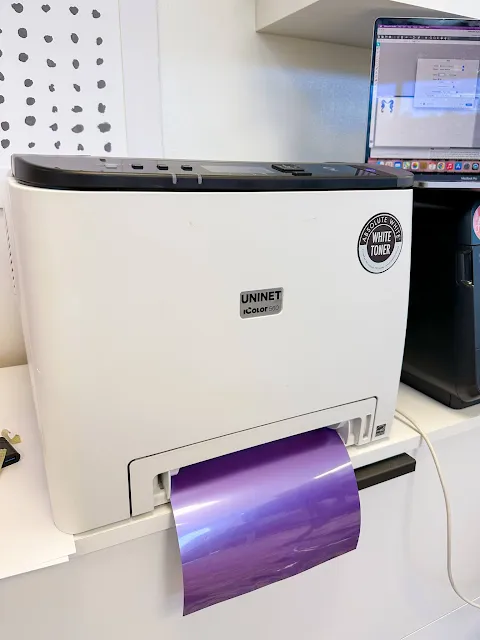
Place it in the printer so that it prints on the dull/cloudy side. I am printing form the bypass tray, but you can use the tray if you prefer.
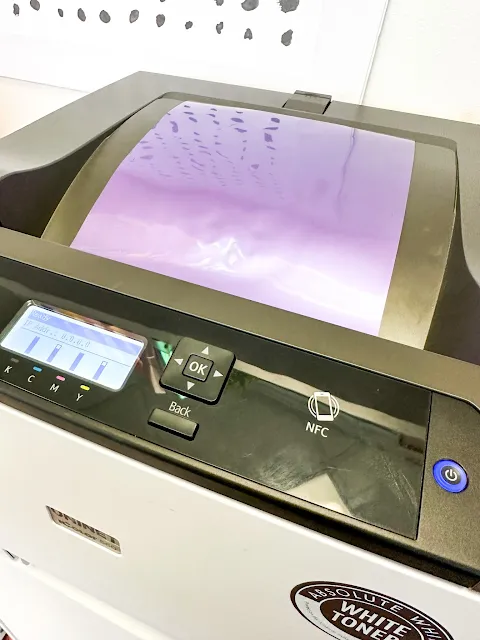
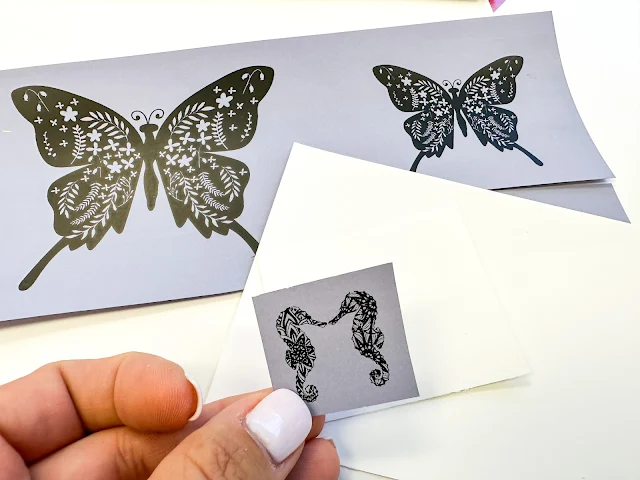
Back in Silhouette Studio click "Print." The sheet will print with the toner on the underside so don't be scared when it comes out like this...
Once the design is printed in black on the Presto paper you're not quite ready to apply it to the shirt.
Applying the Adhesive B Sheet to Presto 2 Step Transfers
We now need to add the adhesive by marrying the included B sheet to it.
Once the press is up to temperature, close the press for 5 minutes to warm up the bottom platen as well. It's important to have both the top and bottom platens warmed up.
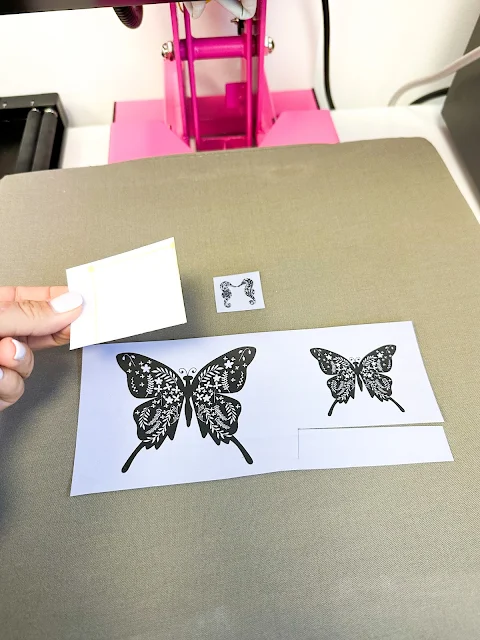
Trim down the printed sheet and cut the B sheet so it's slightly larger than your printed design.
Open your heat press and place a sheet of printer paper down. The heat press should be warmed up to about 285 degrees.
Lay the Presto laser transfer paper on the heat press with the printed image facing up. Then place the B Sheet directly on top with the marked side facing up.
With the Presto 2 Step pack there's also a sheet of kraft paper included. Place that sheet on top of everything.
Press for 120 seconds at 285.
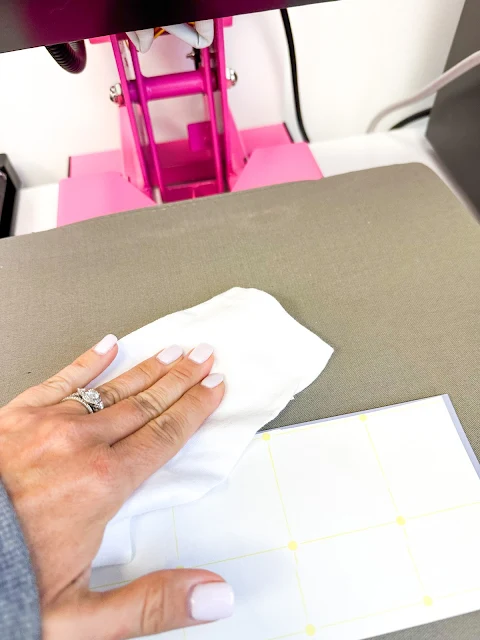
When the time is up immediately open the press and rub for about 5 seconds with a piece of fabric.
Trim down close to the design to make sure you don't accidentally transfer any excess adhesive onto your shirt.
Applying Presto Transfers to Garments
Keep the heat press temperature to 285 for cotton blends and reduce to 265 for polyester.
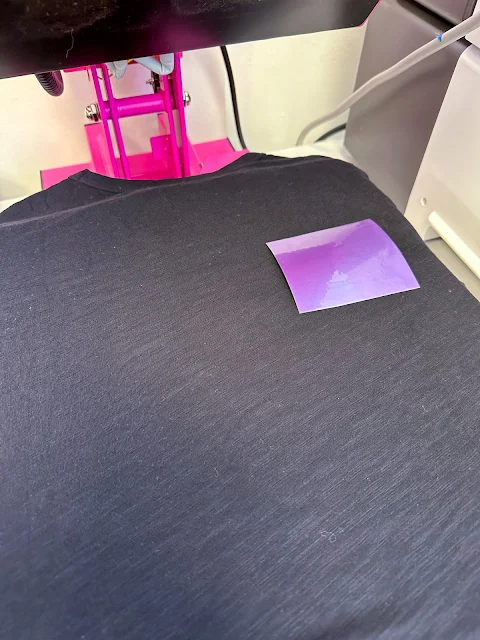
Place the shirt on the heat press and position the transfer with the adhesive side down. You can use a piece of high temperature tape to keep the transfer in place while pressing.
Press for 30 seconds on medium-high heat.
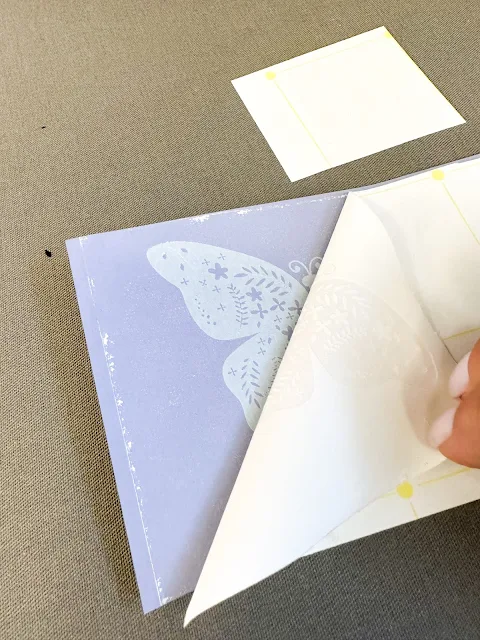
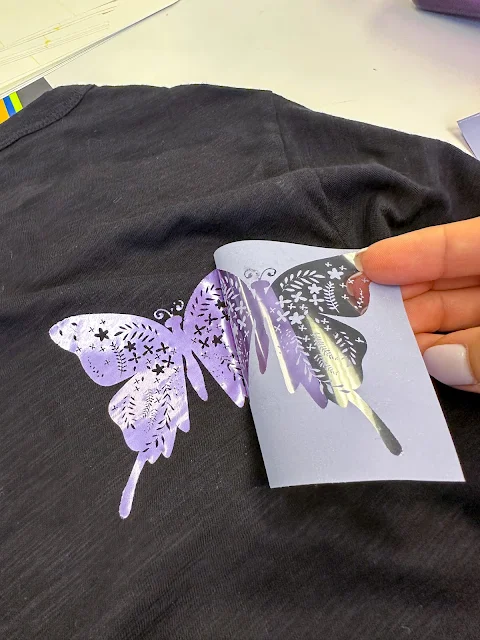
Let cool for 5 minutes before peeling off the transfer sheet.
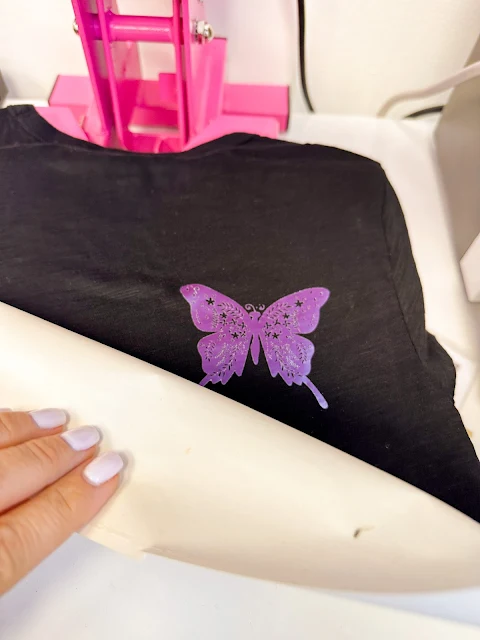
To get rid of that plasticy feel and to press the transfer further into the shirt, do one final press - ideally with a T Seal finishing sheet for 20 seconds at 285.
Note: This post may contain affiliate links. By clicking on them and purchasing products through my links, I receive a small commission. That's what helps fund Silhouette School so I can keep buying new Silhouette-related products to show you how to get the most out of your machine!
Get Silhouette School lessons delivered to your email inbox! Select Once Daily or Weekly.






.png)


No comments
Thanks for leaving a comment! We get several hundred comments a day. While we appreciate every single one of them it's nearly impossible to respond back to all of them, all the time. So... if you could help me by treating these comments like a forum where readers help readers.
In addition, don't forget to look for specific answers by using the Search Box on the blog. If you're still not having any luck, feel free to email me with your question.