If you're trying to get your Silhouette CAMEO 5 setup you've come to the right spot.
I'll take you through the quick and easy set up process step by step so you can be ready to make your first cut with Silhouette CAMEO 5. If you'd rather watch a complete CAMEO 5 setup video, I have that here.
Start by unboxing the CAMEO 5 if you haven't already. There's not much that comes in the box aside from the 12" cutting machine. You'll get a two part power adapter, an autoblade and blade adjustment tool, a 12" cutting mat, and a roll feeder.
Make sure to remove ALL the tape and packing material from both the inside and outside of the machine. There are a few hidden pieces of material that are used to keep the tool carriage in position during shipping.
How to Setup Silhouette CAMEO 5
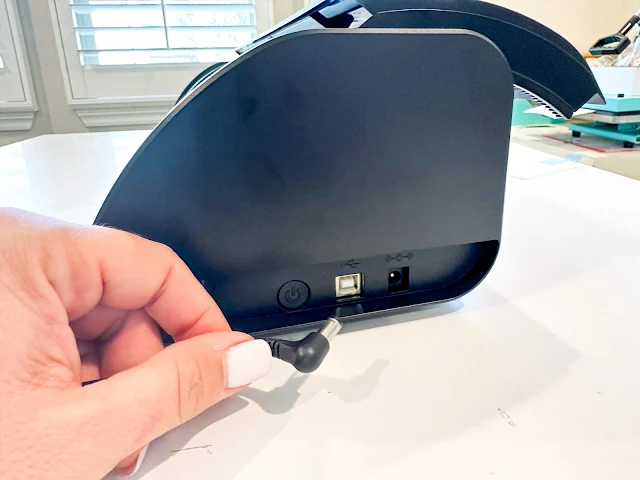
Connect the two parts of the power cord and plug the input into the right side of the CAMEO 5 before connecting to the power supply.
How to Power on CAMEO 5
To turn on the CAMEO 5 hold the power button down for 2-3 seconds. The power button also acts as an automatic stop button while cutting when pressed quickly, so tapping it to power on won't work.
Installing Autoblade in Silhouette CAMEO 5
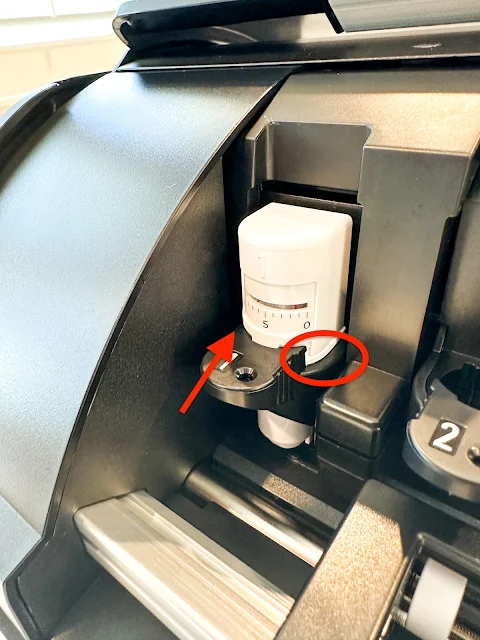
On the tool carriage, pull the locking mechanism completely out before placing the autoblade into the tool slot.
Make sure the blade falls completely down and there's no gap between the lip of the blade and the holder (circled area). Press the lock back in to secure the CAMEO 5 autoblade in place.
The autoblade works fine usually, but I prefer the 1mm manual blade if you want to grab one or two of them to have on hand.
Moving and Positioning the Pinch Rollers
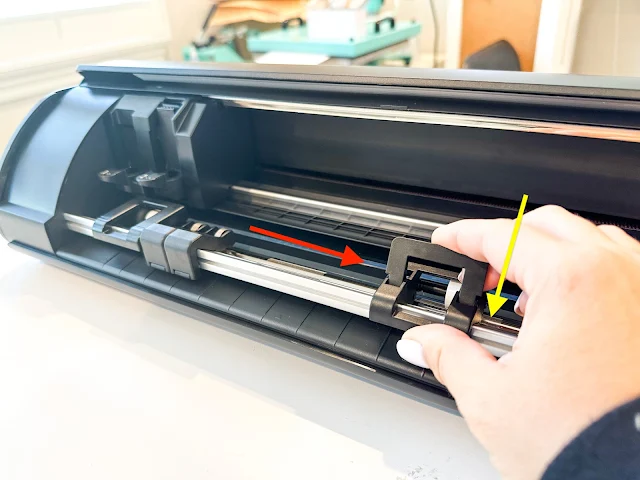
Out of the box, all of the CAMEO 5 pinch rollers will be toward the left side of the machine. Flip up the tab on the newly redesigned pinch roller on the right...
...and slide that roller to the right stopping in one of the gripped areas (yellow arrow). There are several of these areas along the roller bar. Flip the lock back down to lock the pinch roller in place.
This is the roller that will hold the right side of your cutting mat or material down while cutting.
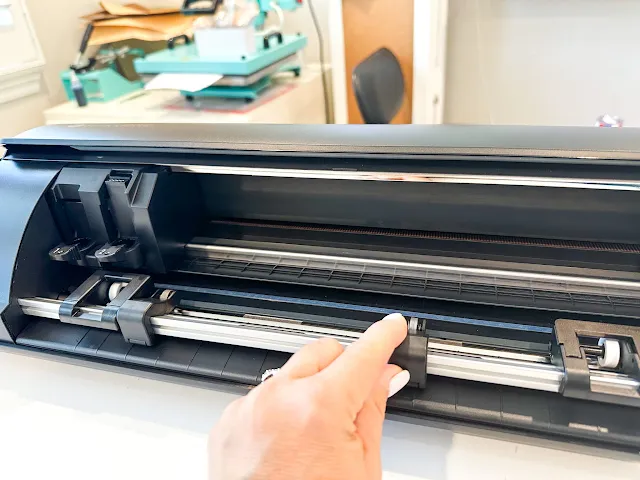
The two small rollers, between the larger left and right rollers, can be placed towards the middle. They don't need to be in a specific spot.
Your rollers should look something like the image below when you've set them up. The left pinch roller does not move. The right roller will be re-positioned depending on how wide your material is to ensure it always grips the right side of your material or mat.
Power on the Bluetooth
The CAMEO 5 can connect by Bluetooth or USB, however a USB cord does not come in the box. Any standard USB cord will work though. For this set up, however we are going to use the Bluetooth connection.
With the machine powered on, make sure the bluetooth icon on the control panel is blue. If it's white, tap it to change it to blue.
Because you're going to have to do a firmware update, I suggest bringing your computer close to your cutting machine for this next step.
Connecting the Silhouette CAMEO 5 to Silhouette Studio
You'll need to download and install Silhouette Studio V4.5.73 or higher/later on your computer. This is the earliest software that will support the CAMEO 5, CAMEO 5 Plus, Portrait 4, and Curio 2.
How to Download Silhouette Studio for CAMEO 5 for MAC and PC
NOTE: If you are a current Silhouette Studio user, make sure you do not have Silhouette Studio open during the new software installation process. If you have an upgraded version of Silhouette Studio, like Designer Edition, it should automatically carry over to the new version of the software.
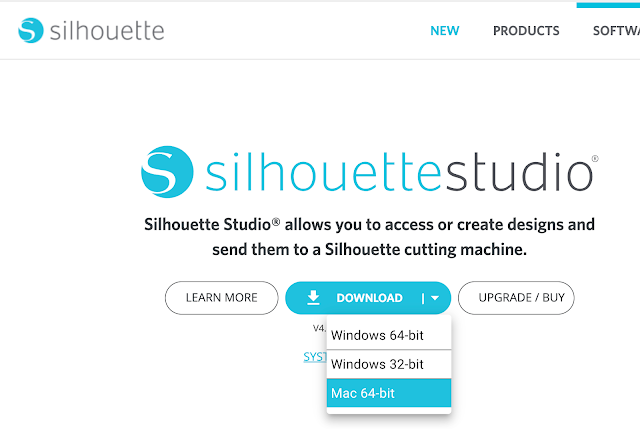
Visit the Silhouette America software page and click the arrow on the Download button. Choose the version of Silhouette Studio you need based on your computer operating system. I have the steps for installing on both Mac and PC below.
Silhouette Studio for Mac
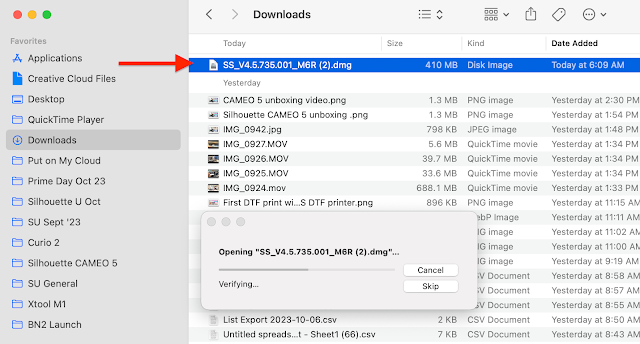
The software will download as a ".dmg" file into the folder or destination where you tell it to download - usually this is the Downloads folder. Once downloaded, navigate to the file and double click the file name to begin the installation process.
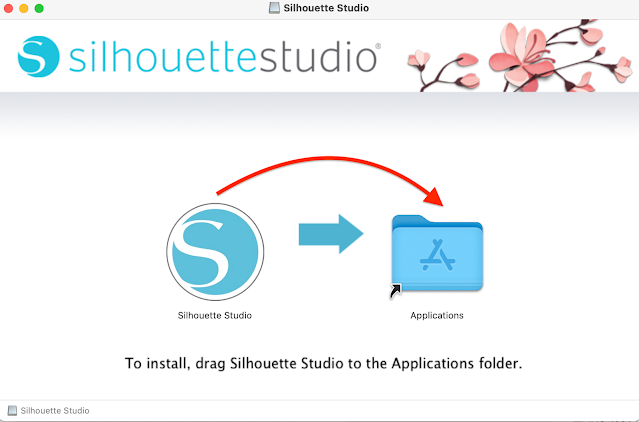
That will prompt another window to open where you'll use your mouse to drag the Silhouette Studio icon into the Applications folder icon.
Mac users can keep multiple versions of Silhouette Studio on their computer. When downloading and asked if you'd like to "Keep Both" just click "yes".
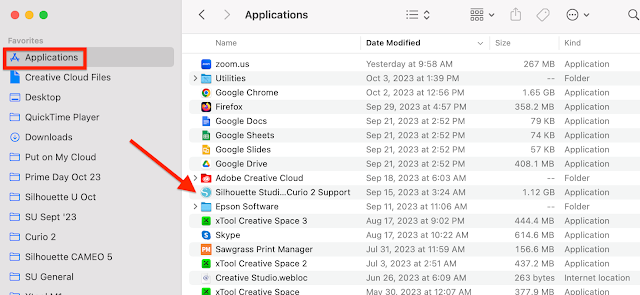
Once this is done, you can go into the Applications folder, find Silhouette Studio and double click it to launch the software program.
Silhouette Studio for PC
When downloading and install Silhouette Studio on a Windows PC you can only have one version of the software. If you already have the software the current version you are using will be replaced by the new downloaded version.
When you click the Windows download link, Microsoft Edge (internet browser) immediately pops-up with an option to download the .exe file.
Click Save.
The next option that displays, once the download is complete, is what to do with the file. Click Run.
Windows will automatically populate the Silhouette Studio Setup Wizard. Click Next to proceed.
Click Save.
The next option that displays, once the download is complete, is what to do with the file. Click Run.
Windows will automatically populate the Silhouette Studio Setup Wizard. Click Next to proceed.
After choosing the location of the file installation, continue to select the prompts to set up the Silhouette Studio installation. When the options have been chosen, go ahead and click Install to proceed.
While the software is installing, be sure not to restart or turn off your computer. Allow the installation to progress until all files have been installed.
Connecting a New Machine in Silhouette Studio
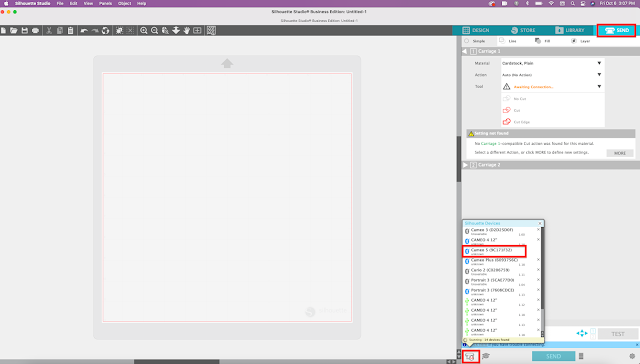
Once Silhouette Studio is launched, immediately go to the Send panel.
Click the Machine List icon, to the left of the Send button, to open up the list of machine connections.
As long as your CAMEO 5 bluetooth is on, you should see the CAMEO 5 bluetooth connection there.
Select it.
How to Do a Silhouette CAMEO 5 Firmware Update
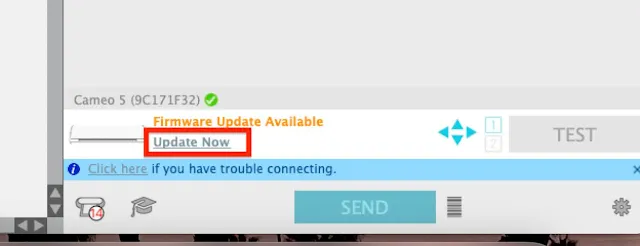
The first time you connect a CAMEO 5 to Silhouette Studio, you'll be prompted to do a firmware update with the message "Firmware Update Available." You will not be able to cut with your CAMEO 5 until you complete the firmware update.
You can either do the update via Bluetooth (keep your computer and machine close to each other) or connect them by USB. Click "Update Now" to begin the firmware update.
This process takes 5-10 minutes so don't worry as long as Silhouette Studio continues to indicate "Updating Firmware".
When the firmware update is complete, the message will switch to either "Load Media", "No Media Loaded" or "Available" and now you're ready to load your cutting mat and can move on to make your first cut.
Getting Started with Silhouette CAMEO 5 for Beginners
Congrats, your Silhouette CAMEO 5 setup is complete. Get to know your new machine with my upcoming CAMEO 5 beginner tips series including how to connect the roll feeder, how to use the auto mat load feature, and how to make your first cut. Be sure you're subscribed to my emails so you get the new tutorials straight to your inbox.
If you're looking for 1:1 help with Silhouette CAMEO 5 or anything related be sure to start a 7 Day Free trial with Silhouette U where I offer members access to a library of 500+ exclusive videos, 1:1 chat help with me, a priority quick Silhouette help email inbox, a monthly $14.99 code for fonts and designs of their choice, and a whole lot more!









.png)


I can't believe how well this machine cuts! I just cut glitter htv like buttah!
ReplyDelete