Vinyl wraps have become a popular way to decorate libbey glass can tumblers.
Using printable vinyl is a great alternative to sublimation and UV DTF wraps - both of which have certain limitations. In this tutorial we'll walk through the steps to learn how to make DIY vinyl glass can wraps without layering.
You could use your Silhouette CAMEO and inkjet printable vinyl for this. However, my suggestion - especially if you are selling the finished product or the wrap - is instead to use an ecosolvent printer like the Roland BN2-20A or the lower priced (but slower) model BN-20A. This will give you a waterproof, scratch and fade resistant printed vinyl wrap on the glass cans that will stand up to washing and a lot of handling.
I do have the steps for the Silhouette CAMEO option as well as the BN-20/A option as well so keep reading.
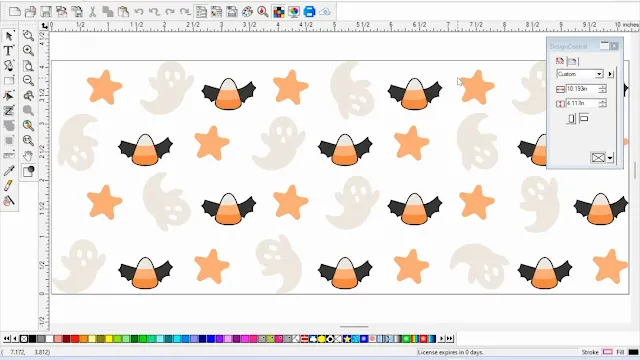
I'm going to use my Roland BN2-20A print and cut machine and this Halloween glass can wrap template from So Fontsy. It's part of the Halloween SVG and Font Bundle for a short period which means it's a steal.
Download the file on your computer and unzip to access the PNG file.
How to Make Vinyl Glass Can Wraps with Silhouette CAMEO
If you are using your Silhouette CAMEO for this project, I have a full video on how to make vinyl wraps with Silhouette CAMEO on Silhouette U that you can preview here if you'd like or watch in full as part of a 7 Day Free Trial that will give you full benefits and access.
Once you the vinyl wrap printed and cut, you can pick up below for how to apply a glass can wrap to the tumbler.
How to Make Vinyl Glass Can Wraps with Roland BN-20A
If you are using a Roland BN-20 or BN-20A you will need to create cut lines in the design software of your choice. I suggest a combination of Silhouette Studio Business Edition and Affinity Designer. This video will show you how to add Versaworks contour cut lines to a PNG file in Affinity Designer (one time paid fee).
Once you the vinyl wrap printed and cut, you can pick up below with how to apply a glass can wrap to the tumbler.
How to Setup Vinyl for Print and Cut on Roland BN2-20A or BN2-20
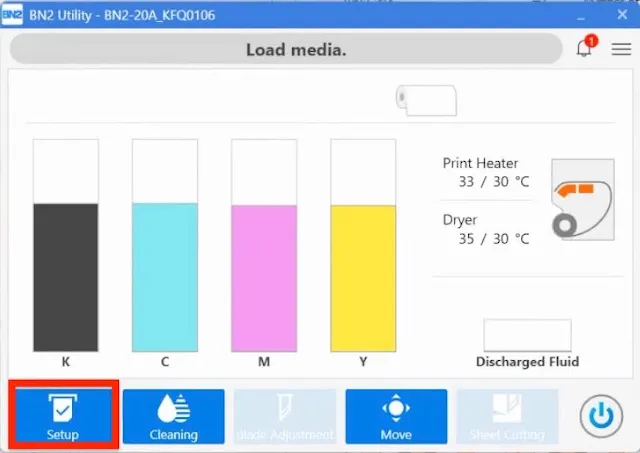
Since I'm using the Roland BN2-20A I can open the file in Flexi Designer. Start by launching the DG Connect Hub > Utility.
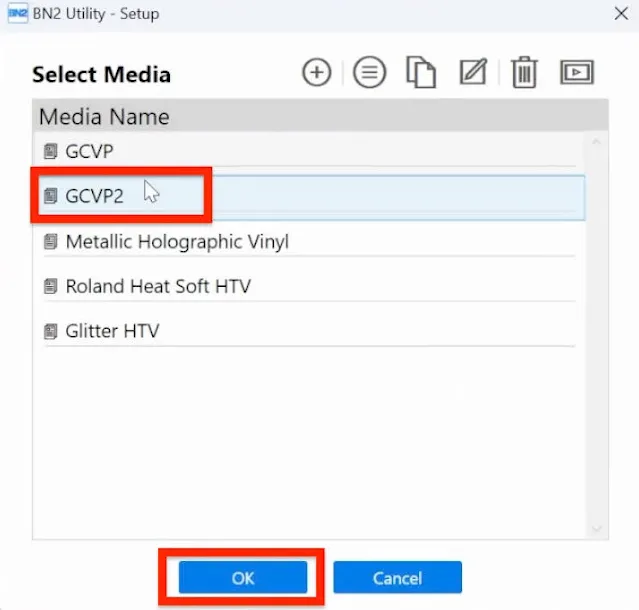
Click Setup and select the material type.
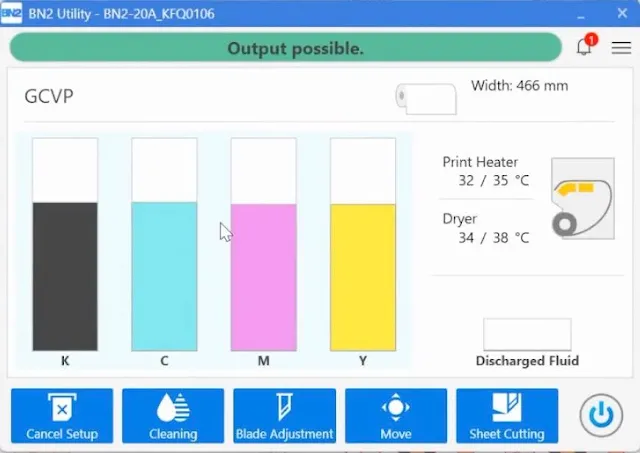
Load the media into the print and cut machine. I am using the Roland GCVP which is glossy adhesive vinyl.
When the status states "Output Possible" in the Utility, return to DG Connect Hub and click "Open" next to Flexi Designer.
How to Add Automatic Cut Contour Lines for Roland BN2 in Flexi Designer
In Flexi go to File > Open and navigate to the glass can wrap template. The can wrap dimensions were perfect and did not need to be sized for the clear glass cans I was using.
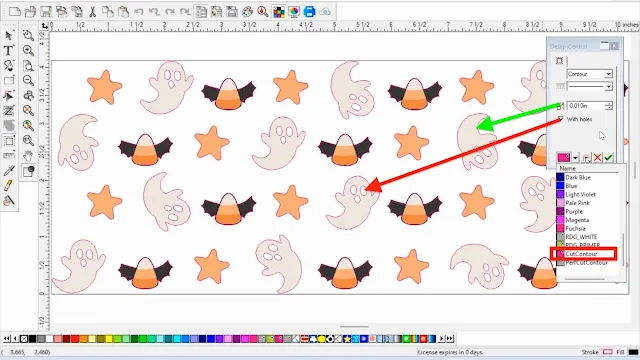
Select the image and go to the Effect menu then click "Contour Cut".
This will turn on automatic cut lines for the Roland BN2 for you. Confirm that that cut lines are for the CutContour (highlighted in red.) If you want to put cut lines on interior path (like the eyes of the ghosts) check the box for "with holes".
If you want to add a bleed, make the distance a negative number (green arrow).
How to Print and Cut on Roland BN2-20A Directly from Flexi Designer
When the box pops up make sure you only have "Object" selected to print.
Click "Print Parameters."
Select the material as Generic Vinyl.
You can verify the settings in the Cut Controls and other panel as well, but there should not be anything else to change.
When the printing is done you can select "Sheet cut" in the Utility to have the BN2 automatically cut your printed vinyl wrap off the rest of the roll.
How to Apply Vinyl Wraps to Glass Can Tumblers
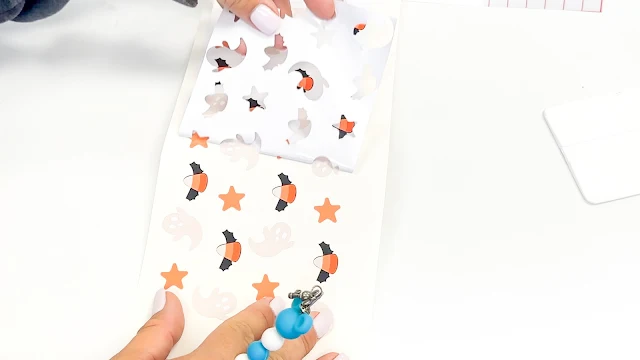
Use a weeding hook to weed away the excess vinyl from around the libbey can wrap design.
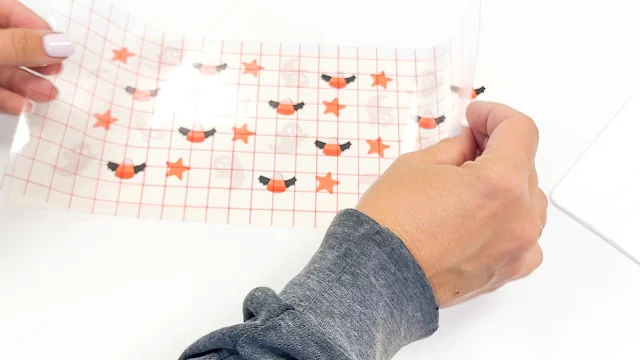
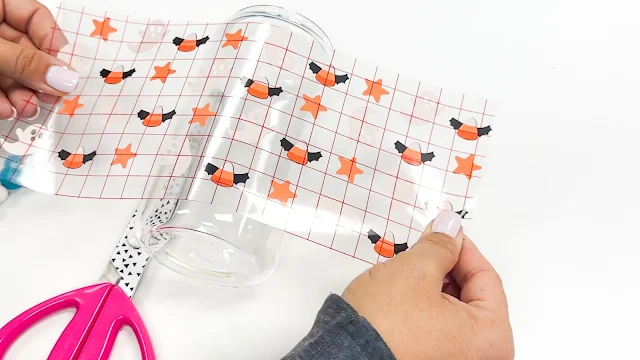
Apply a piece of clear transfer tape, completely covering your vinyl wrap.
Use a scraper to burnish the vinyl.
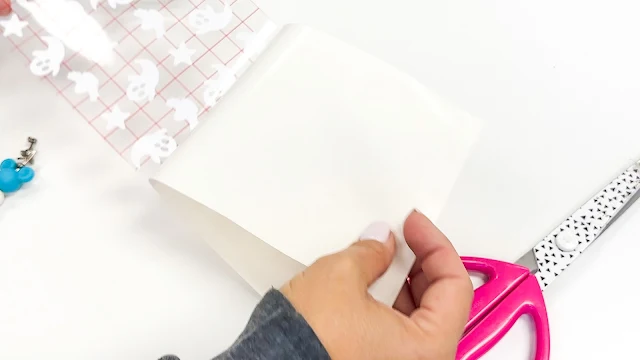
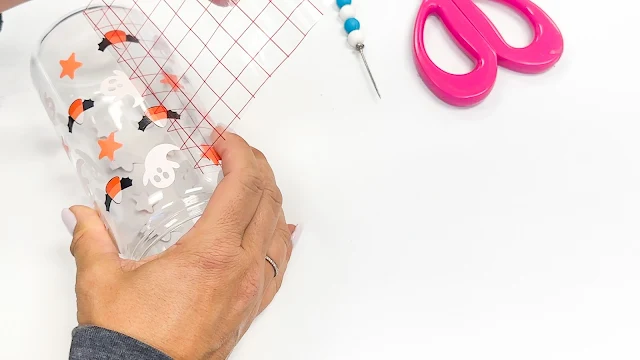
Holding the vinyl can wrap on each of the shorter sides, lay the center down on the glass can and then kind of roll in each direction slowly applying the vinyl wrap fully around the glass can.
Use a squeegee or your fingers to smooth out any bubbles or wrinkles. The strong adhesive of the vinyl should help it adhere securely to the glass surface.
Remove the transfer tape by peeling in a diagonal direction leaving the vinyl wrap on the glass can.
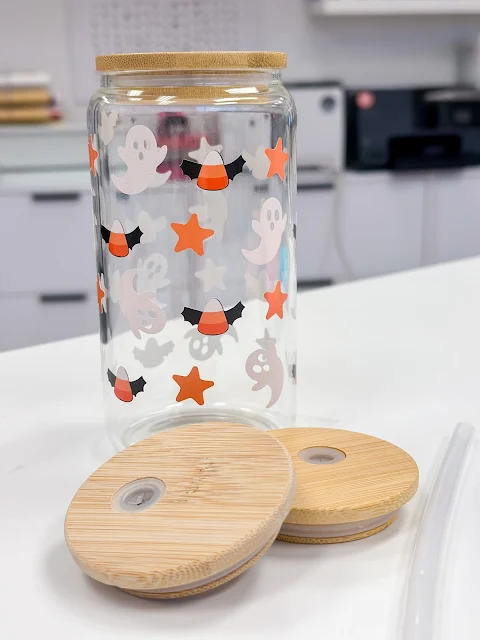
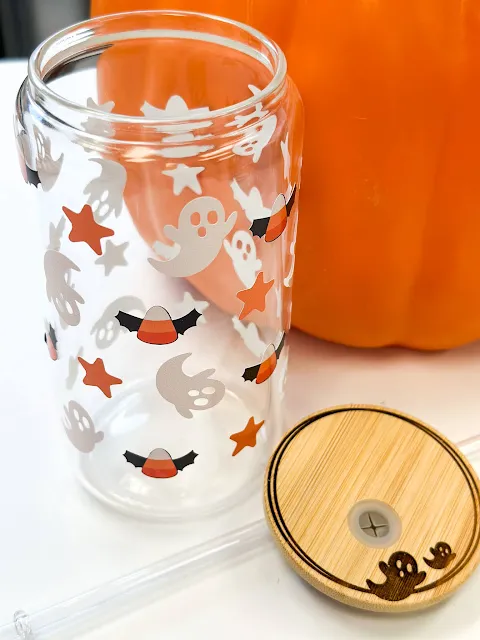
Making vinyl glass can wraps using the Roland BN2-20A or BN-20/A is a pretty quick and easy way to customize glass cans which are really popular right now!
I also went one step further and engraved the bamboo lid using my xTool laser engraver.
If you're looking for more information on how to use the Roland BN2 or what all you can do with it, I would suggest you check out this blog post on Everything You Need to Know About the Roland BN2-20A!










.png)


No comments
Thanks for leaving a comment! We get several hundred comments a day. While we appreciate every single one of them it's nearly impossible to respond back to all of them, all the time. So... if you could help me by treating these comments like a forum where readers help readers.
In addition, don't forget to look for specific answers by using the Search Box on the blog. If you're still not having any luck, feel free to email me with your question.