For custom items like vinyl name stickers or items that are available in various color options, mockups can be easily customized very quickly and cheaply. Using mockups will allow you to not only show off your products in a really visually appealing way but they prevent you from having to create a new physical item for each variation.
In this tutorial I'm going to share the step by step on how to create a product mockups using your own designs in Canva...and I'll even share a little hack for animating tumbler mockups!
Before we begin, if you designed in Silhouette Studio, you will need Silhouette Studio Business Edition (one time fee) to export the design as a PNG with a transparent background, but you can do the rest of this tutorial with the free Canva version.
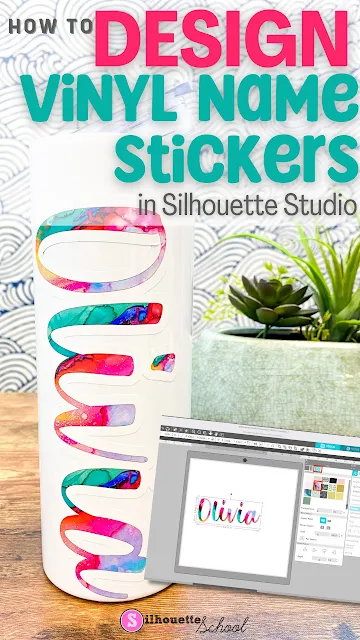
I'm going to show you how to create a realistic product mock up using the vinyl name sticker for a water bottle that I designed in Silhouette Studio.
If you haven't gone through that design tutorial yet, you can check it out and then pick up here or use any design you created.
How to Export from Silhouette Studio as a PNG with Transparent Background
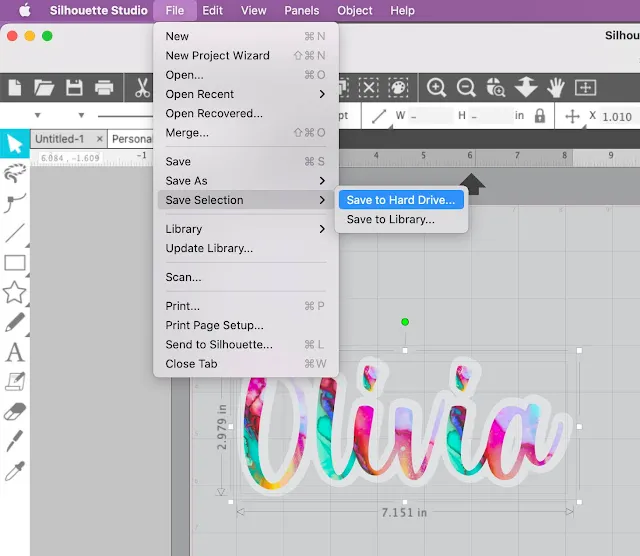
In Silhouette Studio open your design in a design area, if it's not opened already. Select the entire design and go to File > Save Selection > Save to Hard Drive.
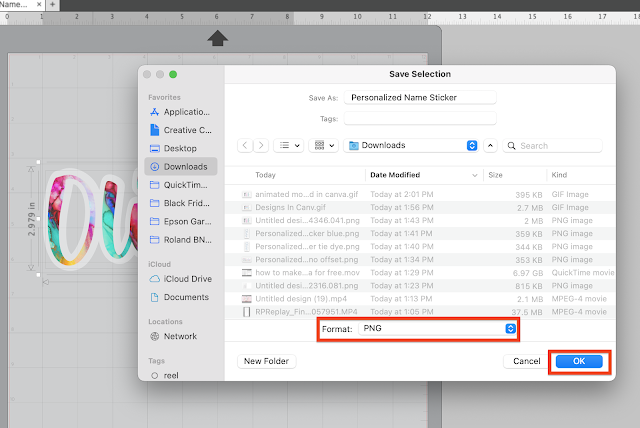
Change the file type to PNG.
After you click "Ok" you'll get a second pop up box where you can then check box for "Transparent background."
How to Create Product Mockups in Canva for Free
Now open Canva. If you haven't used Canva previously you can go Canva.com and create a free account by clicking "Sign Up."
Start by clicking "Create a Design" in the top right corner.
You can pick any of the art board sizes that you want, but I like to use a video option because it gives you some additional options later if you choose to use them.
To create a portrait-oriented product listing photo type "Mobile Video" into the search bar. Select that document size to create the artboard. Pick your size carefully because unless you have Canva Pro (try it free for 30 days) you will not be able to resize or change the layout after you begin creating - you'd have to start completely over.
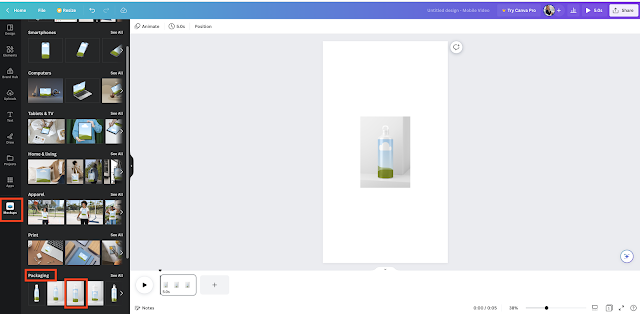
On the black menu bar on the left side of Canva click "Apps" and then scroll down to Mockups.
Click the Mockups icon and you'll get a series of available product mockup options.
Under "Packaging" you'll find several options for water bottle mockups. Click one and it will open on the art board.
Pull one of the corners to expand to fill the design area.
Adding a Custom PNG to a Canva Product Mockup
Now go to Uploads on the left menu and click "Upload files". Navigate to the PNG you exported from Silhouette Studio on your computer to upload it.
Once uploaded, it will appear in your Upload Images section.
Click the file and drag it onto the water bottle mockup in the art board. The PNG will be placed into the mockup area...
With the product mockup selected you can click "Edit" to make some adjustments including the position of the design on the mockup.
When you're ready to export the image from Canva, click the Share button at the top right and then Download.
With free Canva you can download as a PNG, JPEG, PDF, GIF or MP4.
When choosing what file type to download from Canva, there's no reason to download as GIF or MP4 for a static image...but if you are interested in learn how to give your product photos a little extra wow factor you can add an animation in just a few steps...and still in the free version of Canva!
Check out this quick video on creating animating mockups in Canva.
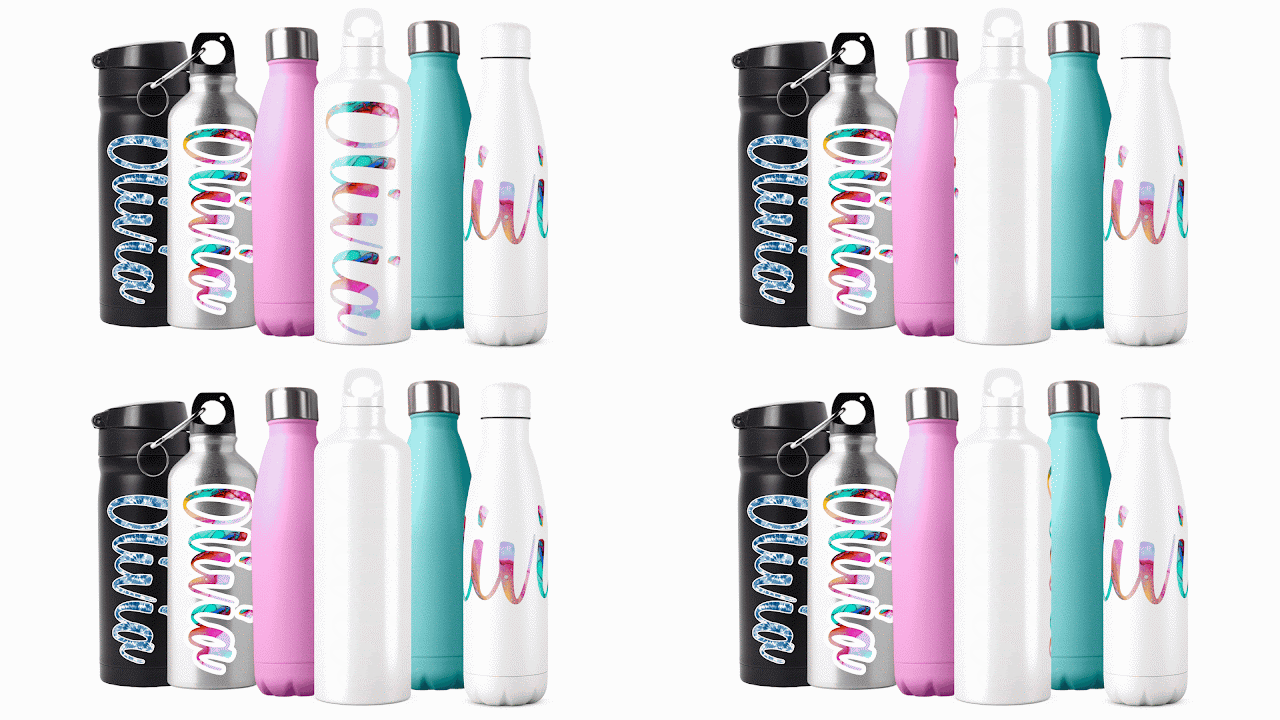
Product mockups are also great for showing off a variety of buying options...so your customers can see several options that are available.
How to Remove a Background in Canva
In the example above, I combined the animated mock up with several other mockup photos. Not all of these water bottles were originally on a transparent background - meaning I had to remove the background for a few of them.
This one-click background removal option, can only be accomplished with Canva Pro (try it free for 30 days through my link). Once you unlock the Pro features you just click an image > click Edit > and choose "Remove Background" and...it's gone!
That's only one of a whole lot list of features and benefits you get with Canva Pro...which I will tell you is worth every penny if you EVER need to create images for social media, a shop or even...just use to print and cuts stickers or find cool sublimation designs!
Note: This post may contain affiliate links. By clicking on them and purchasing products through my links, I receive a small commission. That's what helps fund Silhouette School so I can keep buying new Silhouette-related products to show you how to get the most out of your machine!
Get Silhouette School lessons delivered to your email inbox! Select Once Daily or Weekly.






.gif)


.png)


No comments
Thanks for leaving a comment! We get several hundred comments a day. While we appreciate every single one of them it's nearly impossible to respond back to all of them, all the time. So... if you could help me by treating these comments like a forum where readers help readers.
In addition, don't forget to look for specific answers by using the Search Box on the blog. If you're still not having any luck, feel free to email me with your question.