This is pretty easy to do if you understand how to trace by color and turn off interior cut lines. Read on for how to change some colors of a PNG in Silhouette Studio. If you want to change all the colors in a PNG in Silhouette Studio check out this tutorial.
Start by opening the design in the work area. I'm using this set of cartoon kids from So Fontsy. I want to change a few colors so the design isn't so "Christmasy".
Open the trace panel and click the second tab at the top to trace by color. Click "Trace by Color" then use the eyedropper to click on the color you want to trace.
If you want to change all or most of the red areas, click "All Areas" (which is what I am going to do.
TIP: Widen the tracing box if you want to include the other designs in the work area (these all three came in separately).
When you're ready, click "Trace." The shading will go away and it may look like nothing happened but there are now red cut lines created in the areas you traced.
Move the original design away, but don't delete it. It's a good idea to group it at this point so nothing gets moved out of place.
To work with cut lines you created to fill with color, select the set of cut lines > right click > Release Compound Path.
Now you can freely change the colors of each area as you wish. Open the Fill Color tool and start filling.
When you're done, group them all together by right clicking > Group. Move the two sets back together so that the traced areas with new colors are "in front" or "on top" of the original design.
I would recommend also changing the line color around the traced areas. This will help cover any bit of the old color that wants to peak out.
In this case black will be the easiest color to change to since the entire design has a black outline.
If there are more areas you want to change, repeat the steps above.
When you're completely done, group the entire design and both layers together.
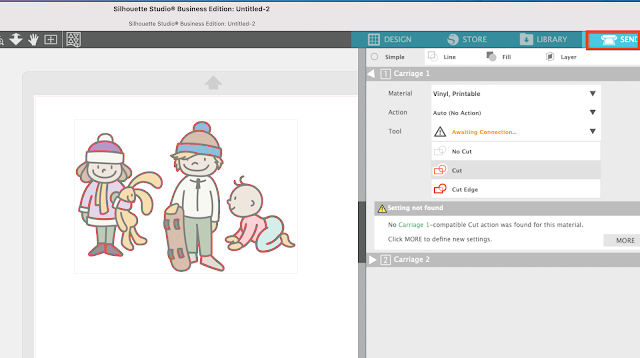
Go to the Send panel. Right now you can see all of those trace lines you created want to cut.
With the design select change to "Cut Edge" to turn off the interior cut lines you created. This will allow you to print and cut just around the edge of the design without cutting the interior areas.
Note: This post may contain affiliate links. By clicking on them and purchasing products through my links, I receive a small commission. That's what helps fund Silhouette School so I can keep buying new Silhouette-related products to show you how to get the most out of your machine!
Get Silhouette School lessons delivered to your email inbox! Select Once Daily or Weekly.


.png)


What silhouette studio version is this????
ReplyDelete