The initial A4 Silhouette Sheet Feeder set up requires a firmware update in Silhouette Studio and connecting the sheet feeder to the CAMEO 4 vs the Portrait 3 is slightly different. This tutorial will walk you through how to setup the Silhouette Sheet Feed - A4 with the CAMEO 4. You can follow this tutorial for how to use with the Portrait 3.
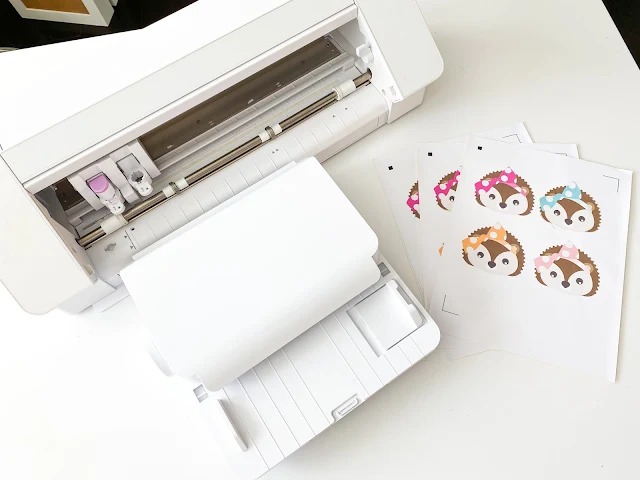
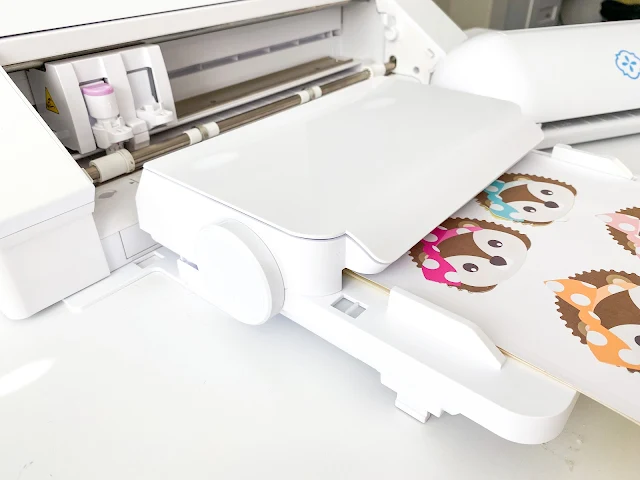
The Silhouette Sheet Feeder allows you to place a stack of sheets into the feeder which will then be automatically fed into the cutting machine automatically. It's a time saver for those who are printing and cutting a lot of the same sticker sheets or other Silhouette print and cut projects.
The Silhouette Sheet Feeder includes the sheet feeder, an attachment plate, a power splitter cord and a USB cord.
How to Attach the Sheet Feeder to CAMEO 4
The attachment plate has multiple sets of cut outs in it for attaching to the various machines. However to use with the CAMEO 4 you will only use the rectangular hole on the far left and the round hole towards the top right side.
Working on a flat surface flip your CAMEO 4 back carefully to locate the left front food and the small round circle towards the front.
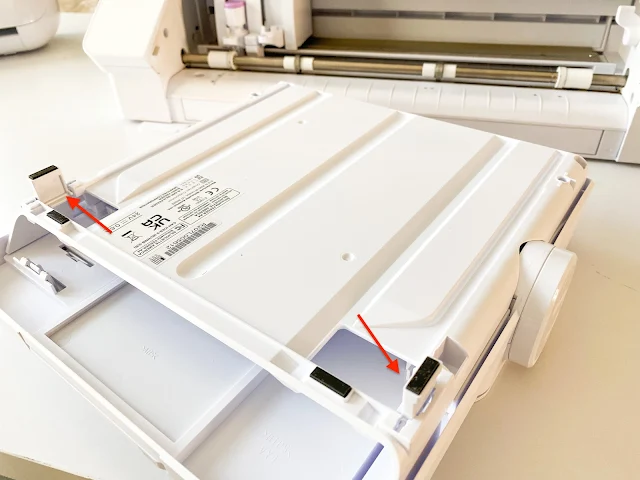
The sheet feeder itself has two small feet on the underside that need to be flipped out/open when using with the CAMEO 4.
You'll also want to find the two holes in the bottom of the sheet feeder, which will attach into the taller set of rods sticking up on the attachment plate.
It should all kind of click into place and feel pretty secure.
How to Connect the Power and USB Cords Between the CAMEO 4 and Sheet Feeder
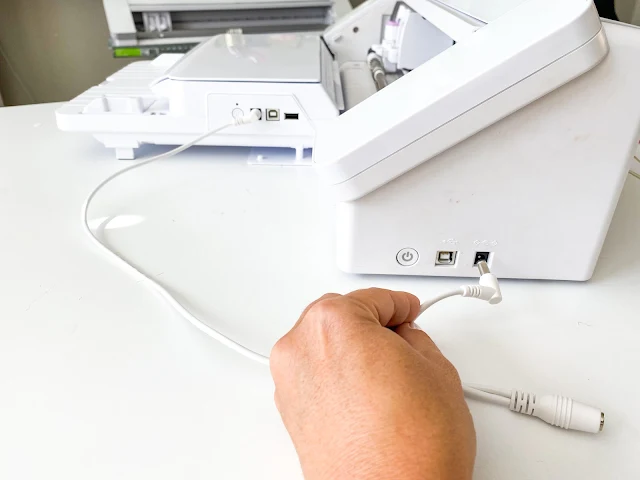
The power splitter has two round connections. One goes into the sheet feeder and other should be plugged into the CAMEO 4. You'll be connecting it to the site where the power cord would normally go.
The CAMEO 4 power cord should be connected to a power source and plug into the splitter.
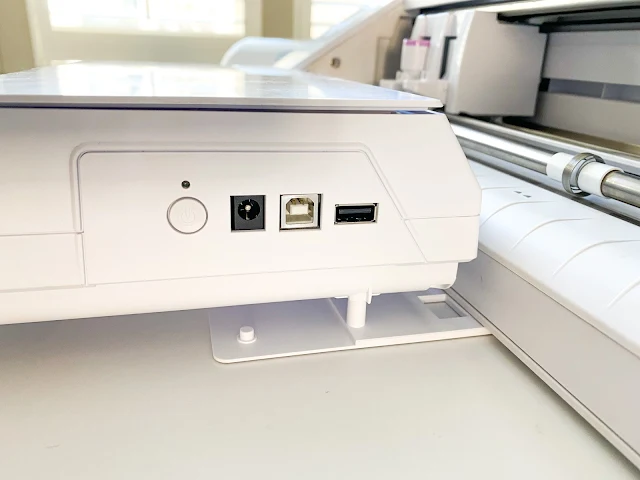
The USB cord that's included with the Sheet feeder should also be connected between the CAMEO 4 and Sheet feeder. The square end goes into the CAMEO 4 with the USB end going into the Auto Sheet Feeder.
Finally, to connect to the computer, the normal USB you'd use to connect between the cutter and the computer, should be connected between the sheet feeder and the computer with the square end plugging into the feeder.
Press the power buttons on both the CAMEO 4 and the Silhouette Auto Sheet Feeder.
Setting Up Silhouette Studio to Use with the Sheet Feeder
You will need to use Silhouette Studio V4.5.152 - or a newer version - in order to use the sheet feeder. Install that version of the software if you haven't already.
Launch Silhouette Studio and open the Page Setup panel. Change the Feed Type to "Sheet Feeder" which will automatically set the mat to none. Select the correct size paper.
Move to the Send panel. If you get a pop up window telling you need to install the sheet feeder click "Continue."
From the Send Panel's Machine List choose the Sheet Feeder (USB) as the machine you are using. Do not select the CAMEO 4.
You will need to complete a firmware update the first time you connect the Sheet Feeder. Follow the on screen prompts.
Once complete, you're not ready to use your Silhouette Auto Sheet Feeder with your Silhouette CAMEO 4.
To learn how to print and cut multiple sticker sheets with the Silhouette Sheet Feeder check out this beginner tutorial.
Note: This post may contain affiliate links. By clicking on them and purchasing products through my links, I receive a small commission. That's what helps fund Silhouette School so I can keep buying new Silhouette-related products to show you how to get the most out of your machine!
Get Silhouette School lessons delivered to your email inbox! Select Once Daily or Weekly.









.png)


No comments
Thanks for leaving a comment! We get several hundred comments a day. While we appreciate every single one of them it's nearly impossible to respond back to all of them, all the time. So... if you could help me by treating these comments like a forum where readers help readers.
In addition, don't forget to look for specific answers by using the Search Box on the blog. If you're still not having any luck, feel free to email me with your question.