Both of these methods avoid the issue of added bulk when layering solid color glitter HTV. I prefer the Roland BN-20 method because it avoids the common issue of trying to line up the sublimation print with the cut vinyl and the transfer isn't as thick.
Read on for how to make glitter heat transfers with Roland BN-20A.
Siser makes a glitter heat transfer vinyl called Sparkleprint that can be printed directly on with an ecosolvent printer - including the Roland BN-20A. This makes it a perfect choice for making glitter transfers. And the best part is - it's a one step process since the Roland BN-20A will both print and cut.
Please note: This product is not compatible with inkjet, laser or sublimation printers.
First let's set up the design...
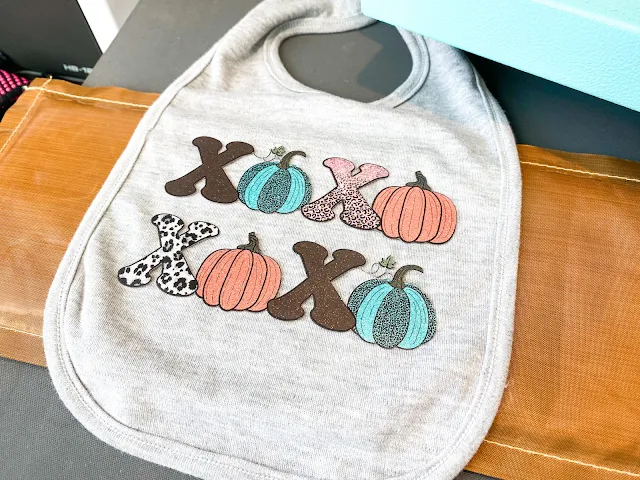
The Roland BN-20A shines with full color designs - many of which are intended for sublimation or transfer printing so they are often PNG file types. The XOXO pumpkin design I'm using is from So Fontsy.
If you have Silhouette Studio Business Edition, you can import the PNG file directly into Silhouette Studio and create the cut lines for Roland Versaworks. No other software is needed. If you aren't familiar with this process you can check out a full step by step here.
You'll end up with a PDF file that contains the vector data Roland Versaworks needs.
Launch Roland Versaworks. Go to File > Add to Queue and find the PDF on your computer.
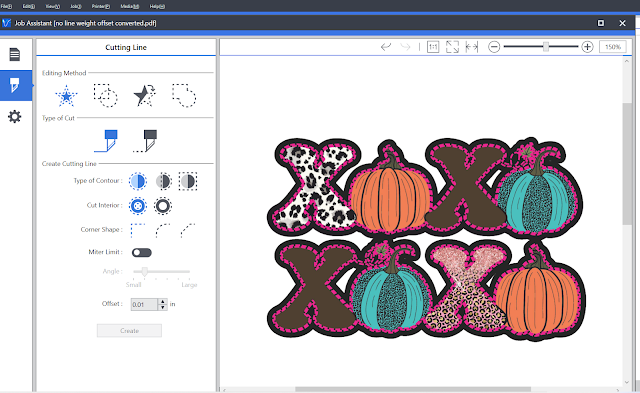
Right click the file name and go to Job Assistant. Select the image and then create the contour cut lines. Again if none of this is sounding familiar you'll want to make sure you go through the step by step process for creating Versaworks cut lines in Silhouette Studio.
Finally you'll right click the file name in the queue and click "Settings." This will bring up the settings window.
Under the Quality tab change the Media Type to THT: Textile Heat Transfer Vinyl
Go to the Cut Controls tab on the left and check the box for Cutting Conditions Settings. You'll need to increase the cutting force to cut through the glitter HTV since it's thicker than vinyl or smooth heat transfer.
I increased the force to 150gf and left the other settings on the default. That worked for a perfect kiss cut on the Siser SparklePrint.
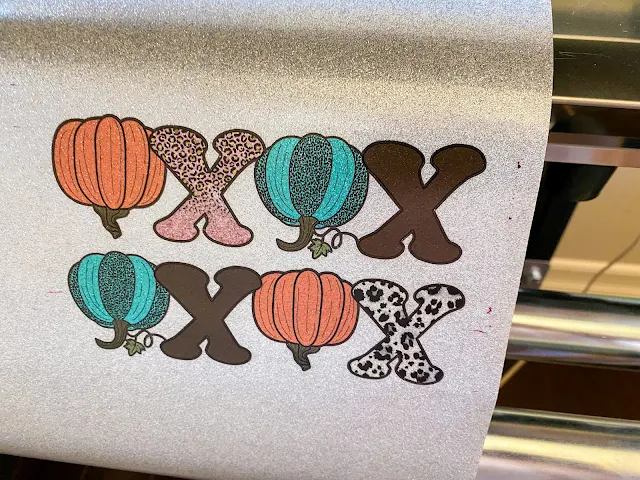
Once you're ready you can Rip and then Print. The Roland BN-20A will first print the image then cut.
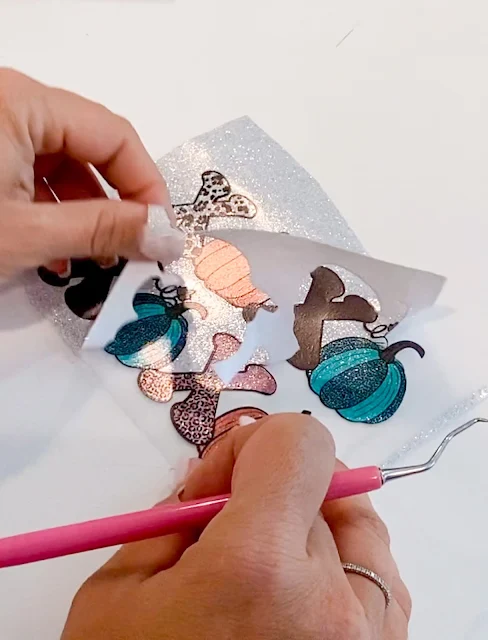
After the printing and cutting is completely you can weed away the excess glitter HTV.
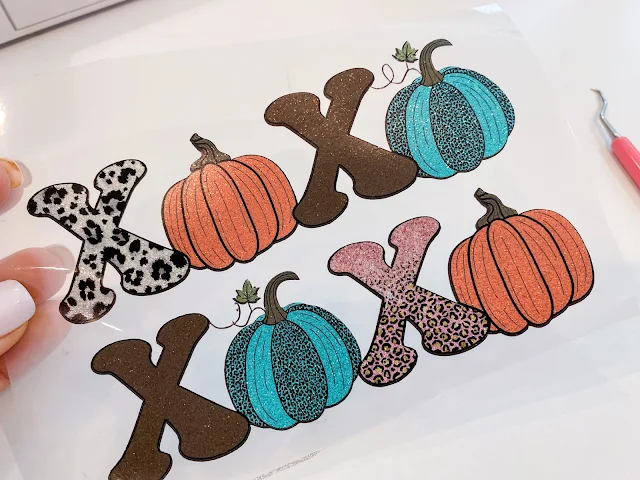
Here's a close up so you can see how pretty this glitter HTV is!
Use a mask to transfer the glitter heat transfer onto the surface where you want to apply it.
Press with a heat press at 310 degrees for 15 seconds at medium pressure.
Note: This post may contain affiliate links. By clicking on them and purchasing products through my links, I receive a small commission. That's what helps fund Silhouette School so I can keep buying new Silhouette-related products to show you how to get the most out of your machine!
Get Silhouette School lessons delivered to your email inbox! Select Once Daily or Weekly.







.png)


No comments
Thanks for leaving a comment! We get several hundred comments a day. While we appreciate every single one of them it's nearly impossible to respond back to all of them, all the time. So... if you could help me by treating these comments like a forum where readers help readers.
In addition, don't forget to look for specific answers by using the Search Box on the blog. If you're still not having any luck, feel free to email me with your question.