In order to correctly print from Silhouette Studio to your printer, though, you'll want to make sure you match the page size between your print manager and Silhouette Studio. This tutorial will explain exactly how to match your printer page size to the settings in Silhouette Studio.
Since Silhouette Studio is extremely helpful for layout, nesting, and designing and can access color profiles, it's a good option for printing especially if you already use it - but also even if you don't have a Silhouette cutting machine.
The ability to print to any printer from Silhouette Studio also means you can print to standard 8.5" x 11" printers as well as wide format printers including wide format sublimation printers ranging from - but not limited to - the 11" wide Sawgrass SG1000 to the 24" Epson F570 sublimation printer. You can even print borderless from Silhouette Studio. The key is matching the page size to your printer settings.
How to Change Printer Settings in Silhouette Studio
Start by opening Silhouette Studio.
From Silhouette Studio go to File > Print Page Setup.
In the printer settings window/panel/box you need to make three selections:
- Select the printer you want to print to. The process is the same here no matter which printer you pick. For this example I'm going to select my standard 8.5 x 11" sublimation printer.
- Select the paper size. I'm going to select Legal - 8.5" x 14".
- Select the orientation. I'm going to pick Portrait.
Confirm the settings by pressing Apply or Ok and exit the panel.
How to Change Paper Size in Silhouette Studio
Return to Silhouette Studio.
It may look as if nothing has changed. But...we need to match these settings in Silhouette Studio before we notice the changes taking effect.
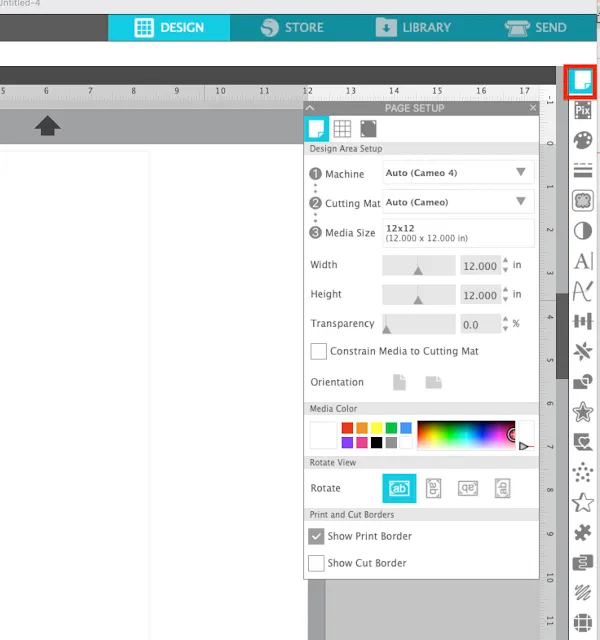
Open the Page Setup panel in Silhouette Studio by clicking the top button on the right toolbar.
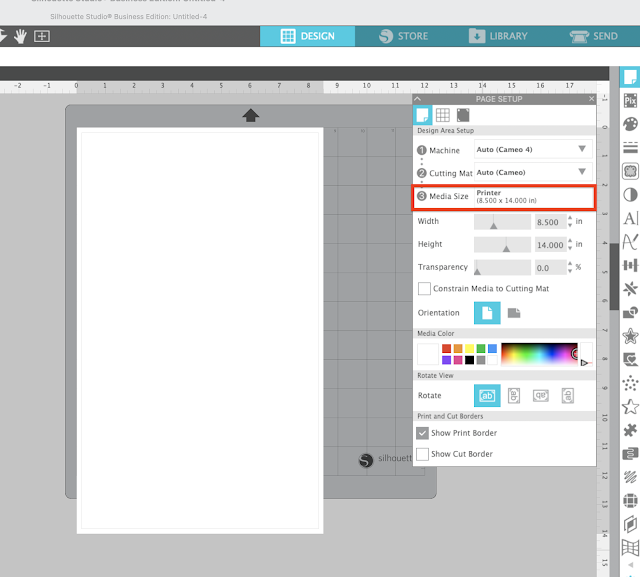
From the Media Size drop down pick "Printer". You'll notice the dimensions under "printer" will show the same as the paper size you selected in the printer set up.
You'll see the printer border in Silhouette Studio (gray line) has also changed.
Changing the Print Border and Printer Page Size in Silhouette Studio
This process of matching your printer size to your page size in Silhouette Studio is not a set it and forget it type situation. You will need to make these adjustments every time you print to a different printer OR print to a different material size on the printer.
For example, if the next time I print to my Sawgrass sublimation printer I am printing on 8.5" x 11" paper instead of 8.5 x 14", I need to go back into the Print Page Setup settings and adjust the page size so it's reflected in Silhouette Studio as well.
Note: This post may contain affiliate links. By clicking on them and purchasing products through my links, I receive a small commission. That's what helps fund Silhouette School so I can keep buying new Silhouette-related products to show you how to get the most out of your machine!
Get Silhouette School lessons delivered to your email inbox! Select Once Daily or Weekly.


.png)


I am having an issue with what I see on my canvas is totaly different in print preview as well as how it prints.
ReplyDeleteHi, my Cameo 4 will only recognize the "default" printer. Using Windows 10. I have a HP laser printer and a Canon Pro 9000 Mark II. In the print set up window, it never allows me to chose the printer? Any thoughts? The HP is wireless and the Canon is USB. My Print Set up doesn't look anything like what is shown up. I'm using the Business Edition of Studio. Just got this for Christmas so am in learning curves. Thank you.
ReplyDeleteI have wasted hours, ink and paper trying to solve this problem and would never in a million years have figured it out. Thank you, Melissa!
ReplyDelete