Making custom logo stickers is great for branding and packaging. This tutorial will explain how to turn your logo into a custom sticker.
Open Silhouette Studio and go the Design area.
Go to File > Merge and navigate to the logo file on your computer. I'm using the logo for my premium membership site Silhouette U.
If you have the SVG file that's the best version to import, but you'll need Designer Edition to import it. Otherwise import a transparent PNG if you have it. If you only have a PNG with white background or JPEG you can import that too.
The first step to turning your logo into a sticker is create a cut line.
- SVGs come in with cut lines turned on so you're all set and can skip ahead to the section on "How to Add a Border"
- If you have autotrace PNG on, the cut lines on the transparent PNG will be automatically turned on, and you can also skip ahead to "How to Add a Border"
- JPEGs and PNGs with white backgrounds needs to be traced.
How to Trace a JPEG or PNG with Background in Silhouette Studio
Open the Trace panel from the right sidebar. Click Select Trace Area.
Adjust the Threshold setting so the entire outer edge of the design - at least - is completely yellow.
Click "Trace Outer Edge."
How to Add a Border for Stickers in Silhouette Studio
Now open the Offset panel. With the cut line you just traced selected, click "Offset".
Adjust the Offset distance until the offset preview line is solid. The Offset line will automatically weld so don't worry if there are overlapping areas.
You're looking for something like this...then click Apply.
Removing Unwanted Cut Lines from Tracing in Silhouette Studio
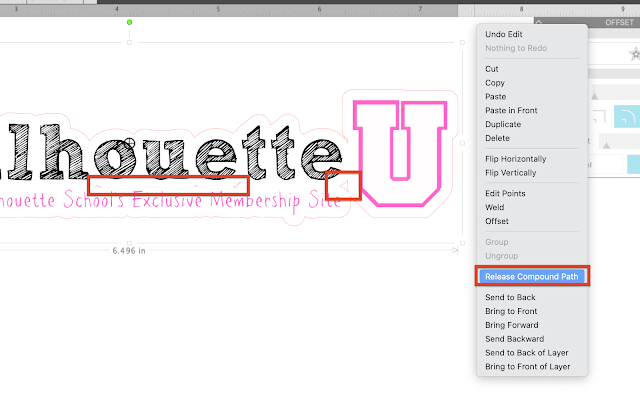
If you have any small unwanted cut lines you can remove them by right clicking > Release Compound Path.
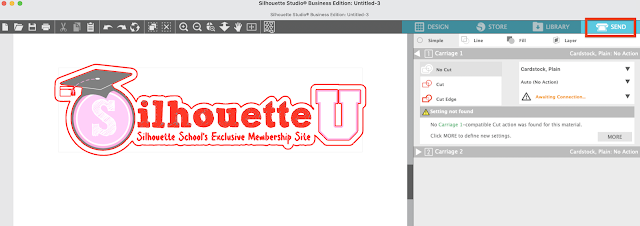
Move to the Send panel. If your original design and the offset both have cut lines - as indicated by bold red lines - we need to turn off those internal cut lines.
How to Quickly Replicate in Silhouette Studio
Return to the Design area and group your logo design and the offset line together. Scale to the size you want the sticker to be.Set up the page for print and cut by opening the Page Setup panel. Make sure the correct printer and print size media are selected from the printer settings.
In the Page Setup panel change the Material Size to Printer. Turn on the registration marks by pressing "M" on your keyboard and check the boxes for Show Print Border and Show Cut Border.
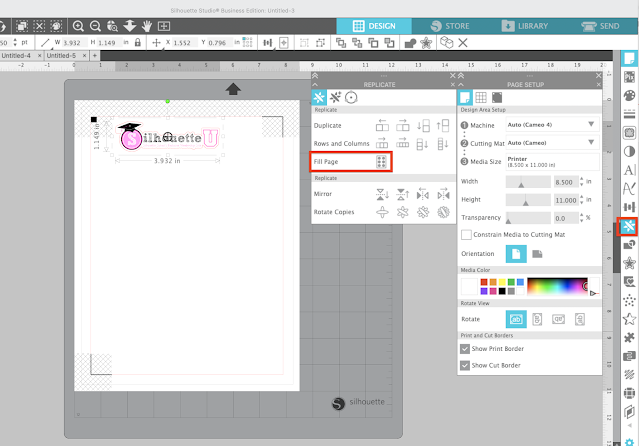
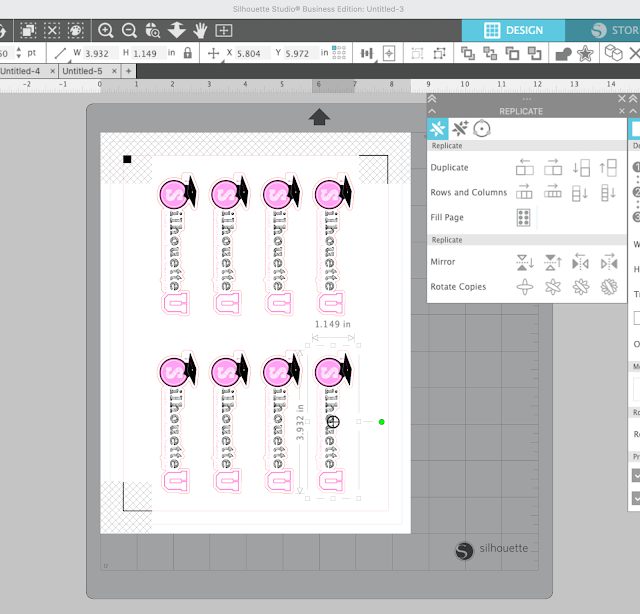
Now you can fill the page with the logo sticker designs. You can do this manually by copying and pasting or you can open the Replicate panel and with the logo selected click "Fill page."
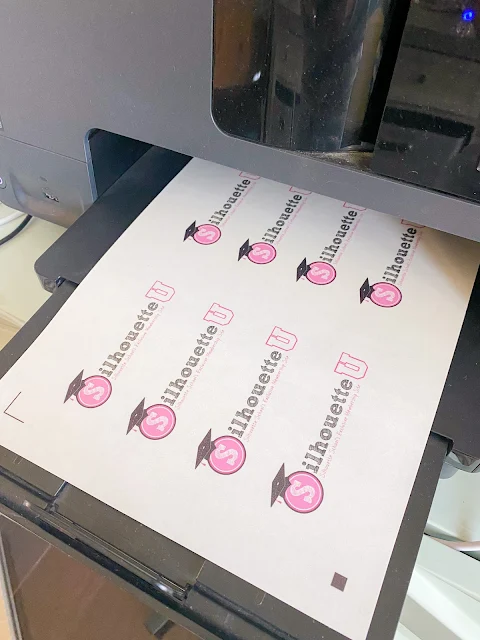
You're ready to print and cut so load a sheet of sticker paper into your printer. I always use Online Labels sticker sheets. Today I'm printing clear stickers so I'm using the Online Labels clear printable sticker sheets for inkjet printers.
From Silhouette Studio send the page to print.
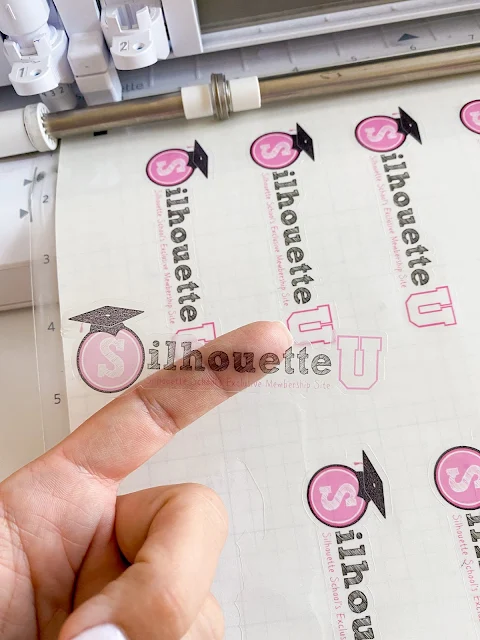
Place the printed sheet on the Silhouette cutting mat and load into the Silhouette CAMEO.
From the Send panel select Sticker Paper, Clear as the material and then Send to cut.
Note: This post may contain affiliate links. By clicking on them and purchasing products through my links, I receive a small commission. That's what helps fund Silhouette School so I can keep buying new Silhouette-related products to show you how to get the most out of your machine!
Get Silhouette School lessons delivered to your email inbox! Select Once Daily or Weekly.








.png)


No comments
Thanks for leaving a comment! We get several hundred comments a day. While we appreciate every single one of them it's nearly impossible to respond back to all of them, all the time. So... if you could help me by treating these comments like a forum where readers help readers.
In addition, don't forget to look for specific answers by using the Search Box on the blog. If you're still not having any luck, feel free to email me with your question.