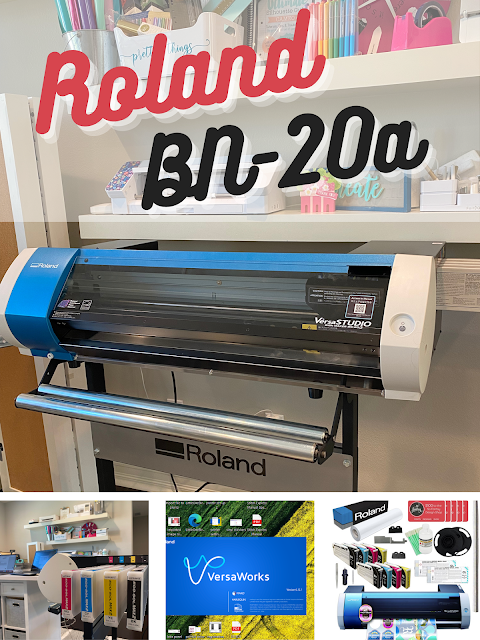
You can print patterned vinyl with an inkjet printer and inkjet printable vinyl as I shared previously, but you'll get the best results, the longest lasting, and the highest quality with an eco solvent printer and cal vinyl. In this tutorial I'll share the steps for how to print patterned vinyl or heat transfer vinyl with the Roland BN-20A or BN-20.
Since I am most comfortable in Silhouette Studio I like to do as much of the designing as I can in Silhouette Studio before exporting into Roland Versaworks for the printing and cutting.
How to Fill a Shape with a Pattern in Silhouette Studio
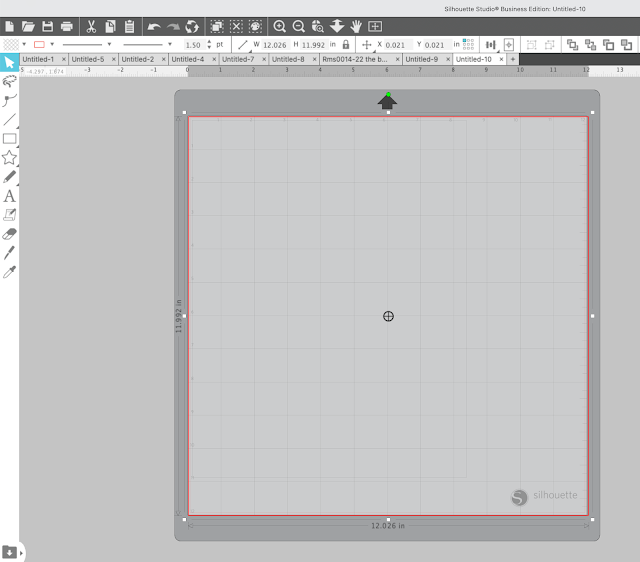
Start by opening Silhouette Studio and using the Draw a Rectangle tool to draw out a 12x12" square. This is assuming you are printing 12x12" patterned sheets.
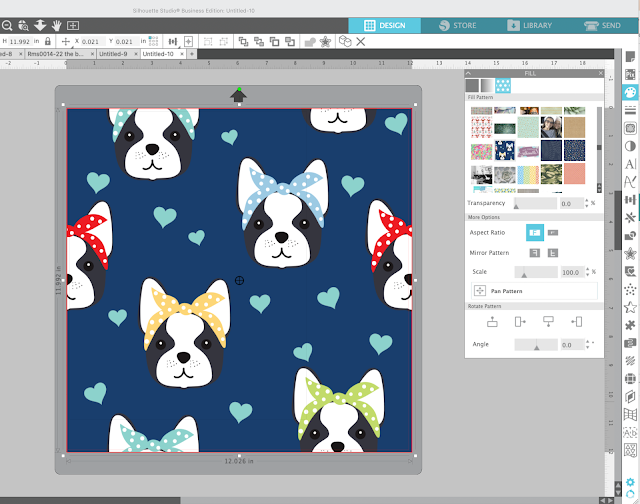
Open the Fill tool on the right sidebar and click the Patterns tab.
With the square you drew selected, click a pattern to fill the square. I'm using this digital pattern from So Fontsy. To import your own digital pattern or background into the Patterns folder, you'll need Silhouette Studio Designer Edition. This tutorial will walk you through the steps of importing your own patterns in Silhouette Studio.
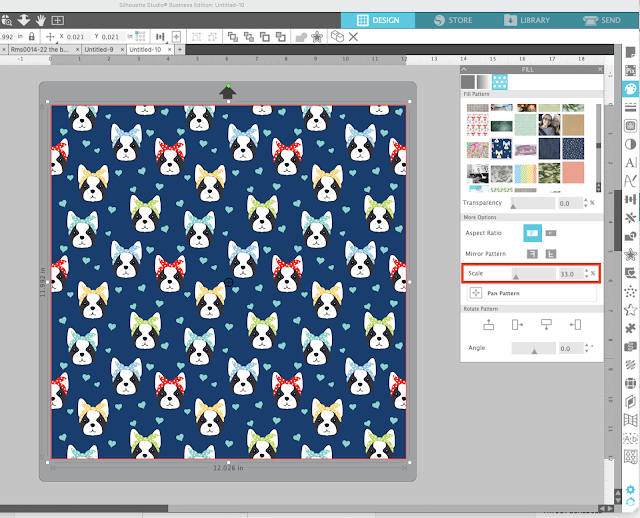
How to Scale a Digital Pattern in Silhouette Studio
Once the square is filled with the pattern, use the Patterns tools to scale and position the digital pattern within the square as you'd like.
How to Export PDF from Silhouette Studio
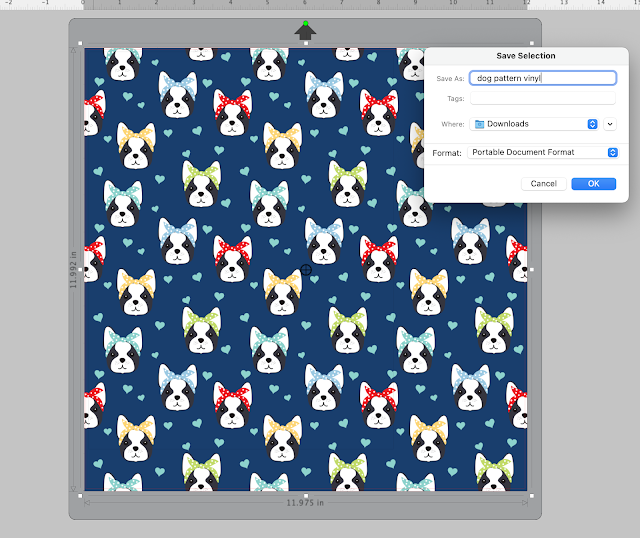
When you're ready select the square and go to File > Save Selection > Save to Hard Drive.
Select the file format as a PDF. This will require the one time paid purchase of Silhouette Studio Business Edition.
How to Print Patterned Vinyl with Roland BN-20A
Now we need to open the PDF in Roland Versaworks. TIP: If you are a MAC user, put the PDF on Google Drive and then move to your PC > open Google Drive > Download the PDF > open in Versaworks.
Launch Versaworks and then go to File > Add to Queue > Select the PDF file.
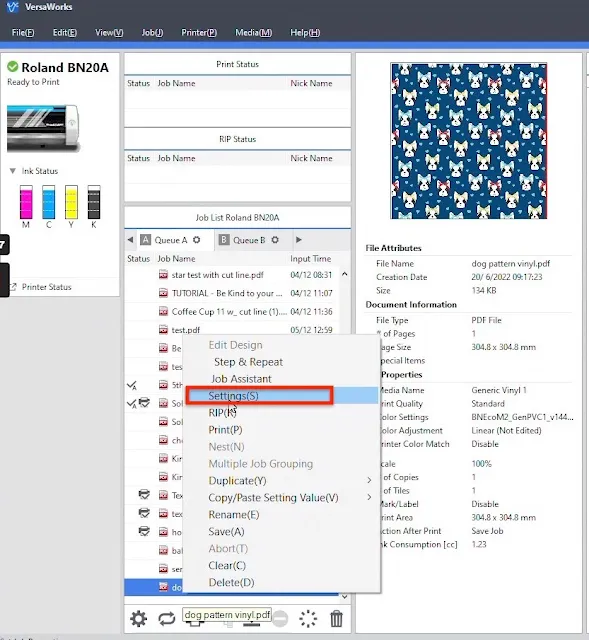
The digital pattern you are going to print as patterned vinyl will be added to the queue. Right click it and click Settings. This will open up the Settings panel.
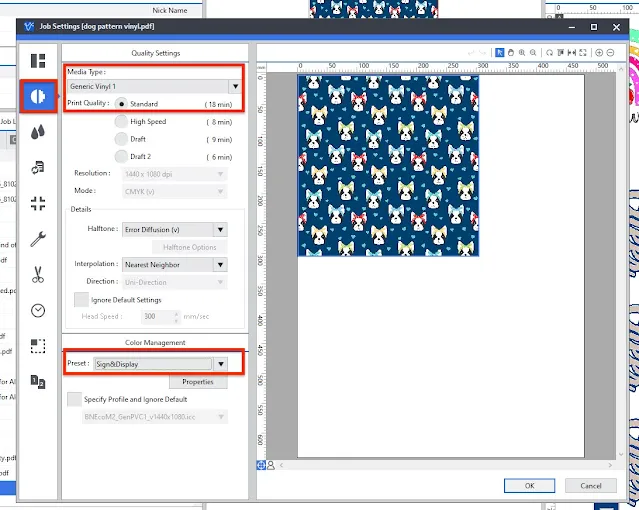
You want to click the "Quality Settings" tab - the second button on the left.
Change the "Media Type" to Vinyl 1 and select the print quality.
Under "Color Management" I always choose Sign & Display.
Move to the Cut Settings tab. Here you change the Operation Mode to just Print or Print & Cut. "Print" is fine for sheets of vinyl since you will need to trim them down yourself anyway.
I opted for Print & Cut and have the machine cutting the image border (as a kiss cut) as well. I will still have to cut it off the larger roll myself though.
When you're ready pull the PDF into the Rip area.
After the printing is complete, you can trim off the sheet from the larger roll and then use a paper trimmer to make sure the sides are evenly cut.
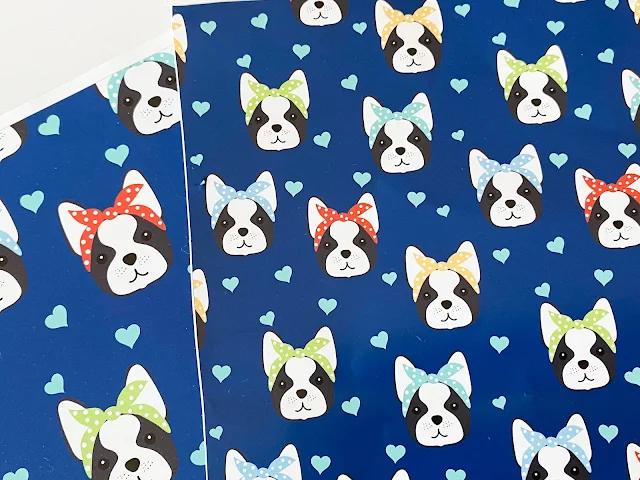
Here's a close up so you can see the quality of the print on the Roland BN-20A.
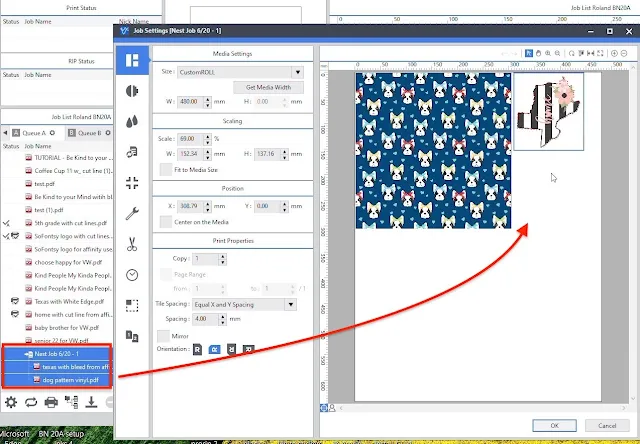
If you want to avoid wasted vinyl when printing 12x12" sheets of vinyl on the Roland BN-20A or BN-20 you can use the nest feature in Roland Versaworks to put other images in that space to print and cut at the same time.
Looking for more info and tutorials on Roland BN-20A, BN-20 and Versaworks? Check out all of the Silhouette School Roland tutorials.
Note: This post may contain affiliate links. By clicking on them and purchasing products through my links, I receive a small commission. That's what helps fund Silhouette School so I can keep buying new Silhouette-related products to show you how to get the most out of your machine!
Get Silhouette School lessons delivered to your email inbox! Select Once Daily or Weekly.








.png)


No comments
Thanks for leaving a comment! We get several hundred comments a day. While we appreciate every single one of them it's nearly impossible to respond back to all of them, all the time. So... if you could help me by treating these comments like a forum where readers help readers.
In addition, don't forget to look for specific answers by using the Search Box on the blog. If you're still not having any luck, feel free to email me with your question.