How you add a bleed though depends on the design itself. Let's look at the four most common ways to add a bleed in Silhouette Studio and when you'd want to apply each method.
Adding bleed in Silhouette Studio is a must for making stickers. If you want to get the best results for sticker combine the best print settings, the best sticker paper - I always use Online Labels - and add bleed. Nothing else is more important - not even the printer.
Method 1: Add a Bleed with Line Thickness
This method - where you increase the line weight - is the fastest and easiest, but it only works if your design has a single color edge around the entire design. The stickers in this set all have a solid pink edge so using the line thickness method to add a bleed is simple and effective. Read more on how to create a bleed by increasing the line weight.
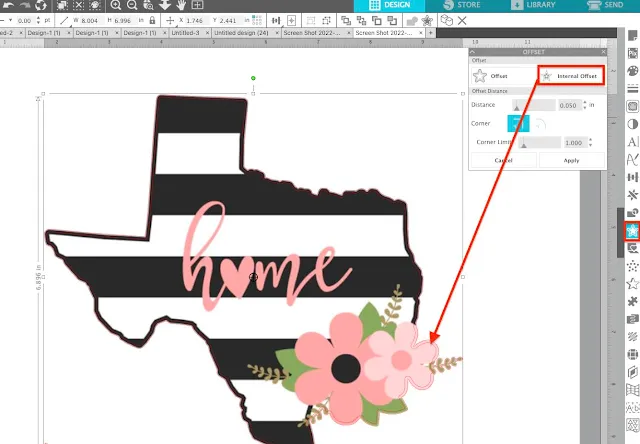
Method 2: Create a Bleed by Adding an Internal Offset
For designs with a multi color edge create an internal offset and use the space between the offset line and the original edge as the bleed area. This method works well for designs that have an edge that's different colors throughout. Read more on how to create a bleed by using an internal offset
Method 3: Create an Offset to Match the Shirt/Surface Color
This is a great hack that is fast to apply. It works well when you have a solid color surface such as a black shirt. Add an offset around the design and fill the offset to match the shirt. Even if the print and cut is off a little bit, the edge will match the shirt color as opposed to being white which would likely be much more noticeable. Read more on how to create a surface-matching offset to avoid white edges on print and cuts.
Method 4: Use the Silhouette Studio Add Bleed Tool
Silhouette Studio has a built in bleed option, found on the Page Setup panel, that works well when it works...but it doesn't always work. There is also no preview of the bleed area so you're leaving it to chance and trusting the bleed area is created the way you want. Read more on using the Silhouette Studio Bleed tool.
Method 5: Add a White Border Around an Image
If you're making print and cut stickers, you can get a professional looking sticker by using high quality sticker paper and adding an intentional white border around the outside of the design. This way the white edge is purposeful instead of accidental. Read more on adding a white border around an image in Silhouette Studio.
Now that know you how how to avoid a little white edge around your stickers when you don't want it, grab some sticker paper from Online Labels and get printing and cutting!!
Note: This post may contain affiliate links. By clicking on them and purchasing products through my links, I receive a small commission. That's what helps fund Silhouette School so I can keep buying new Silhouette-related products to show you how to get the most out of your machine!
Get Silhouette School lessons delivered to your email inbox! Select Once Daily or Weekly.


.png)


Señora Melissa, muchas gracias por impartirnos sus conocimientos. No entiendo, ni sé Inglés por eso no escucho videos. Dios la siga bendiciendo.
ReplyDelete