Silhouette Studio can be used for Sublimation printing for not only designing, but also print layout.
You don't even need a Silhouette cutting machine to use Silhouette Studio for Sublimation! Just download Silhouette Studio free.
This tutorial will explain how to use Silhouette Studio for sublimation.
Can You Use Silhouette Studio without a Silhouette Machine?
Yes! Silhouette Studio can be used as a graphic design and layout software. It's a free software that anyone can download. You can unlock additional features of the software by upgrading to Designer Edition, Designer Edition Plus or Business Edition. Each is a one-time paid software upgrade. You can go directly from the free basic version to Silhouette Studio Business Edition which will give you all features of the software for a one time fee of $99.
How to Set Up the Silhouette Studio Design Page for Sublimation
Open Silhouette Studio and start by going to File > Print Page Setup and select your printer. On the Printer Page Setup window, be sure to select the paper size you are using in those printer settings.
If you're printing on 11 x 17-inch paper with the Sawgrass SG1000 sublimation printer, check out this blog post for the printer page setup for SG1000 in Silhouette Studio.
From the Silhouette Studio Design area, open the Page Setup Panel and change the Media Size to "Printer." This will now match the selections you picked in the printer setup settings.
How to Open a Sublimation Design in Silhouette Studio
Merge the sublimation image into the open Silhouette Studio work area by going to File > Merge. Be sure to use a high-quality sublimation image file for best results, like a PNG file. The sublimation image we're using is from So Fontsy's Funny Sayings Bundle.
If the PNG image is huge when imported into Silhouette Studio, you'll want to resize it to fit your project by selecting the image and dragging one of the corner nodules in to scale the image down. Check out this blog post about the fastest way to resize an image in Silhouette Studio.
You can edit the image as desired including quickly recolor the sublimation image in Silhouette Studio by using the Image Effects panel.
You can add more copies of the design by selecting it > right click > duplicate. Or you can add different sublimation images to this same work area to take advantage of the full printable area. Go to File > Merge to add additional images to the same work area.
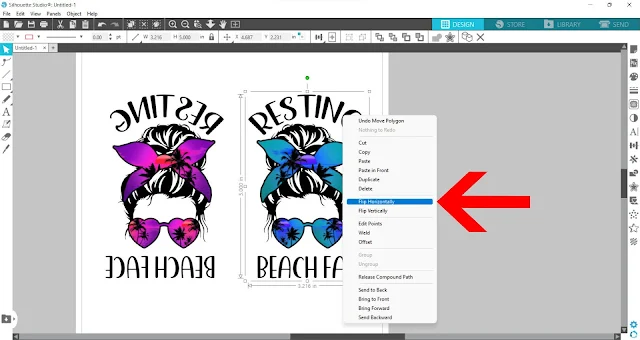
If you're printing to a Sawgrass sublimation printer, the image needs to be mirrored. Right-click over the image and select Flip Horizontally.
If you have a true (not converted) Epson sublimation printer including an F570, you do not need to mirror your design in Silhouette Studio.
How to Print to a Sublimation Printer from Silhouette Studio
When printing sublimation images, you want to be sure you're going through the Sublimation printer's print manager.
⭐️ MAC users with a Sawgrass sublimation printer can not print directly through the print manager from Silhouette Studio and therefore need to export the image out of Studio as a PDF, JPEG, or PNG prior to printing. Then launch Sawgrass Print Manager and open the image into the Sawgrass Print Manager. Once in the Sawgrass print manager, you can follow the steps below.
PC users can access the print manager for Sawgrass and Epson printers directly through Silhouette Studio. MAC users with an Epson sublimation printer can as well.
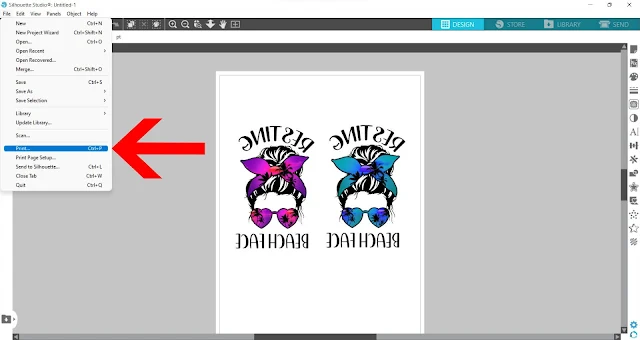
To do so, go to File > Print
The Sawgrass Print manager will pop up as an option.
Note: Epson users can select the printer itself to launch the print manager.
Once you click the Print Manager a new window will open.
How to Use the Sawgrass Print Manager
The print manager will give you more control over the printer's sublimation print settings like the type of ink you're using, type of substrate, and type of paper you are using. Selecting the appropriate settings will give you the best printing results.
One of the most important things to check BEFORE printing is that the image appears mirrored in the print preview area.
The Sawgrass Print Manager gives you the ability to mirror the image, but remember we ALREADY mirrored the image in Silhouette Studio! So don't check the mirror option!
When you're ready to print, click the Print button and the image will be printed on your Sawgrass sublimation printer.
How to Use the Epson Sublimation Print Manager
The Epson Sublimation Print Manager is all built in and can be accessed by selecting the different options in the drop down menu starting with Color Matching.
You'll want to be sure to go through the Color Matching menu, the Printer Settings menu, and Advanced. For more detailed directions on using the Epson print manager, check out this tutorial.
Printing to a Sublimation Printer from Silhouette Studio
When you're ready to print, be sure you have sublimation paper in your sublimation printer.
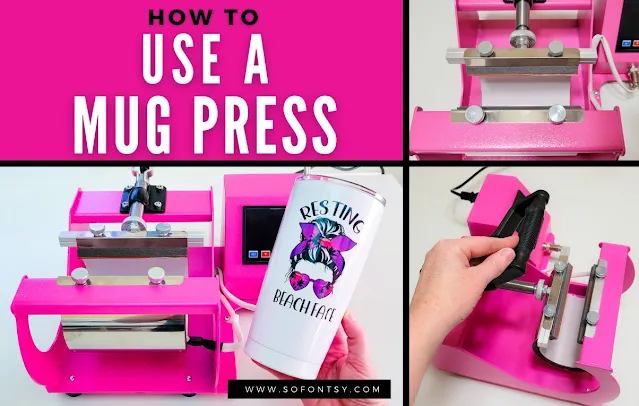
After printing, do a rough trim around the image with a pair of scissors, and you're now ready to move on to pressing! This printed image will be sublimated onto a tumbler using a mug press.
You can see how that's done over on the So Fontsy blog.
And don't forget to grab this sublimation image from the Funny Sayings Bundle at So Fontsy!
Get Silhouette School lessons delivered to your email inbox! Select Once Daily or Weekly.


.png)


How do I get silhouette studio for my iMac and my iPad. I have looked in my apps and cannot find it. Lynn
ReplyDelete