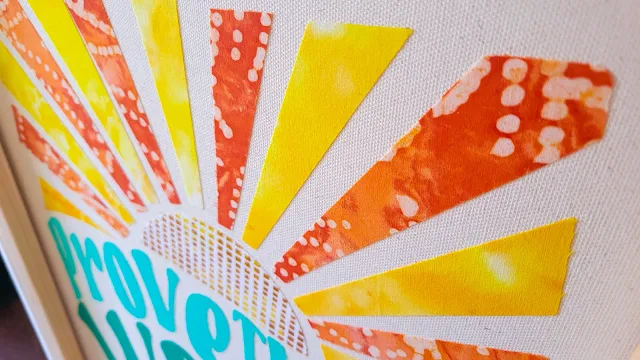
If you don't have a Silhouette CAMEO 4 Rotary Blade, you can use a Silhouette Autoblade to cut fabric.
It does require more preparation to cut fabric with an auto blade, since you need to stabilize it, but it is possible in a pinch. This tutorial will walk you through how to cut fabric with a Silhouette CAMEO 4 Autoblade.
When it comes to cutting fabric on the Silhouette CAMEO, one of the most important things you can do to get a successful cut is to stabilize the fabric prior to cutting.
Before getting started there are a few things to note:
- It's really important to use a new-ish Autoblade to get the cleanest cuts.
- Be sure to use a sticky mat. You may even want to try the Silhouette Cameo Strong Grip Mat.
- You'll get the best results when you choose a design or shape that is relatively simple and large. Small, intricate shapes and designs do not work well when cutting out fabric.
Open a Design area in Silhouette Studio and import the design you want to cut.
The design we chose is this colorful sunrise image scaled to almost 12 inches across. You can find this design in the Big Inspirational Quotes Bundle at So Fontsy.
Why Cut fabric with the Silhouette Cameo?
One of the main reasons people use their Silhouette Cameo to cut fabric is for applique projects. Applique is a technique where fabric shapes are adhered to larger pieces of fabric to create an image or pattern. You'll often find applique in quilts, machine embroidery projects, or fabric art decor.
A common fabric used for applique projects is quilting cotton, and that is what is used in this tutorial.
What Should I Use to Stabilize Fabric?
A good fabric stabilizer to use for cutting fabric with your Cameo is a thin double-sided fusible stabilizer like Pellon 805 Wonder-Under Interfacing. Note: the words interfacing and stabilizer are often used interchangeably even though there are some very slight differences between the two.
I do not recommend using a two-sided pressure sensitive fusible web like EZ Steam II which has a repositionable sticky adhesive that becomes permanent with ironing. I found the stickiness interfered with cutting and made it extremely difficult to remove the cut fabric from the mat. This kind of product would work better if you cut out the shapes by hand.
How to Adhere the Stabilizer/Interfacing
Start by ironing the fabric to remove any folds or wrinkles then cut of piece of Wonder-Under that is very slightly smaller than your piece of fabric.
Place the rough side of the Wonder-Under down onto the wrong side of the fabric. The "wrong side" of the fabric is the back of the fabric.
Press with a hot, dry iron for 5-8 seconds and let cool. If the piece is bigger than the iron, move to the next area and press for 5-8 seconds. Continue until the entire interfacing has been pressed to the fabric.
A thin fusible adhesive is now fused to the back of the fabric (covered by a paper backing). Do not remove the paper backing just yet.
How to Cut the Stabilized Fabric with the Silhouette Cameo
After fusing the Wonder-Under to the fabric, it's now ready for cutting. Using a sticky mat, like the Silhouette Strong Tack Mat, place the stabilized fabric on the cutting cutting mat with the fabric side down.
It's recommended to place the fabric side down because the Wonder-Under fused to the bottom of the fabric has a slick paper backing which does not adhere well to the cutting mat.
Do not remove the paper backing and stick the fabric to the cutting mat because the stickiness from the cutting mat can remove the fusible web from the back of the fabric when you remove the fabric from the mat.
Use a brayer to adhere the fabric down very well and very smooth so that there are NO bubbles or wrinkles in the fabric on the mat.
Return to Silhouette Studio before sending the design to cut, making sure to reverse or mirror, the design so that it is cut backwards.
It's always best to do a test cut before cutting into the project, but I found the setting that worked best for me was the Fabric, Thick (Canvas) material setting.
Then, cut out the design using the Silhouette CAMEO Autoblade.
Remove the excess fabric from the mat.
Now with your freshly cut fabric pieces you're ready for a fabric applique project! To see how to use this cut fabric to create your own DIY fabric wall art, check out this blog post over on the So Fontsy blog.
If you liked the design we used for this project, you'll find it in the Big Inspirational Quotes Bundle at So Fontsy.
Get Silhouette School lessons delivered to your email inbox! Select Once Daily or Weekly.


.png)


No comments
Thanks for leaving a comment! We get several hundred comments a day. While we appreciate every single one of them it's nearly impossible to respond back to all of them, all the time. So... if you could help me by treating these comments like a forum where readers help readers.
In addition, don't forget to look for specific answers by using the Search Box on the blog. If you're still not having any luck, feel free to email me with your question.