Fortunately it's not only easy to vectorize a JPEG or PNG to SVG in Silhouette Studio, but it's easy to do the very last step in Adobe Illustrator.
This tutorial is part of a five part series on using Silhouette Studio to create contour cut lines including bleed lines and white borders that are recognized by other software programs including Illustrator. If you haven't started from the beginning of the series, I would highly suggest you do that to learn:
This tutorial assumes you have a firm understanding of the three critical steps before advancing...and that you have Silhouette Studio Business Edition along with Adobe Illustrator.
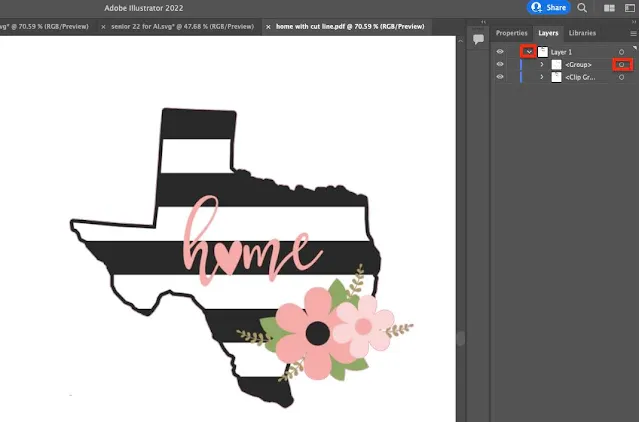
Start by launching Adobe Illustrator and go to File > Open to navigate to the SVG design to open it in the software.
From the Window Menu make sure "Layers" is checked so you have the Layers panel on the right side of the software.
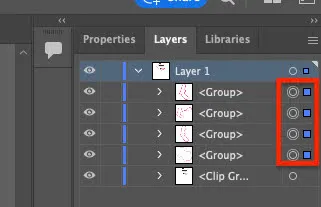
If you happen to have multiple contour cut lines (due to text or your design is not one solid piece) you can select them all by clicking the targets next to all of them in the Layers panel.
Now you want to open the Roland VersaWorks from the Illustrator Swatch Library by going to the Window menu > Swatch Libraries > Roland VersaWorks.
If you haven't downloaded and added the VersaWorks color swatches to Illustrator yet, you're going to want to do that first. You can download them here free.
This same process works whether the cut contour line you created in Silhouette Studio is a bleed line or an offset line used to give your design a white edge.
Now you're ready to export the file with the VersaWorks Cut lines from Illustrator. This can be easily done by going to File > Save As and selecting "PDF" as the format.
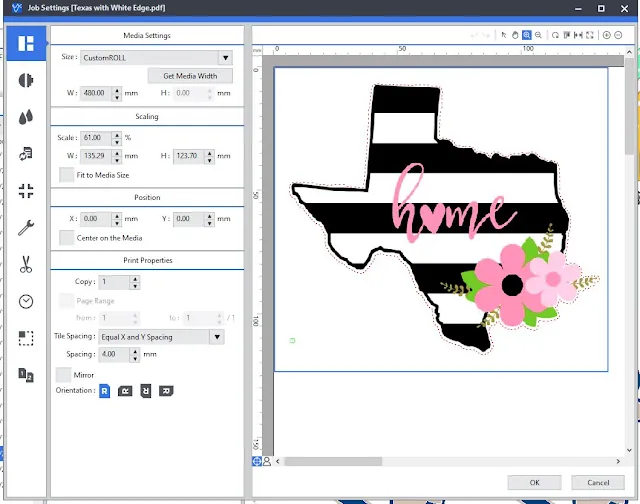
You can now move over into Roland VersaWorks and open the file by going to File > Add to Queue.
When the file loads into the queue, right click and select Settings. You'll get a preview of the file with the contour cut line indicated by "dancing ants" or what looks like an animated red perforated line.
Now when you go to print and cut the image on your Roland BN-20A the contour cut line will be placed exactly where you set it!
This same process works whether your Roland VersaWorks Contour Cut line is right on the edge, offset to create a white border around the entire shape or inside the bleed.
Enjoying my Roland BN-20A tutorials and videos? Sign up to get them straight to your inbox.


.png)


No comments
Thanks for leaving a comment! We get several hundred comments a day. While we appreciate every single one of them it's nearly impossible to respond back to all of them, all the time. So... if you could help me by treating these comments like a forum where readers help readers.
In addition, don't forget to look for specific answers by using the Search Box on the blog. If you're still not having any luck, feel free to email me with your question.