If you are printing from Silhouette Studio and need to fit more in the Silhouette Studio print area there are multiple ways to do so.
The method - or combination of changes - that you make will depend on the design itself and if you are printing and cutting or just printing. Read on for five ways to fit more in the Silhouette printable area.
It's important to first understand what and where the printable area is in Silhouette Studio. To turn on the print border, open the Page Setup Panel. Assuming you are cutting on an 8.5x11" printer and paper, change the "Material" to "Letter."
Check the box for Print Border. A gray border will now display in your work area.
The printable area here is determined by both your printer itself and your settings in both the print manager and also Silhouette Studio.
1. How to Print Borderless Printing from Silhouette Studio
One option is to print borderless. This is only a good idea if you are NOT doing a print and cut and simply want to directly print from Silhouette Studio and reduce the margin area without worrying about registration marks.
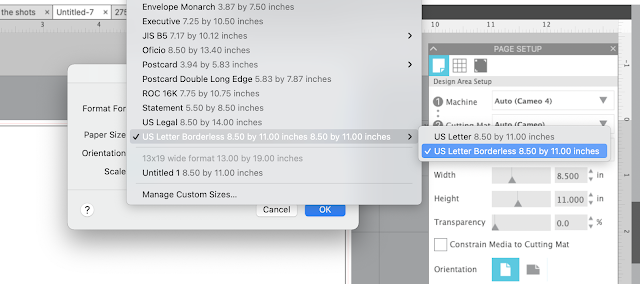
From Silhouette Studio Go to File > Print Page Setup. If your printer can print borderless you will have an option for Letter > 8.5x11 Borderless. Select that.
In Silhouette Studio you'll see the print border will move to the edge of the virtual material.
The remaining options can be used with Print and Cut or just as a print from Silhouette Studio
2) Rotate Your Design
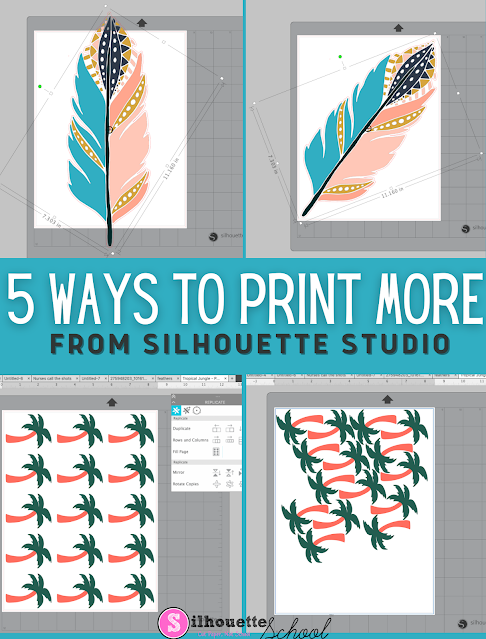
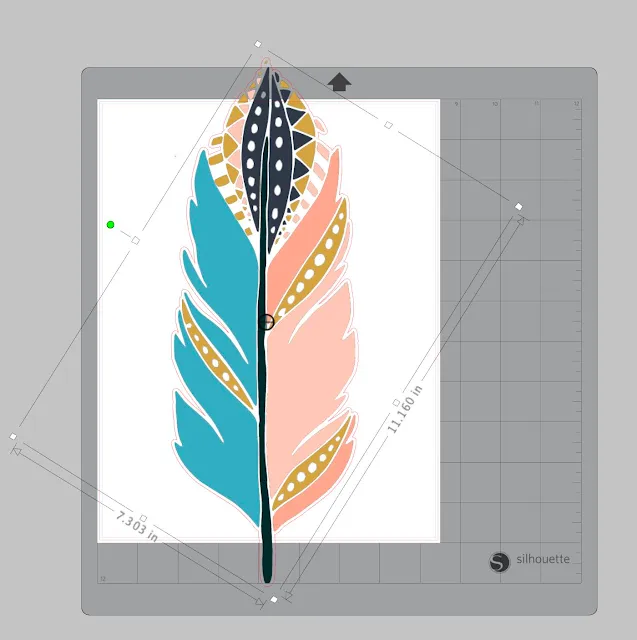
Often times rotating your design especially on an angle to take advantage of the full corner to corner space will allow you to fit larger designs in the printable area.
This design would be far too big to fit on an 8.5x11" sheet of paper. In fact it's larger than the entire 12x12" cutting mat.
But by simply rotating the design it can fit on the 8.5x11" sheet.
3) Nest Your Designs to Fit More
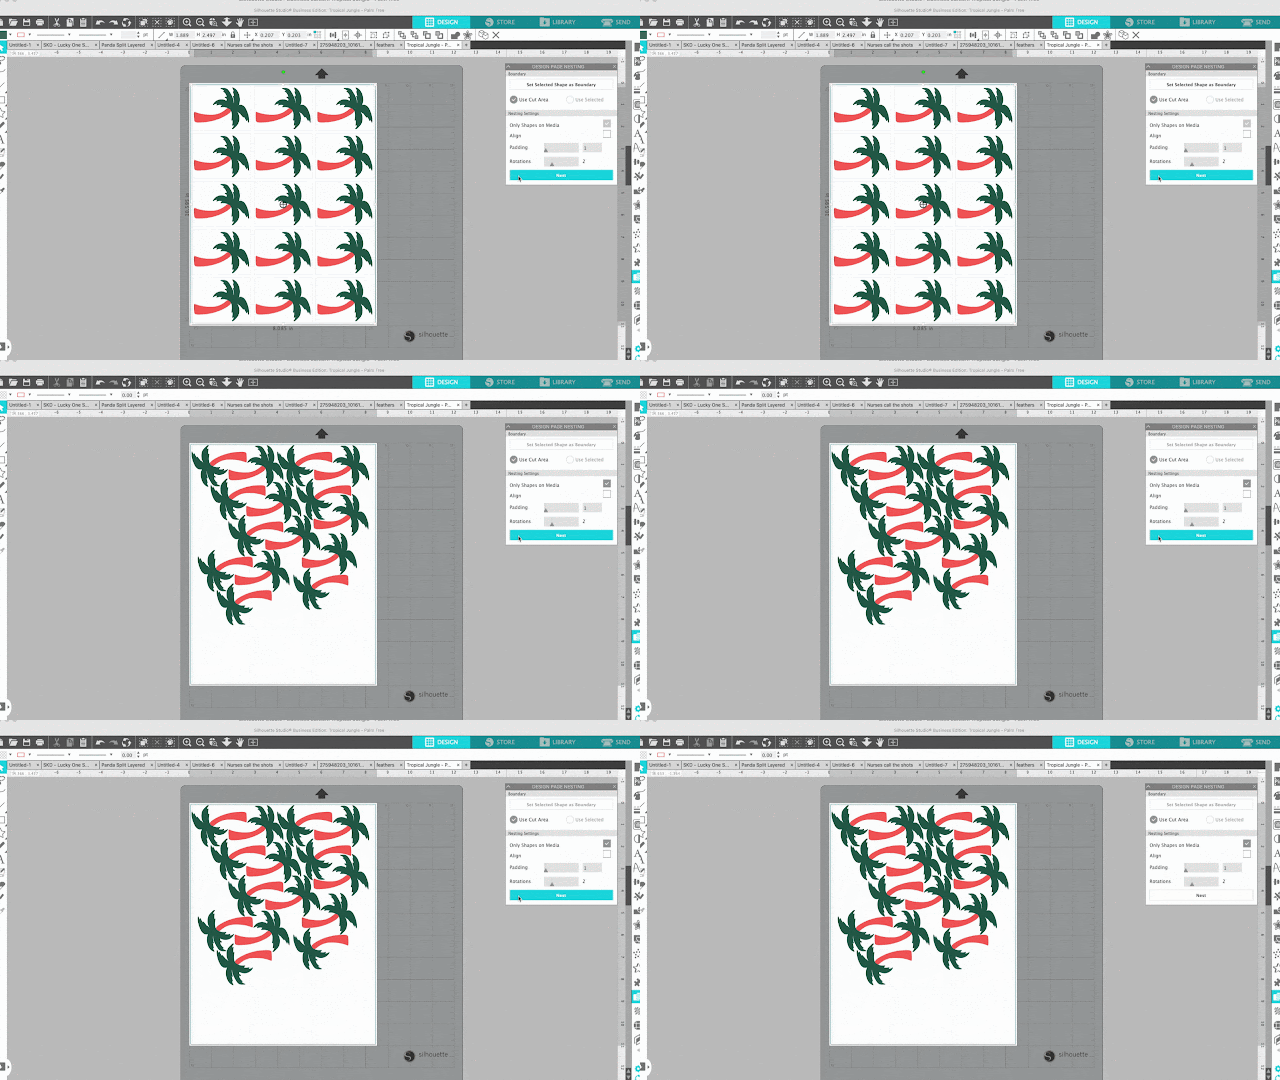
You can use the "Fill Page" option to fill your design area with duplicates of your design, but it won't maximize space.
If you, go one step further and use the Nest tool you can fit many more copies of your design in the same printable area.
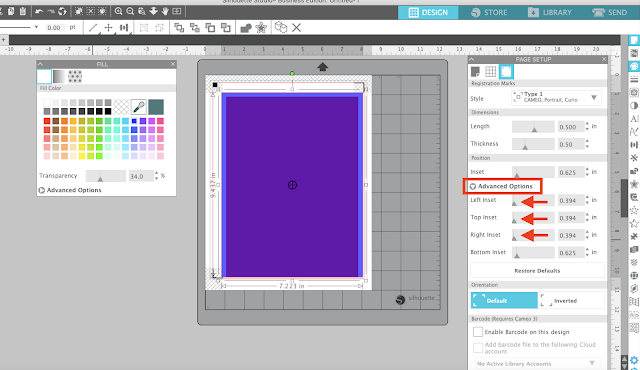
4) Adjust the Position of the Registration Marks
If you are an experiencing print and cut user, you can change the position of the Registration Marks to create a larger print able area.
The difference can be dramatic - but you should be careful using this option to create more space as it's easy to move the registration marks outside of the printable area completely which will cause errors.
5) Print and Cut Without Registration Marks
You can create the largest print and cut area by printing and cutting without registration marks and instead using the Silhouette Pixscan mat. This will allow you to use the full 8.5x11" sheet without losing the area where the registration marks are printed.
Note: This post may contain affiliate links. By clicking on them and purchasing products through my links, I receive a small commission. That's what helps fund Silhouette School so I can keep buying new Silhouette-related products to show you how to get the most out of your machine!
Get Silhouette School lessons delivered to your email inbox! Select Once Daily or Weekly.






.png)


No comments
Thanks for leaving a comment! We get several hundred comments a day. While we appreciate every single one of them it's nearly impossible to respond back to all of them, all the time. So... if you could help me by treating these comments like a forum where readers help readers.
In addition, don't forget to look for specific answers by using the Search Box on the blog. If you're still not having any luck, feel free to email me with your question.