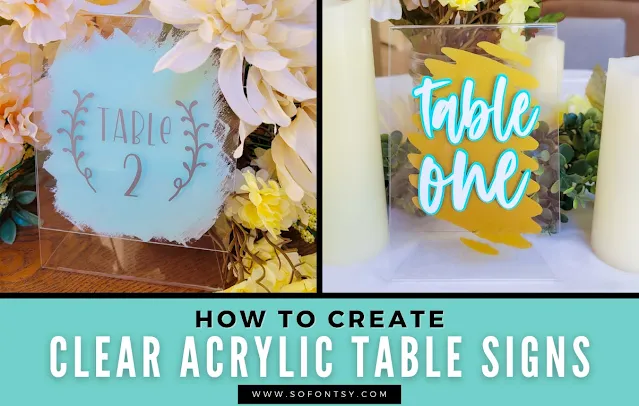
Clear acrylic table number signs are such a popular project, especially for weddings and showers. They look super fancy and expensive, but when you DIY your own acrylic table number signs you save a ton of money!
In this tutorial, we're sharing a really easy trick for how to apply vinyl to acrylic signs for quick and accurate placement.
First, open Silhouette Studio and set up the page for printing in the Page Setup panel.
Next, draw a rectangle to the exact size of your clear acrylic.
Add a 1.0 weight (pt.) to the rectangle. Change line color to black, if not already.
Use the text tool, select the desired font, and type out the text.
The font used for this sign comes from the Farmhouse Font Bundle at So Fontsy.
Place the text inside the rectangle. You can use the alignment tools to help get the text perfectly centered.
If you're adding anything else to the design that will be cut in vinyl (like an offset etc.), then add them now. Make this look like what you want the table sign to look like.
Then, print it out.
It's not necessary to print it out in color - black and white is fine. Trim excess paper away from the printed design (keep the black rectangle!).
Place the printed design behind the clear acrylic. Use the printed black rectangle to help align it behind the sign. Secure the printed design to the back of the clear acrylic with low tack blue painter's tape.
Now you have a physical mockup of how the table sign will look. If you like how it looks, then you're ready to move on and apply the vinyl. If not, go back into Silhouette Studio and make any desired changes to the design. Print out again, repeat as necessary until you are happy with how this physical mockup looks.
Now, take your cut and weeded vinyl and use the printed design behind the acrylic as your guide to place the vinyl decal on the front of the clear acrylic.
This method makes it super easy to quickly and accurately place the vinyl exactly where you want it.
Burnish the vinyl and then repeat with remaining table signs. We put the yellow "paint splash vinyl" on the other side of the acrylic so it is visible through the front of the sign.
If you're making a lot of sign (and you have some helpers with you), print out more than one of the designs and give everyone a copy to use as a guide for placing the vinyl. You'll get through all the table signs in no time!
For complete project instructions on how to create your own DIY clear acrylic table number signs, check out the following blog post.
And grab the fonts used in these table signs from the Farmhouse Font Bundle at So Fontsy.
Get Silhouette School lessons delivered to your email inbox! Select Once Daily or Weekly.


.png)


No comments
Thanks for leaving a comment! We get several hundred comments a day. While we appreciate every single one of them it's nearly impossible to respond back to all of them, all the time. So... if you could help me by treating these comments like a forum where readers help readers.
In addition, don't forget to look for specific answers by using the Search Box on the blog. If you're still not having any luck, feel free to email me with your question.