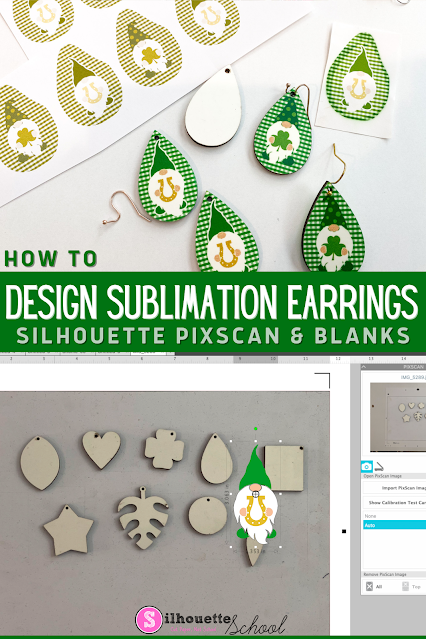
The easiest way to design for sublimation earrings is to create your own templates using the sublimation earring blanks themselves.
The key to this is to use the Silhouette Pixscan mat. This will allow you to layout and print sublimation earring designs to perfectly match your sublimation blanks! Follow this Silhouette Pixscan tutorial for the step by step.
I am using a variety pack of double sided sublimation earring blanks. They're all different sizes and shapes and they include the earring hooks too.
Instead of measuring the earrings and trying to create a template in Silhouette Studio using the design tools, the Silhouette Pixscan mat will do all the work for me.
How to Use Silhouette Pixscan Mat with Blanks
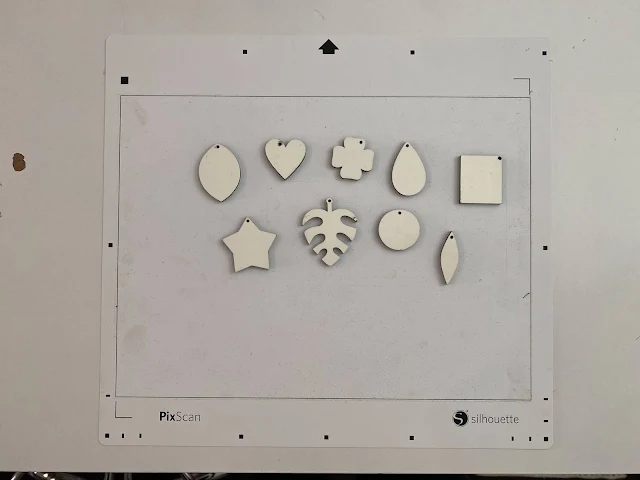
Grab your Silhouette Pixscan cutting mat and place the blank earrings directly on the mat.
Take a picture from directly overhead making sure there's no shadows or glare on the mat at all.
Move the photo to your computer.
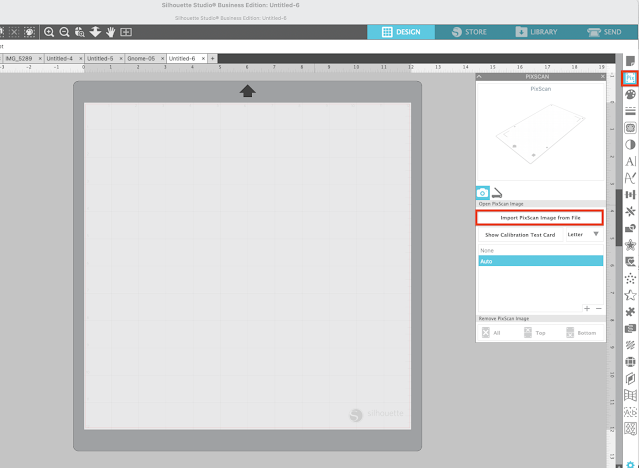
Launch Silhouette Studio. Open the Pixscan tool from the right sidebar.
Select "Import Pixscan Image from File" and then navigate to the photo you just took.
You will likely get an error message that tells you there's no calibration profile. click "Continue Without Calibration." The photo will open in Silhouette Studio.
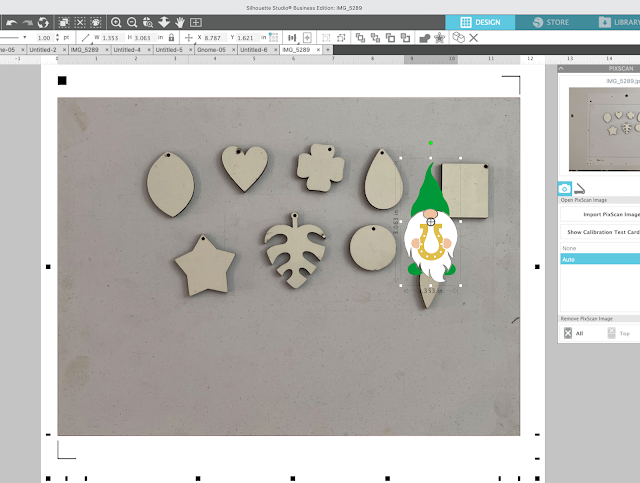
The way the Pixscan mat work is it keeps the exact size dimension of any item on the Pixscan mat. So the earring shapes you see here are exactly the same size and shape as the actual blanks. This allows you to design sublimation earrings directly over the photo so you can get the sizing to match perfectly.
Now open your design in the same work area in Silhouette Studio. You can do this by going to File > Merge or dragging and dropping the file into the work area.
The cute little St. Patrick's Day Gnomes I'm using are from the So Fontsy March SVG and Font Bundle.
Scale the design to fit on the earring blank you are going to sublimate.
OPTIONAL: If you want to sublimate the entire blank with a background color or pattern and not just add the image you can either trace the blank or use the drawing tools to draw roughly around it. It doesn't need to be perfect. (Note the red cut line in the image above.)
Add a small offset to create a bleed area then fill the offset with the pattern or solid color.
Select the full design for the sublimation earring and copy it to your clipboard.
Click the + at the top of the Design window to open a new tab and paste the design into the new work area.
Now you can replicate the sublimation earring designs (for multiple earrings or to make front/back) or add different designs into the base template.
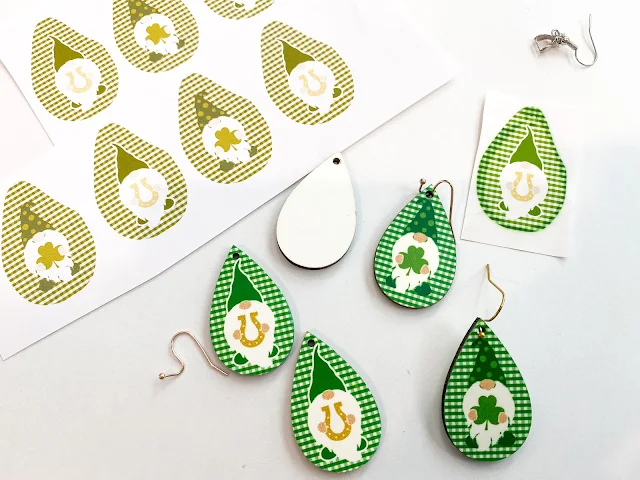
From here you're ready to print the images to your sublimation printer and then sublimate the earrings.
Get Silhouette School lessons delivered to your email inbox! Select Once Daily or Weekly.







.png)


No comments
Thanks for leaving a comment! We get several hundred comments a day. While we appreciate every single one of them it's nearly impossible to respond back to all of them, all the time. So... if you could help me by treating these comments like a forum where readers help readers.
In addition, don't forget to look for specific answers by using the Search Box on the blog. If you're still not having any luck, feel free to email me with your question.