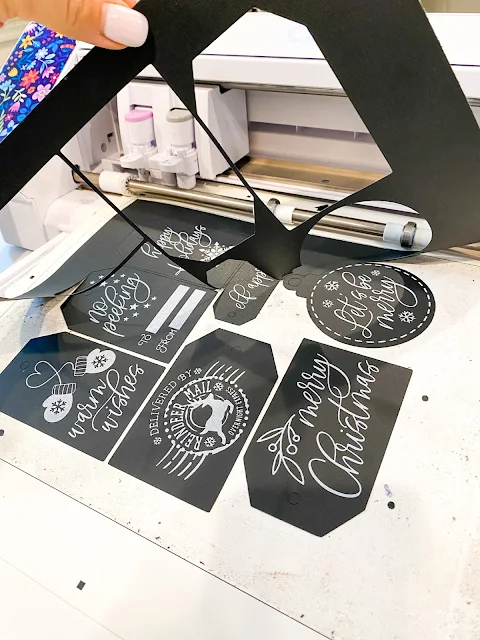
You can do Silhouette Print and Cut without registration marks!
There are three main reasons why you might want or need to print and cut without Silhouette registration marks:
- The paper you are printing on is dark and the black registration marks don't show up
- You want to maximize the printable and cuttable space
- You are getting a Silhouette registration mark error
This Silhouette print and cut tutorial works for all three so read on for how to use the Pixscan mat instead of registration marks! And because I know you'll ask you can use Silhouette Pixscan with all Silhouette cutting machines.
I love the look of these chalkboard-style tags. I used my white toner printer to print the white on black paper...but to cut them with my Silhouette CAMEO, registration marks would be needed.
Silhouette registration marks are black and the color can't be changed which means they would print black on black paper. That will definitely cause a registration mark error as the machine won't be able to find them. However, it doesn't mean we can't print and cut these tags. Instead, the Silhouette Pixscan mat is the perfect alternative.
How to Silhouette Print and Cut Without Registration Marks
Open the designs you are going to print and cut in Silhouette Studio. These Christmas Chalkboard tags are from So Fontsy and include the tag shape and the white designs.
Setup the page to match your printer size - in this case Letter. Keep in mind 8.5 x 11" is the large size paper that can fit on the Pixscan Mat.
Only place the images you want to print on the design page. The parts you want to cut, leave off to the side for now.
Send the printable page to print. With my (extremely versatile) Uninet iColor 560 White Toner Printer I have the ability to not only print no cut, no weed heat transfers, but white on black paper which gives stunning results!
Once your page is printed, place it on the Silhouette Pixscan cutting mat. Take a top-down picture of the entire Pixscan mat trying to avoid any shadowing over the marks on the edge of the mat.
Send the photo to your computer via Airdrop or email.
How to Open a Pixscan Image in Silhouette Studio
Return to Silhouette Studio and from the Pixscan tool on the right side import the photo of the Pixscan mat by clicking "Import Pixscan Image from File."
The Pixscan image will open in a new Silhouette Studio design area. The Pixscan mat brings images into Silhouette Studio keeping them at their true size ratio and dimension.
How to Add Cut Lines to a Pixscan Image in Silhouette Studio
Go back to the original design area and copy the cut lines (tag shape in this example). Paste the cut lines into the work area with the Pixscan image. You can use the keyboard shortcuts to do this.
If the cut lines are filled with a solid color change the fill to "transparent" so you can see better.
If the cut lines need to be rotated, do that as well, either using the free hand rotation tool (highlighted in blue) or using the Rotate options in the Transform panel (in red).
Adjust the position of the cut lines over the printed area if you need to.
How to Cut with the Silhouette Pixscan Mat
Move to the Send panel and select the material.
Once the Pixscan mat is loaded into the CAMEO, you can go ahead and click Send to begin the cutting.
The machine will look for the registration marks and then begin cutting.
Congrats you've successfully done a Silhouette print and cut without registration marks!
Get Silhouette School lessons delivered to your email inbox! Select Once Daily or Weekly.


.png)


Also, I have tried to use the pix scan mat, however on a normal sheet of paper it will leave out details of certain areas (especially with sublimation as the colors are MUCH lighter and often less detailed) and it will also detect NEGATIVE SPACE on the camera, wanting to draw a trace pattern around parts of a "transparent image"
ReplyDeleteA little too complicated for me. I would rather just add the registration marks and waste some of the paper if I need to.
ReplyDelete