If you know the right tools to use, you can edit a PNG file in Silhouette Studio...but there a few things to know!
The easiest file type to open and edit in Silhouette Studio is an SVG, but if you don't have that option you can edit PNG files in Silhouette software as well. This tutorial will explain the best way to go about editing PNGs in Silhouette Studio.
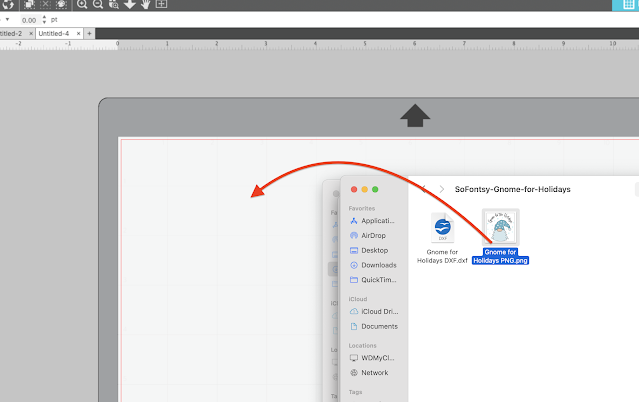
Start in the Design area of Silhouette Studio and either drag and drop the PNG file into the work area or go to File > Merge and select the file from your computer. The Gnome PNG file I'm using can be found here.
How to Change the Size of a PNG File in Silhouette Studio
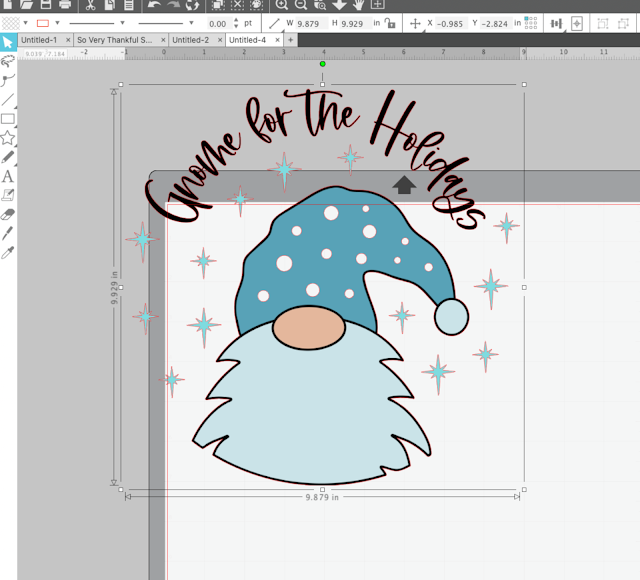
If the PNG file comes into Silhouette Studio larger or smaller than you might want to change the size of the design.
You can do this by selecting the design and then dragging one of the corner nodules in or out to adjust the scale. Watch the dimensions along the top/bottom and sides to see the size of your full design.
How to Change the Line Color in Silhouette Studio
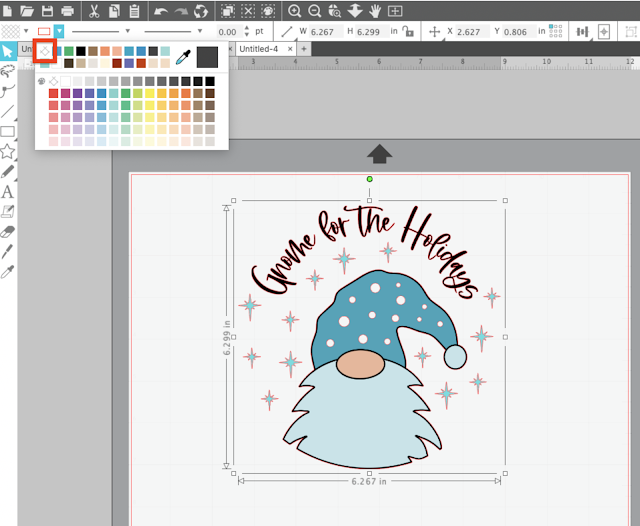
It's likely the PNG file was imported with a red cut line.
If the line color is read, and you want to change the it, select the design and go to the Line Color tool on the Quick Access Toolbar.
Select the transparent option to remove the red line around the design.
How to Ungroup a PNG File in Silhouette Studio
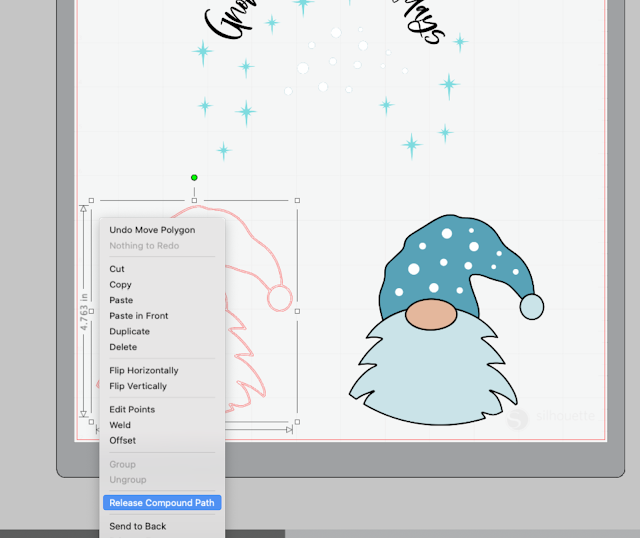
It's likely you don't have the option to Ungroup a PNG file in Silhouette Studio. Check by right clicking the design. If Ungroup is not an option, instead you'll need to release the compound path.
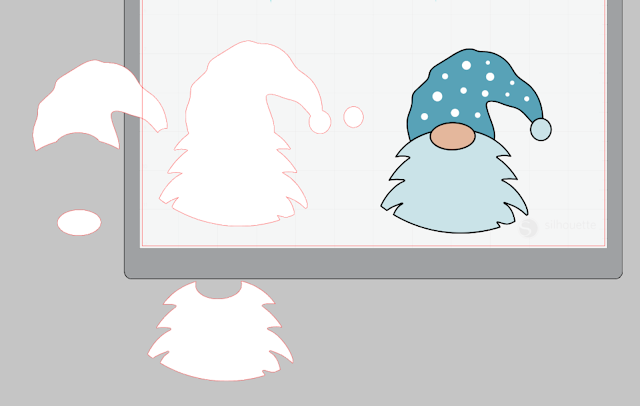
Releasing the compound path will separate the design as much as possible. Once the pieces are separated you can then select them individually and edit as you wish by re-sizing or changing the color.
But let's say you have a design like this where you want to further separate the design so you can get access to the hat or beard so you can change the color. When you can't ungroup or release the compound path you have to resort to tracing.
How to Trace a PNG File in Silhouette Studio
If you can't easily trace the PNG file without tracing other elements of the design as well, grab the part you want to trace and move it away from the rest of the design.
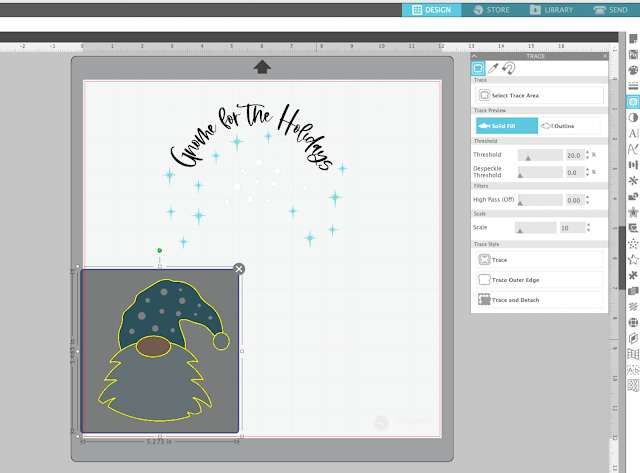
Open the trace tool on the right sidebar.
Click "Select Trace Area" and using your mouse draw a box completely over the PNG file you need to trace. If the design gets a yellow outline on it like this...click "Trace".
Move the original design off to the side.
Working with the trace cut line now, select it > right click > Release Compound Path.
Now you can access the individual pieces of the design. You need to click right on the line to select an individual piece so it's easier to actually select the entire thing and fill with white THEN start working with the design. This way you can click anywhere on a piece to select it.
Separate the pieces and then fill with the new colors that you wish.
I would also suggest you change the line colors back to transparent.
Once the pieces are all changed, you can reassemble and place back into the main part of the design.
Note: This post may contain affiliate links. By clicking on them and purchasing products through my links, I receive a small commission. That's what helps fund Silhouette School so I can keep buying new Silhouette-related products to show you how to get the most out of your machine!
Get Silhouette School lessons delivered to your email inbox! Select Once Daily or Weekly.








.png)


wow, been a SIL user for years and couldn't figure out how to change that red line with png's... thanks so much.
ReplyDeleteThis was SO helpful! Thank you!
ReplyDelete