Turn any shape into a custom-shaped greeting card with Silhouette Studio!
Open Silhouette Studio and the Page Setup panel to select your page settings. This tutorial will show you how to make a card from a letter sized piece of cardstock (8.5 by 11 inches), however, this technique can be applied to other sizes of cardstock as well.
Open the desired design into this workspace by clicking File >> Merge.
You'll find this rainbow design in the Big Love SVG and Font Bundle at So Fontsy.
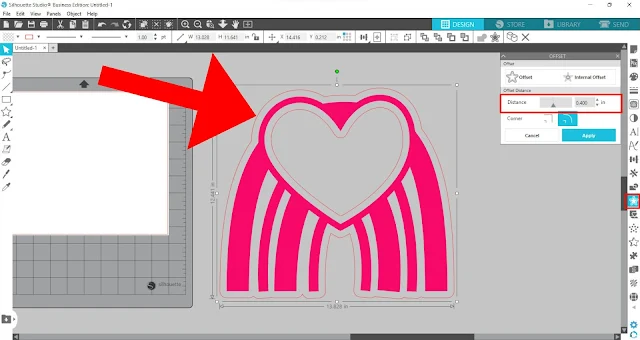
With the design in the work area, open Offset panel. Make an offset of your design - make the offset big enough so that the outside edge of the design is smooth with as little "gaps" in the edges as possible. This offset will be the shape of your card and smooth shapes make for better card bases.
If the offset contains any "internal" shapes, delete them by first releasing the compound path of the offset. Right click on the offset >> Release Compound Path.
Select only the internal shapes of the offset and delete it.
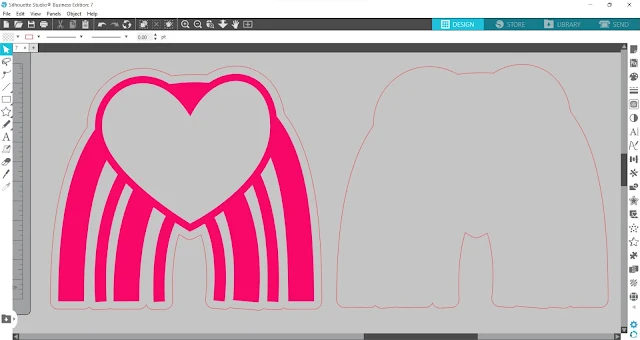
Next, make a duplicate of the offset and set it off to the side for now.
Select just the original offset, and from the Replicate panel and click mirror Left or mirror Above.
Whatever direction you choose will determine the location of the "fold" on the card. If you want the card to open like a book, then Mirror Left. Use the Mirror Above option to make the fold at the top of the card and the opening will be at the bottom.
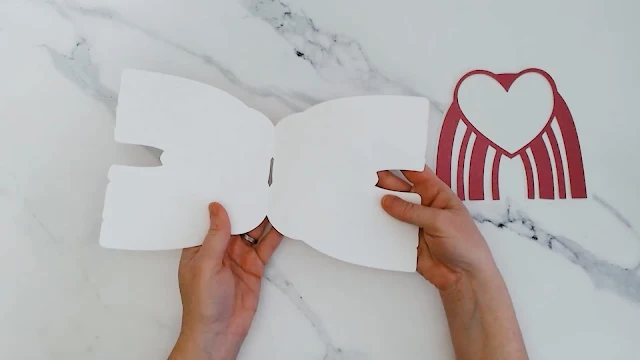
Using the arrow keys on your keyboard, move the duplicate so that it overlaps the original offset by a generous amount. This overlap will be "fold" of the card.
Next, select both offsets (not the original design) and click Weld from the top menu.
This connects the two designs to make your card base.
Now, select everything: the welded card base, the original design, and the offset we made earlier and resize so that the card base fits on your page size. It's okay if the other elements you selected (the original design and second offset) go off the edge of the cardstock.
You're now ready to cut the base of the card and the individual offset.
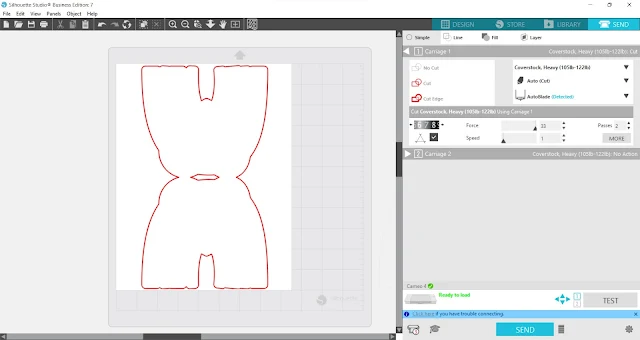
Move to the Send panel. Select the appropriate material settings. You want a nice and sturdy card base so use a heavyweight cardstock.
Set the original design off the mat and send just the card base shape and the second offset to your Silhouette for cutting.
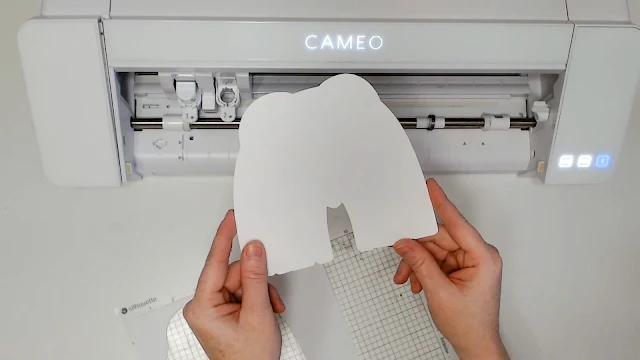
Then, cut with your machine.
To cut the front of the card, using any cardstock you like.
Now you're ready to assemble the card.
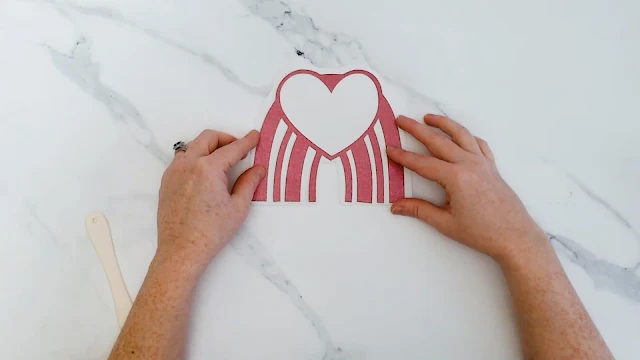
Use a bone folder or other tool to reinforce the fold for nice crisp crease.
Because we had to overlap the shapes to make the fold in the card, the front of the card can now actually be smaller than the original design and/or offset. But that's why we cut that separate offset.
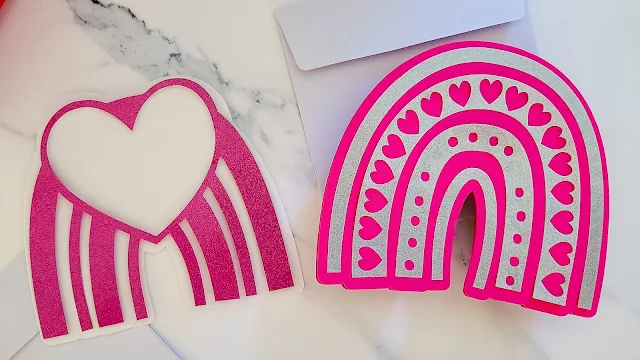
Adhere the offset to the front of the card with adhesive and then place the contrasting piece on top.
And now you've got yourself a rainbow-shaped card! Now use this technique to turn just about any shape into a greeting card!
You'll can grab this rainbow SVG design from the Big Love SVG and Font Bundle at So Fontsy.
Get Silhouette School lessons delivered to your email inbox! Select Once Daily or Weekly.











.png)


No comments
Thanks for leaving a comment! We get several hundred comments a day. While we appreciate every single one of them it's nearly impossible to respond back to all of them, all the time. So... if you could help me by treating these comments like a forum where readers help readers.
In addition, don't forget to look for specific answers by using the Search Box on the blog. If you're still not having any luck, feel free to email me with your question.