Now that I've figured out the best way to etch metal with Silhouette CAMEO - thanks to the Zoom Precision engraving and etching tool - I'm taking it one step further.
I have to admit engraving on metal bracelets with Silhouette CAMEO seemed a bit intimidating. I mean how do you hit something THAT small - we're talking 1/4" wide - that precisely?
Read on because I'm sharing the secret to not only a deep engraving on metal bracelets, but how to hit such a narrow target on the first try!
If you're not familiar with the 3-in-1 Zoom Precision tool yet, it's an adapter-free tool that fits directly into the Silhouette CAMEO 4. There is also a version for Silhouette CAMEO 3/2/1! Both Zoom tools include three different sizes. tips: fine, standard, and bold.
I'm going to suggest you use the fine tip for engraving these metal bracelets. The bracelet kit, which includes three different width aluminum and copper bracelets along with the bracelet shaping tool, is also made by Zoom Precision.
As I mentioned the most challenging part is engraving on these very narrow bracelets - while also making sure your design is centered in both direction. In most cases I would suggest using the Silhouette Pixscan mat as it's the most obvious solution. However there's an added challenge here because the bracelets are rather heavy and you need to work on an extremely sticky cutting mat - which the Silhouette Pixscan just isn't.
How to Make a Jig with Silhouette CAMEO for Engraving Bracelets
The alternative is to make yourself a jig or a template. I have done the hardest part for you already by creating templates for the three bracelet sizes. Keep in mind these templates are specific to the Zoom Precision bracelet kit metal bracelets.
You can download the free bracelet templates here and open them directly into Silhouette studio. DO NOT RESIZE THE TEMPLATES IN ANY WAY. I repeat, do not resize the templates!
Decide which width bracelet you are going to engrave on and remove the other templates from your Silhouette Studio work area. From the Page Setup panel change the material size to "Letter."
Place the template cut file somewhere towards the middle of that cuttable area (which should be displaying as 8.5" x 11"). From here on out DO NOT MOVE THE BRACELET SHAPE AT ALL.
Grab a very sticky cutting mat. I use the Nicapa SuperMats when engraving metal bracelets and metal sheets.
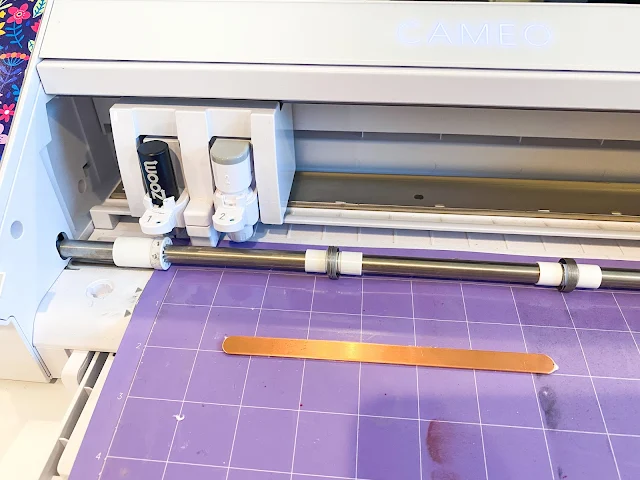
Place a piece of copy paper on the cutting mat and load the cutting mat into the Silhouette CAMEO - making sure the edge of the mat is lined up perfectly with the gray mat line on the CAMEO.
Load a cutting blade (autoblade or 1mm blade) into the tool 1 carriage.
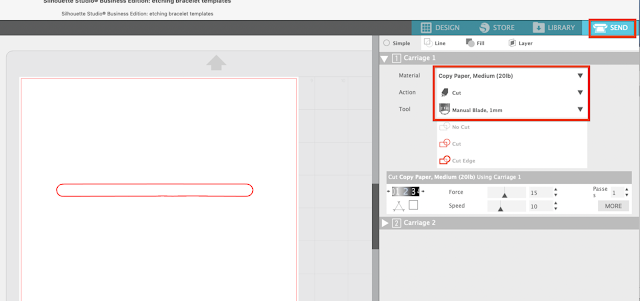
In the software, move to the Send panel and change the material type to Copy Paper. Send it to cut.
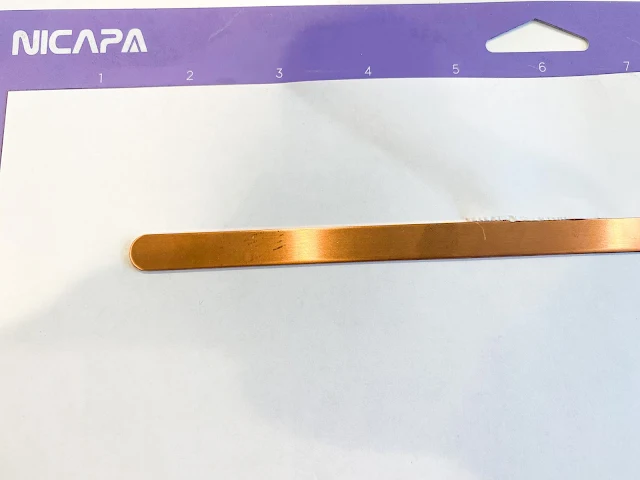
When the cutting is complete you can unload the cutting mat. ONLY remove the piece that cut that's in the shape of the bracelet. Leave the rest of the piece of paper on the cutting mat for now. You've made a template!
How to Engrave on Thin Metal Bracelets with Silhouette CAMEO
Now take your flat metal bracelet - with the protective film removed - and place it directly on the template so it sticks to the cutting mat. Make sure it's stuck down really well.
Hold it in place while you remove the rest of the paper from around it.
Load the cutting mat back into the Silhouette CAMEO - again making sure the left edge is lined up with the gray line.
Swap out the cutting blade for the Zoom Engraving tool.
How to Center Engraving Perfectly on Metal Bracelets
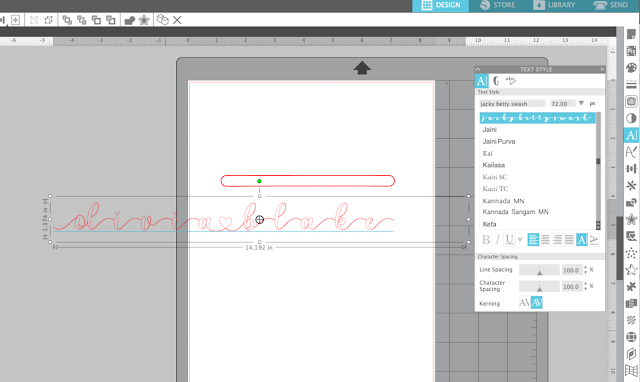
Return to Silhouette Studio. This time we need to set up the design or text to be engraved. I typed out my kids' names using a font with a heart connector.
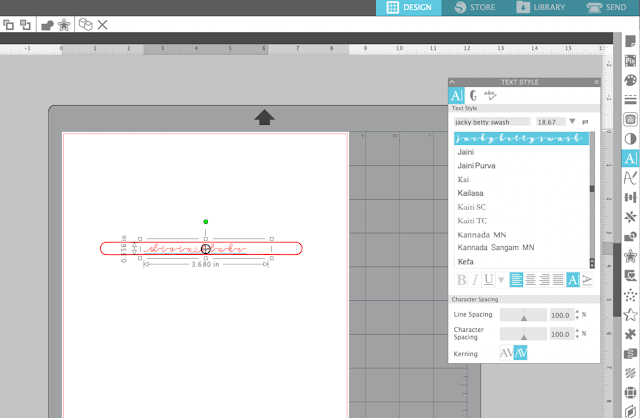
Select the text and size it down to scale so it fits right into the bracelet template in the same work area. Remember NOT to move or scale the bracelet template at all. Ever.
TIP: If you need to zoom in to enlarge use the zoom tool along the top tool bar rather than increasing the size of the design template.
The final step is to fill the design with a sketch fill so you get a solid etch or engraving. Select the Sketch tool on the right sidebar and make the following changes to fill the shape or text.
Sketch Edge: Line
Sketch Fill: Hashed
Fill Spacing: 0.004
Move to the Send Panel again.
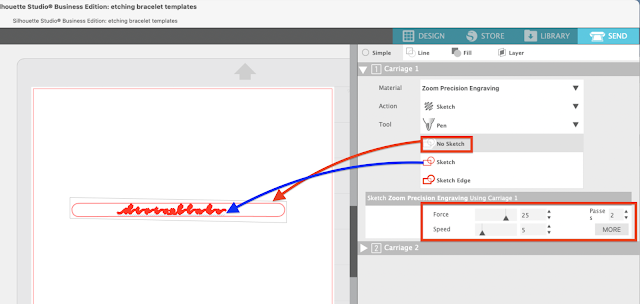
This time change the Tool to "Pen". That will change the Action to "Sketch."
Select the bracelet shape and set it to "No Sketch". Make sure the text or design you want to etch is set to "Sketch"
Finally adjust the cut settings for using the Zoom tool. If you don't have a custom material setting already, the best Silhouette cut settings for engraving with the Zoom tool are:
Force: 25
Speed: 5
Passes: 2
Take a deep breath - and Send the design to engrave.
When the engraving is finished you should be able to see the etching on the metal bracelet and if you didn't move anything in Silhouette Studio - and the bracelet stayed in place - the design should be exactly as you placed it in Silhouette Studio.
How to Shape and Darken Engraving on Metal Bracelets
When the engraving is finished you may want to darken it. You can do this by running a permanent marker over the engraved area then wiping away the excess with water or alcohol.
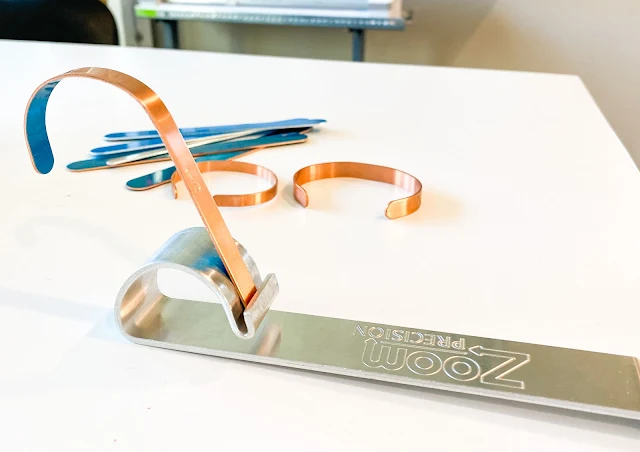
The final step is to bend the metal bracelet into shape. The bracelet bending and shaping tool is included with the Zoom Precision Bracelet Making Kit.
Take one end of the metal bracelet and place it in hook part of the rounded edge....
and bend the bracelet around.
Flip the bracelet around and repeat with the other side.
The very middle of the bracelet should remain straight/flat.
I love how these DIY engraved bracelets come out when etched with the Zoom Precision tool and Silhouette CAMEO!
Get Silhouette School lessons delivered to your email inbox! Select Once Daily or Weekly.










.png)


Will this work with the Portrait 3?
ReplyDeleteSure does! You'll want the set for the Cameo 4 linked above.
DeleteWhat if you only have the basic edition. Does everything stay the same?
ReplyDeleteHi there! Yes, it will stay the same! There are studio files in the free download on So Fontsy so you can upload those.
DeleteThis comment has been removed by a blog administrator.
ReplyDeleteI am following all of the instructions and it is only etching half of my font then says job complete. What do i need to do? Using a Cameo 3
ReplyDelete