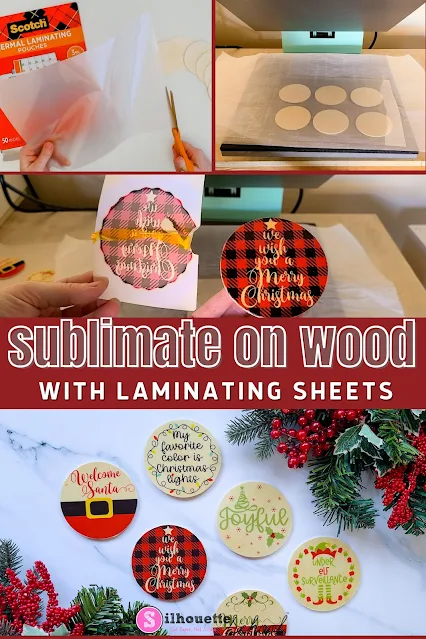
Take your sublimation to the next level by creating sublimated wood projects!
This process is super cool and uses thermal laminating pouches - like the kind you use in a laminator. In this tutorial, we'll show you exactly how to laminate on wood.
For this sublimation wood project, I'm using some unfinished thin wood slices from the craft store which are perfect for this project because they are small and thin enough to fit into the heat press.
You'll need thermal laminating pouches like the kind you would use to laminate a piece of paper in a laminator.
Cut the laminating pouch at the seam to separate the top and the bottom. This creates two sheets but set one sheet aside for another project because we only need one for this project.
Set heat press at 385 F for 60 seconds and place a piece of parchment paper on the bottom platen of your press.
Place the wood slices on the warmed-up heat press. Place thermal laminating sheet over wood slices.
Make sure the laminating sheet extends beyond the edges of the wood slices and with the glossy side facing up.
Cover with another piece of parchment and press for 60 seconds.
Remove the wood slices - the laminate will be stuck to them.
Trim away the excess laminate around the edges of the wood slices.
You can use a piece of sandpaper or a sanding block to smooth out the edges of the wood slices if you need to.
Next, print out your sublimation design on your sublimation printer. I use a Sawgrass SG400 which is the older model of the Sawgrass SG500 Sublimation printer.
I'm using a set of round wood sign designs that are from the Big Fall and Winter Porch SVG Bundle from So Fontsy.
Place the sublimation design face down over the laminated wood slices. Hold the paper in place with a strip of heat resistant tape.
Take the wood slices back to the heat press - still at 385 F - and place them on the heat press with the sublimation paper on top.
Cover with parchment and press for 60 seconds then carefully remove the sublimation paper.
Pretty cool, huh?!
You can press a whole bunch at once which makes this a pretty fast process!
You can find all the designs used in this project in the Big Fall and Winter Porch SVG Bundle from So Fontsy. Have fun creating your own sublimated wood projects!
Get Silhouette School lessons delivered to your email inbox! Select Once Daily or Weekly.


.png)


If I want a pure white background, should I paint the wood first?
ReplyDeleteFor a white background, I would instead use oracle 651 white vinyl instead of the laminating sheet.
DeleteDid you sublimated on the laminated side?
ReplyDeleteYes, the laminated side!
DeleteHave you tried this on anything else besides wood with the laminate sheets? I'm about to "try" it and see if it will work on some coasters that I got that were mislabeled as sublimateable. Hopefully it does, or I have 50 square and round coasters I don't know what to do with unless I figure out how to make them sublimateable!
ReplyDeleteI am interested. Did you try and was it successful? were the coasters ceramic or what?
DeleteI love it where did you get the wood circles and what size are they?
ReplyDeleteCan you use regular laminating film? I have many 'leftover' ends from a huge laminator- just wondering if this would be a recycling use for them?!?!
ReplyDeleteI wouldn't see why not! It would be worth a test!
DeleteWhat kind of paint would you use if some of your design has white in it?
ReplyDeleteHey there, if the design NEEDS the white, I probably wouldn't use this method. Maybe something more like this: https://www.silhouetteschoolblog.com/2021/08/how-to-make-custom-reusable-screen.html
DeleteDidn’t work for me. Not sure what I did wrong. Did use Subliink in Sawgrass printer
ReplyDelete