Putting vinyl on a curved surface can be a struggle - but not if you have a few tricks up your sleeve.
Curved surfaces can cause the design to be - or appear to be - applied crooked or wrinkled. The cause is usually due to the transfer tape having no give and therefore resulting in wrinkles as it wraps around the surface. Read on for how to center vinyl on curved surfaces like tumblers, mugs, and utensil canisters.
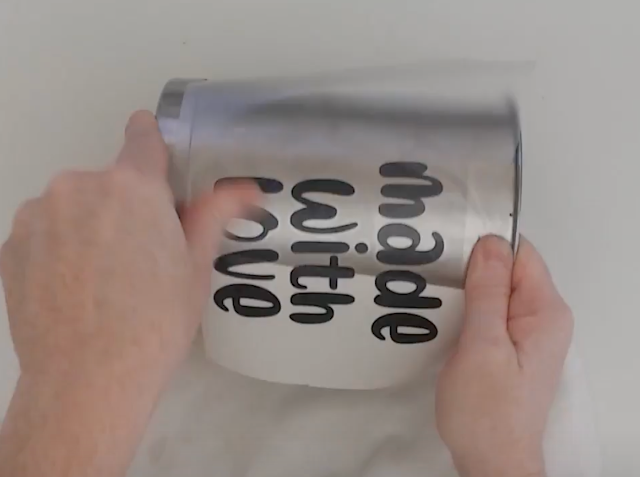
Vinyl needs to be applied with transfer tape and that transfer tape needs to be larger than the vinyl design. The issue is when you have a large design to fill the surface, like we have here with this Made with Love SVG from the Best Fonts Bundle on So Fontsy, the large area of tape is working against you.
Ideally you need to lay the middle of the design down first so it can be centered and straight. As you do this though you risk either side sticking to your surface. That's where this take on the hinge method trick comes in.
Cut and weed the design like your normally would.
Cover it with a piece of transfer tape.
Remove the vinyl backing. Don't throw it out - you need to keep it. Cut the piece of backing in half right down the middle.
Now place it back on the transfer tape-covered vinyl leaving just a small gap in the center.
This gap is what is going to be used to hold your vinyl decal on the curved surface!
Line up your design so it's straight and centered. Press down just that small area of transfer tape in the middle that's exposed so it sticks to the curved surface. You'll have two flaps on either side that still have the vinyl backing on them, preventing them from sticking to your surface.
Fold one side back and peel off the vinyl backing. Carefully fold it back down onto the surface making sure there are no wrinkles and that it's taunt. You can even use that piece again to quarter off the area you are applying.
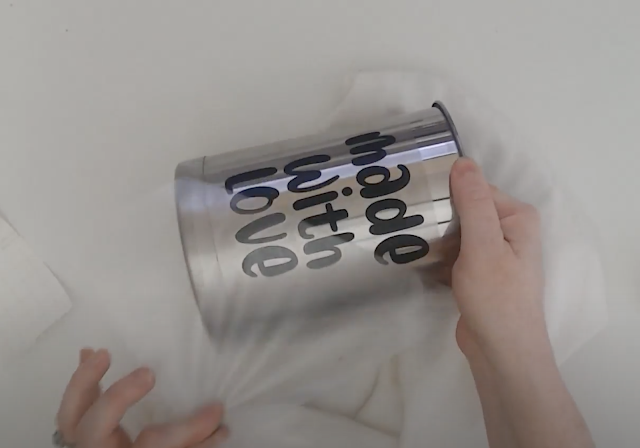
Burnish the entire vinyl decal through the transfer tape and then from one corner peel away the transfer tape.
I love this vinyl hack for putting vinyl on curved surfaces because it's so easy!
When you're putting vinyl on mugs and tumblers the key to making sure it sticks long term is to make sure you pick a thicker font so that each letter has substantial adhesive area and doesn't peel with washing and handling.
The My Sweet Farmhouse font used here is a good example. There are quite a few font in the Best Fonts Bundle that would be great for making vinyl decals for mugs, tumblers, and small round items. Of the 31 total fonts in this bundle just a small sampling are displayed here..and I have marked those that would be ideal for mugs and tumblers that get handled a lot.
Get Silhouette School lessons delivered to your email inbox! Select Once Daily or Weekly.


.png)


No comments
Thanks for leaving a comment! We get several hundred comments a day. While we appreciate every single one of them it's nearly impossible to respond back to all of them, all the time. So... if you could help me by treating these comments like a forum where readers help readers.
In addition, don't forget to look for specific answers by using the Search Box on the blog. If you're still not having any luck, feel free to email me with your question.