I have finally figured out how to make reusable stencils with Silhouette Studio thanks to Ikonart Stencil System.
And I have a hack for you that's going to let you make multiple stencils out of each reusable stencil sheet...even if they're made at different times!
You can leave your Silhouette machine on the shelf for this, we're going to use Silhouette Studio as the free software to make Ikonart Stencils!
To make your own custom silkscreen stencils for screen printing or painted signs the Ikonart Stencil Making Kit is a game changer. If you're not familiar with the full process I did a full beginner Ikonart tutorial here and I have several Ikonart Youtube videos.
But now I'm going to take this one step further so you can get more out of your reusable stencil sheets and printer film when pairing the Silhouette software with Ikonart!
The Ikonart Stencil Making Kit comes with 5 sheets of inkjet printer film so you definitely want to get the most out of it that you can. This trick is going to help you do that!
How to Set Up Stencil Designs in Silhouette Studio for Ikonart
Start by opening a work area in Silhouette Studio.
In the Page Set Up tool panel, you want to set the Media size to either Letter or Legal - to match the Ikonart printer film size you are using. It comes in 8.5 x 11" or 11 x 14" so just make sure you are using the size that works with your printer. In this tutorial we'll be using an 8.5" x 11" letter size reusable stencil sheet.
In the same panel, be sure the orientation is set to Portrait and check the box for "Show Print Border."
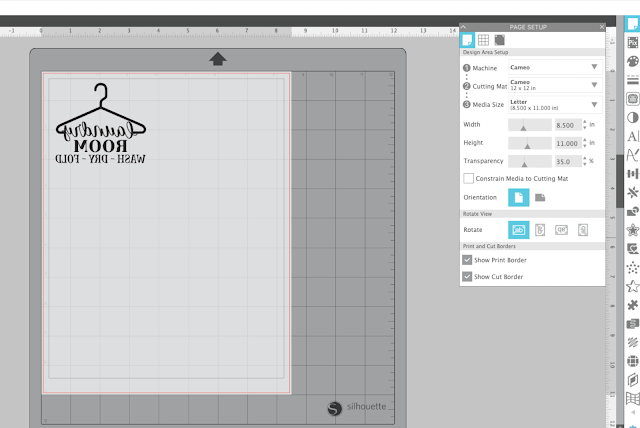
Open your stencil design and size it by adjusting one of the corners in/out. In this example I want to make a 3 x 3" stencil so I scaled down the design size.
Right click and select Flip Horizontally to mirror the stencil design. Make all other adjustments to your stencil including making sure it's filled with solid black.
Now here's the key to reusing the stencil sheet again later when you decide to make another stencil: place the stencil design towards the top left of the printable area. Place it as close to the print border as you can.
How to Make Multiple Stencils on a Single Reusable Stencil Sheet..Now or Later
How to Put Multiple Stencils on the Same Stencil Sheet
You can of course add more stencil designs to this same sheet by going to File > Merge and navigating to another design to import it (or dragging and dropping into the same working area.
Size, color, position, and mirror it just like you did the original.
How to Re-Print on a Reusable Stencil Sheet
But what if you don't have another stencil to make right now? Are you really going to waste 75% of the printer film by just printing one small 3x3" stencil? No...you're not. You're going to print the sheet and after you expose it, you're going to save the partially printed printer film sheet for later.
TIP: Before you expose the stencil, cut down a piece of the blue or purple stencil film so it's about an inch larger on each side than the stencil design. Once the stencil film is exposed to light it can't be reused so just trim off a piece and place the rest back in the foil bag for another stencil.
In Silhouette Studio, you're also going to save this design area exactly as it is here (single design and all). Go to File > Save As > Save to Library. Name it something like Ikonart Stencil Sheet_Working so you can easily find it.
The next time you want to make a stencil open Silhouette Studio. Go to your library and navigate to this design to open it.
Now open the design you want to make into a stencil by either dragging or dropping or going to File > Merge.
Take this new design and place it somewhere else on the same work area. The reason you want the original there is so you know where to position the new design so it doesn't print in the same area or over the same area as the original.
Size, fill with black, and mirror the second design.
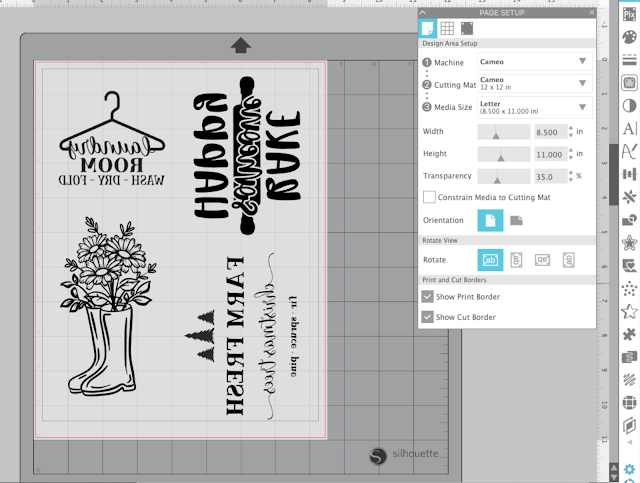
TIP: You can fill the whole page with new designs (like I did) or just add one or two ... and again save this document and sheet to add to later.
Once you've done those steps it's safe to select the first design and delete it.
When you go to print your sheet page setup should look something like this...
Since you saved the partially used sheet of printer film, place it back in your printer tray and print again.
The new stencil design(s) will print in the blank area.
You can do this over and over until you have printed the entire sheet with various stencil designs.
I also made a quick video on this process on how to add to your reusable stencil sheets that you can watch here:
If you want to grab one, I have a 15% off Ikonart coupon you can use code! Just enter SILSCHOOL at checkout and save 15% on anything in the Ikonart site!
Get Silhouette School lessons delivered to your email inbox! Select Once Daily or Weekly.


.png)


I am trying to think how often I would make tiny stencils vs. large full size stencils. I feel like I would try to make door hanger type signs that require a full sheet.
ReplyDelete