Making stencils for wood signs with Silhouette CAMEO is pretty straightforward and easy. There's only one problem with all of the cuttable materials (vinyl, stencil material, laminate sheets, paper, freezer paper): they all create single use stencils that require either a transfer tape/paper or hand placing.
But I recently discovered how to make custom DIY reusable stencils - with no cutting, no weeding, and no transfer tape - with my Silhouette designs and SVGs!
The Ikonart Custom Stencil Making Kit is literally a game changer for sign makers and screen printers. I am not only going to show you how to use this awesome kit AND I have a 15% off Ikonart coupon code (SILSCHOOL) for you if you decide to "need" to add this to your craft tool belt!
The Ikonart Stencil System allows you to print a design on your inkjet or laser printer and through a quick emulsion process a mesh or silkscreen stencil is created which means the "middle" of letters don't fall out!
There's no need for transfer material or hand placing allowing you to push the paint through the mesh stencil, then lift the stencil up, wash it off, and reuse it over and over again.
With the exception of paint, the Ikonart Stencil Kit includes everything you need to get started to make stencils for hard goods (there's a separate add-on kit you can get to make screenprint stencils for textiles) like signs.
How to Make Custom Reusable Stencils with Silhouette Studio
Open Silhouette Studio and open your design. You can import a design file or SVG into Silhouette Studio by dragging and dropping or you can open a design from your Silhouette library. I am using a design from So Fontsy that normally would not be terribly stencil-friendly.
From the Page Setup Panel, adjust the Material size to Letter to match the 8.5 x 11" size of the printer film. Make sure you have the Show Print Border box checked.
It's extremely important to make sure your full design is solid black. If you have designs that are not black, you want to change their line and fill colors to black from the fill color tool on the quick access tool bar or from the Fill panel.
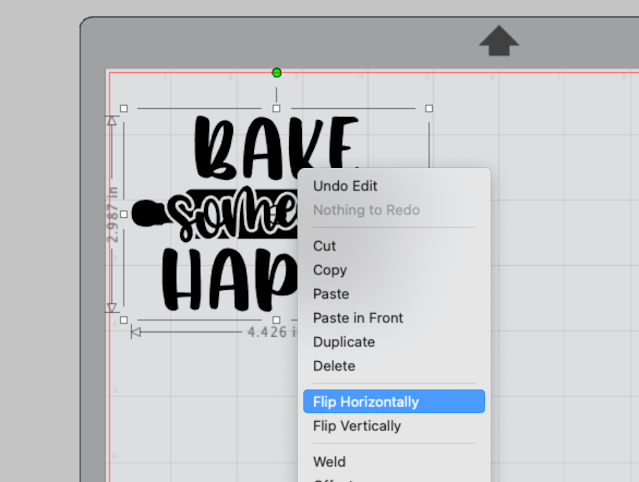
I would also recommend mirroring all of your designs just like you would for HTV (but it's required if you have designs with text). Select the design > Right Click > Flip Horizontally.
Now it's time to print.
How to Print onto Ikonart Stencil Film from Silhouette Studio
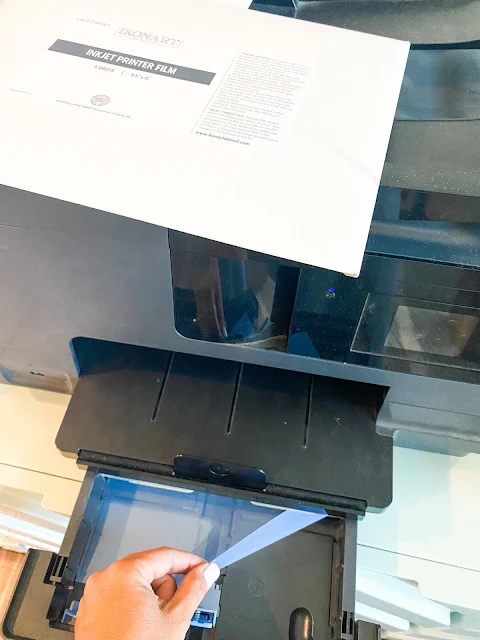
Place a single sheet of the Stencil Film in your printer. I am using an HP Officejet Inkjet Printer so I am using the Inkjet Printer Film. When using the inkjet film sheets you want to put the sheet into the printer so the printer prints on the dull (emulsion) side.
If you are using a Laser printer with Laser Print Film you can print on either side of the film.
The key here is to get as dark and solid of a print as you can. In Silhouette Studio go to File > Print or click the Print icon along the top tool bar.
- Adjust your settings to print in black and white
- Print at the "best" quality
- Select the material as "Glossy"
When you're ready click Print.
How to Make DIY Custom Stencils with Inkjet Printer or Laser Printer
The next step is to take the printed film and expose it so that the black printed area is removed to create the stencil. The Ikonart Stencil kit includes the exposure light stand so just make sure you have assembled that if this is your first reusable stencil using this method.
If you are making a small stencil you can trim down a sheet of blue stencil film so you don't waste it. Once it's exposed to light you can't reuse it - so make sure you cut it down to size first. Place the rest of the stencil film back in the foil sealed bag.
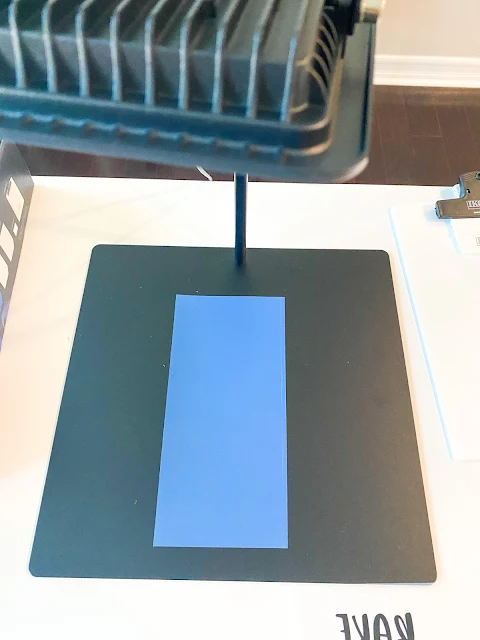
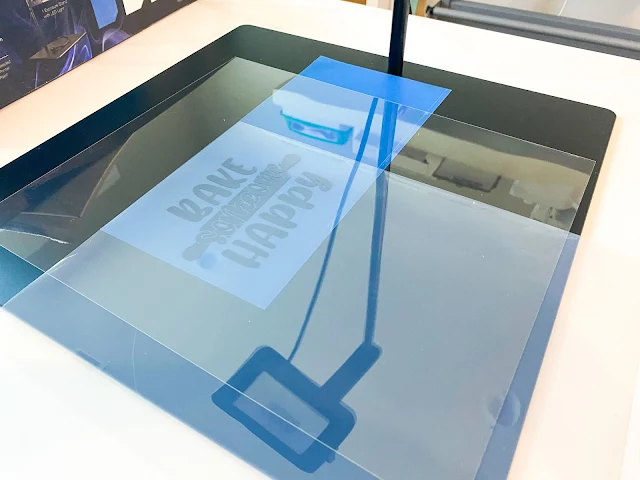
Place a sheet of the Ikonart stencil film (the blue stencil material) on the black base of the exposure stand. The textured side should be facing up.
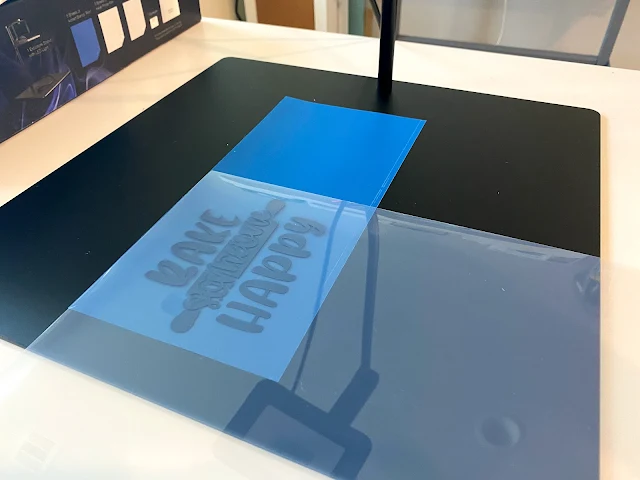
Your transparent printed design sheet should go directly on top of the stencil film oriented in exactly the same way you want the final stencil to look.
Lay the clear exposure sheet (found in the blue stencil film sheets bag) on top - it's now the third layer.
Rub all over the stencil sandwich you have created to seal the printed sheet against the stencil film.
Plug in and power on the exposure light. The time varies depending on if you printed with an inkjet or laser printer. Expose the stencil for 35 seconds if you use the inkjet film and 30 seconds if you use a laser printer.
When the time is up, place the blue stencil film onto the included clipboard. The shiny side of the stencil sheet should be down. Don't worry if you can't see anything yet (I admit I was a little panicked...). The next step is where your stencil will come to life.
NOTE: Save the printed sheet you can use it again to make another stencil if you ever need to OR you can print on it again in another area if there's still room.
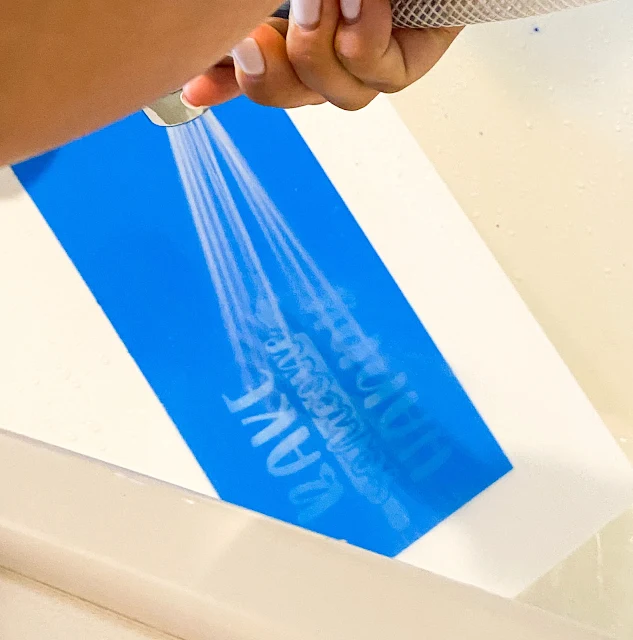
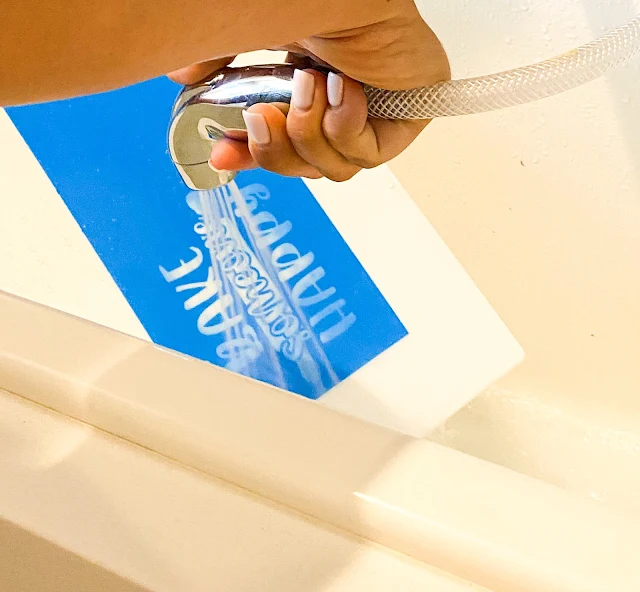
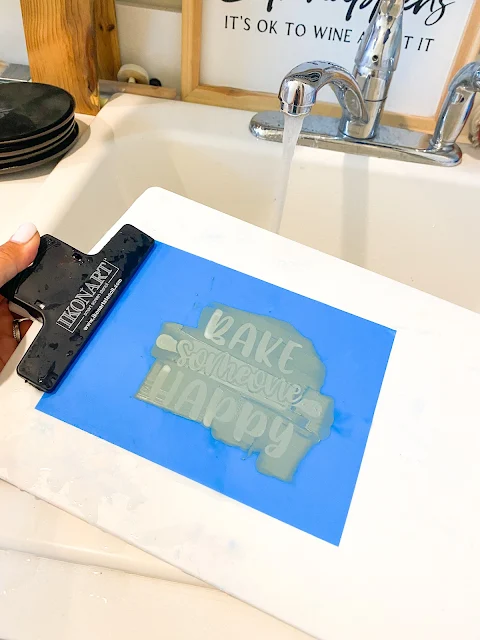
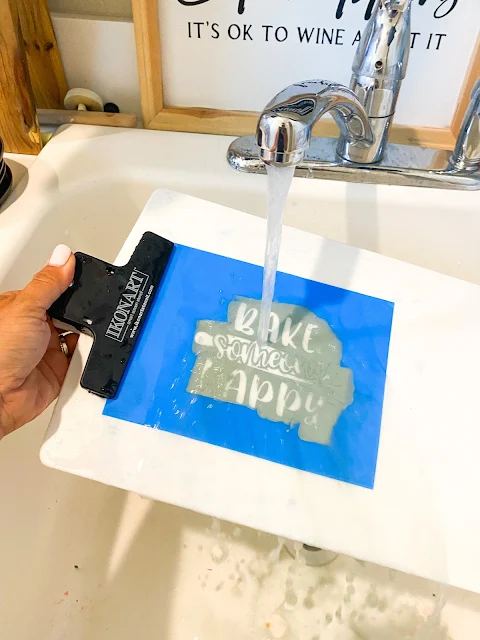
Use warm water to evenly wash out the stencil for up to 3 minutes. (It didn't take me nearly this long for this small stencil.)
When the stencil is fully washed out it should look like this.
The areas of your design should now look like very fine mesh with the blue stencil material no longer visible in those areas.
Let the stencil hang or lay flat to dry for at least 45 minutes.
The final step to make the silkscreen stencil is to place the stencil back on the exposure stand and expose it to light for another two minutes.
How to Paint a Reusable Silk Screen Stencil
Now, you're ready to use your stencil for the first time! Remove the backing from the stencil you created.
Be sure to keep the backing sheet so you can place the stencil back on it after you've used it.
When you place the stencil on the surface, rub it so there are not wrinkles where paint could bleed.
Let me save you some time and testing...chalk paste is what you want to use. Believe me I tried a few other kinds of paint I had in my craft room and it wasn't a good scene.
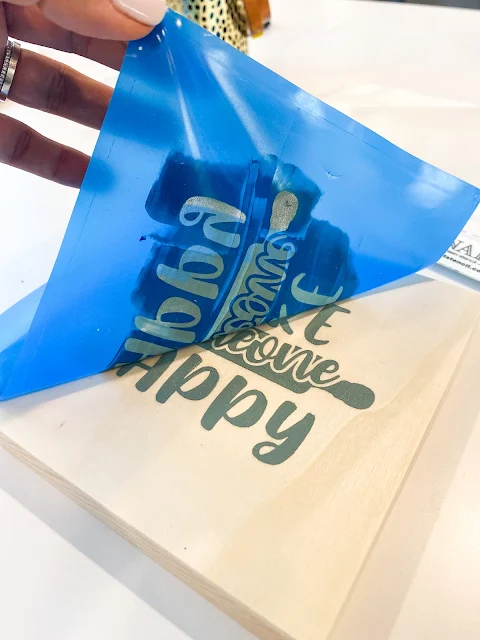
A scoop of chalk paste up with a squeegee was perfection every time!
You'll want to remove the stencil right after you've painted especially with the chalk paste because it dries very fast.
I mean look at that perfectly painted sign!!
To clean the stencil place it back on the wet clipboard with the adhesive side down.
As the water runs over it, gently rub the stencil film with your finger to remove any excess paint.
Then let it dry and you can reuse!
If you have been following Silhouette School for any amount of time you have probably heard me say I don't like painting. I find it to be a messy, time-consuming process for a single use stencil where I am always nervous I'll get paint bleed. In fact, I often use printable heat transfer or HTV on wood because I can avoid painting.
But the Ikonart Stencil Making Kit is a game changer. I can honestly I say I am enjoying making custom stencils for painted signs now all while still using the SVGs and Silhouette cut files I already have AND using the Silhouette Studio software that I am most familiar with!
For Silhouette crafters who make a lot of signs and are used to using their Silhouette CAMEO to cut single-use stencils on Oracal stencil material, the ability to make DIY custom reusable stencils at home will change the way you make painted wood signs.
If you want to grab one, I have a 15% off Ikonart coupon you can use code! Just enter SILSCHOOL at checkout and save 15% on anything in the Ikonart site!
The giveaway has ended.
Get Silhouette School lessons delivered to your email inbox! Select Once Daily or Weekly.










.png)


Wow! How awesome is this! Going to have to try it ASAP!
ReplyDeleteThis looks amazing!
ReplyDeleteThat would be so awesome for my business!
ReplyDeleteI am going to have to study these instructions to make reusable stencils.
ReplyDeleteThanks for sharing. I have a lot of acrylic paints and it's good to know that chalk paint is the way to go. I hope over time these kits go down in price. So much easier than weeding.
ReplyDeleteIs this product safe to use as a cookie stencil?
ReplyDeleteHey, I finally tried my Ikonart, and during the wash out process. It washes out with difficulty and more than the motive.
ReplyDeleteI did try the motive that came with the box, thinking that maybe my motive wasn't dark enough. But it didn't work either.
I can't figure out what I am doing wrong. I tried hot water, warm water, cooler water. Soaking it before. But to no avail.
Help? ;-)