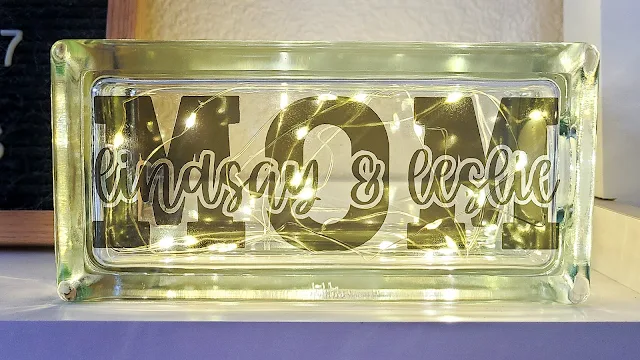
Create some knockout projects using this knockout text technique!
In this Silhouette Studio knockout tutorial we'll walk through how to design custom knockout name designs in the Silhouette software.
Install Fonts in Silhouette Studio
Before opening Silhouette Studio, install the fonts you want to use. The two fonts used in this project come from the Big Font Bundle over at So Fontsy. This bundle is a collection of 50 fonts, so you'll definitely find that perfect font for your knockout project!
Once the fonts are installed on your computer, open Silhouette Studio.
Be sure to recreate the following steps in this exact order because it does matter!
Type Out Your Text
Type out your "background" text. This is the text that will get "knocked out" so you'll probably want a thick, bold text so there's enough of it left over after the knockout. The font used for this project is Ferguson Ultra Black from So Fontsy's Big Font Bundle.
Fill the text with a black fill from the Quick Access Toolbar fill tool.
Open a new text box and type the text that will be "in front". In this project it's this scripty font called Candy Lovely. Give this text a different fill color than the background. I went with red.
Place the scripty text across the background word and size it appropriately to fit across it.
Add an Offset in Silhouette Studio
Add a small offset around the scripty text - about 0.05 is a good offset size.
The offset will be how much of the background text will get "knocked out" so you might not want it too big.
After you hit "apply" in the Offset panel, the offset will be applied and selected in the workspace.
Now hold Shift on your keyboard and click on the "background" text (Mom in this example). The only things that should be selected are the offset and the background text.
Open the Modify Panel and click Subtract.
This is what you should end up with....
The space between the smaller text and the larger background text is created when the offset is subtracted from the background text.
The Subtract tool uses the frontmost shape (the offset) to cut a hole in the backmost shape (the background text). That's why order of elements matter because it determines what are the frontmost and backmost shapes.
You can then cut the design out of vinyl and apply it to a glass block like in this project which uses Oracal Transparent vinyl.
Recreate this glass block project by grabbing the fonts used here in the Big Font Bundle at So Fontsy.
Note: This post may contain affiliate links. By clicking on them and purchasing products through my links, I receive a small commission. That's what helps fund Silhouette School so I can keep buying new Silhouette-related products to show you how to get the most out of your machine!
Get Silhouette School lessons delivered to your email inbox! Select Once Daily or Weekly.


.png)


Thank you for bringing this technique to my attention - I never thought of doing a "knock-out".
ReplyDeleteYou can also "KNOCKOUT" the sections for interlocking letters using OFFSET and SUBTRACT with the KNIFE TOOL - see https://youtu.be/nvc5WTNbOzk
ReplyDelete