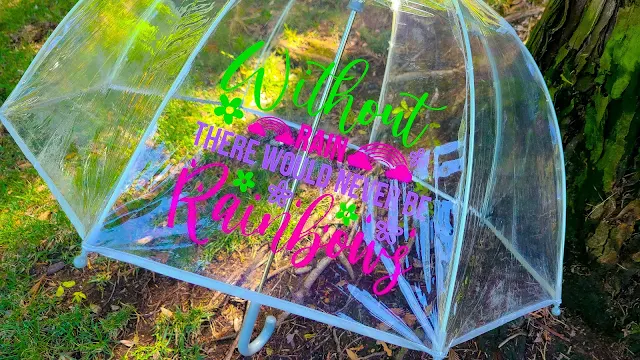
Every year around this time we get asked how to put vinyl on clear umbrellas.
There's a little trick to this project that makes it much easier than you expect. Take a look at the tutorial below.
Before we get started, this is the clear umbrella that was used to apply the vinyl to.
Set-up design in Silhouette Studio
It all starts in Silhouette Studio. Import your design and size appropriately to fit within one of the sections of the umbrella.
This design comes from the new April 2021 SVG Design & Fonts Bundle over at So Fontsy. Isn't it just the perfect quote for an umbrella? There are 155 SVGs and 24 fonts + 40 font doodles in this bundle. You'll find the perfect design and/or font for your umbrella project.
Mirror the Design in Silhouette Studio
Next, here's the little trick that will make this project easy-peasy - flip the design horizontally. Highlight the design >> right-click >> Flip Horizontally. Yes, the design will now be backwards, but this makes all the difference.
Using Multiple Vinyl Colors?
If you have a multi-color vinyl design you'll need to layering it, using the registration marks for layering adhesive vinyl method.
Cut, Weed, & Transfer Tape
Send the design to cut, then weed out all the excess vinyl. The vinyl used in this project is Oracal 651. Check out this blog post for cutting vinyl with your CAMEO (for beginners).
Transfer vinyl decal onto a piece of transfer tape. If you used registration marks for a multi-color vinyl design, you'll need to align the registration marks.
Apply the Vinyl to the Umbrella
Open the umbrella and choose a section where you're going to apply the vinyl. Lay that section on your work surface with the inside facing you.
Take your vinyl decal on the transfer tape and apply it to the inside of the umbrella. The hinge-method of vinyl application is one no-fail method to applying vinyl decals exactly where to you want them.
You adhere the vinyl to the inside of the umbrella and since the umbrella is clear, you'll be able to see the design from the outside. This is why you need to mirror the design before cutting.
Applying the vinyl in this manner has a couple of benefits. First, it gives you a solid work surface against the umbrella so you can firmly adhere the vinyl. Second, this also helps to protect the vinyl from the elements.
Remove transfer tape
Use caution when removing the transfer tape. Work slowly, checking to make sure the vinyl isn't lifting with the transfer tape. If it does, lay the transfer tape back down and burnish the vinyl in that area really well. Then, resume removing the transfer tape.
Burnish the decal really, really well. Now's a good time to use your finger to press the vinyl onto the umbrella.
It may also be a good idea to leave the umbrella open until the vinyl has fully cured before closing it. That way the vinyl cures flat against the umbrella.
More Mirrored Vinyl Projects
If you thought mirroring a design before cutting was just when using heat transfer vinyl - think again! Check out this blog post for more projects where mirroring is necessary with adhesive vinyl.
And if you want to check out more designs from the April 2021 SVG Design and Fonts Bundle, head on over to So Fontsy and you'll no doubt go head-over-heels for these adorable designs!
Get Silhouette School lessons delivered to your email inbox! Select Once Daily or Weekly.


.png)


I have thought so many times of entering the blogging world as I love reading them. I think I finally have the courage to give it a try. Thank you so much for all of the ideas!
ReplyDelete