Wondering if HTV or vinyl is better for wood signs?
We get the question quite a bit so today we'll compare making a wood sign with vinyl vs heat transfer vinyl. Both results in beautiful signs so read on for more info on each method to decide what you think will work best for you and your project.
Before we start, you can find the design used in these projects in the Big Wood Sign SVG Bundle over at So Fontsy! With 28 designs for 87% off, this is too good a deal to pass up. And with so many different ways to create wood signs (have you tried freeze paper or vinyl stencils?), you'll be sign making 24/7!
Sign Making with Heat Transfer Vinyl
Time required
Applying HTV is extremely fast! You are literally pressing the design to the wood for a matter of seconds. Plus, if you're using smaller pieces of wood on a heat press, you could potentially press more than one sign at a time.
Weeding
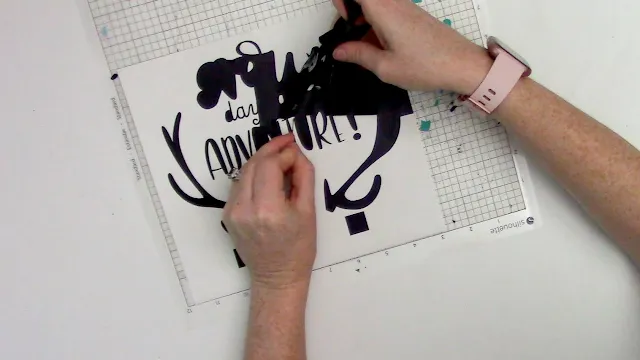
Many people find weeding HTV to be much easier than weeding adhesive vinyl. Weed on your heat press to make it even easier!
HTV can also be more forgiving to weeding mistakes as they often "smooth themselves out" during pressing. For example, if you accidentally rip part of the design while weeding, here's a neat little trick to seamlessly fix it. Or you can completely remove the HTV mistake with a special HTV remover.
Applying HTV to Wood with a Heat Press
You'll need either a heat press or iron for applying HTV. If you're using a clamshell heat press (rather than a swing away), you will need to take into consideration how pressure will likely be unequally applied to the wood sign so you'll need to adjust accordingly. You can do this by pressing the design...
... then rotating the piece of wood 180 degrees and pressing again. This helps to equalize the amount of pressure each section of the design receives from the heat press.
Price of HTV vs Adhesive Vinyl
Truth be told, the price of HTV can often be more than adhesive vinyl. Plus, it does require either a heat press or iron to apply. Fortunately, they are lots of ways to save HTV - check out this blog post for this HTV saving hack.
Application method
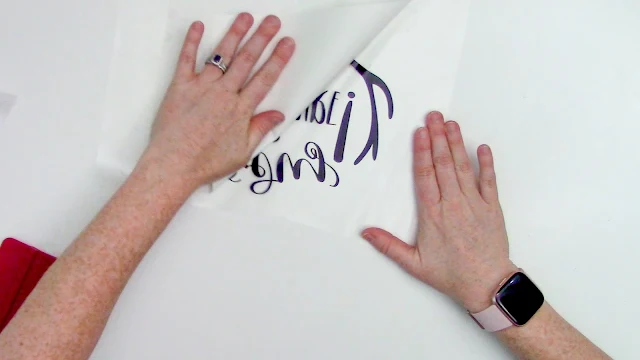
Unlike adhesive vinyl, you don't need to worry about transferring the design to your project with transfer tape, and some people may find transfer tape frustrating.
Also unlike adhesive vinyl, with the weeded HTV design on the carrier sheet, you have the ability to lay down the design on the sign and then easily pick it back up to reposition it if needed.
An important thing to note with HTV, is that you do not want to over press it. This can happen with too much time, pressure, or heat and could end up distorting the design. Multiple short presses with light-to-medium pressure is less likely to give you problems than one long, high pressure press.
Also, for most HTV you need to mirror the design before cutting. Although, some kinds of patterned HTV don't require mirroring - make sure you check the manufacturer's directions to avoid wasting your material.
Wood Signs with Adhesive Vinyl
Time Required
This method doesn't take a considerable amount of time - especially once you've done several signs (it gets easier with practice). One way to really speed up the process when you're using multiple colors of vinyl is to work "assembly line style". That means, cut all the vinyl pieces, then weed all the vinyl pieces, then transfer them to the transfer tape (instead of cutting, weeding, and transferring one color of vinyl at a time). There are also many other time saving hacks out there - like this insanely fast weeding hack.
How to Weed Adhesive Vinyl
Speaking of weeding, not gonna lie, some people find weeding adhesive vinyl to be more challenging than HTV. If you do have problems weeding, there are many tips and tricks that can resolve your issues, like adding weeding lines or even using washi tape for small or distressed designs.
And don't worry, many vinyl mistakes can be fixed as well. For example, if you lose a word while weeding the design...
...just cut that word out separately and add it later to the design on the wood.
Supplies and Tools for Adhesive Vinyl
Obviously you'll need good quality adhesive vinyl - try Oracal 651. You also need transfer tape to transfer the weeded vinyl onto the wood - here's a post about the best transfer tape. And finally, you'll need some sort of burnishing tool - like the red scraper pictures below - to firmly press the vinyl when transferring to transfer tape and when applying onto the wood itself.
Price of Adhesive Vinyl
Vinyl is a less costly option for creating your wood signs compared to HTV. Not only is the vinyl itself less expensive, so are the other tools required - transfer tape and a burnishing tool - you can just use an old gift card and sometimes just your finger works very well.
Application Method
There are some who find adhesive vinyl application to be harder than HTV....especially on wood. First, if the vinyl isn't sticking to your painted wood sign, try sealing the paint first with either a spray or brush application sealer.
Then, use this trick of flipping the vinyl over and removing the transfer tape if you're having trouble getting the vinyl to stick to the transfer tape.
Next, use the hinge method to apply vinyl straight (on the first try). Using adhesive vinyl can be a great way to make to your wood signs!
Whatever method you choose - whether HTV or vinyl - wood signs are so versatile and make lovely home decor and gifts. To check out more wood sign SVGs, check out the Big Wood Sign SVG Bundle at So Fontsy!
Get Silhouette School lessons delivered to your email inbox! Select Once Daily or Weekly.


.png)


No comments
Thanks for leaving a comment! We get several hundred comments a day. While we appreciate every single one of them it's nearly impossible to respond back to all of them, all the time. So... if you could help me by treating these comments like a forum where readers help readers.
In addition, don't forget to look for specific answers by using the Search Box on the blog. If you're still not having any luck, feel free to email me with your question.