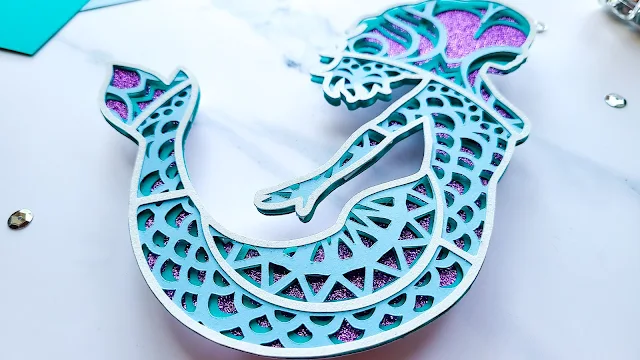
3D layered paper art projects are all the rage right now - and it's no wonder. If you're looking for a truly impressive paper project that is sure to turn some heads, try your hand at a paper layered mandala!
In this tutorial, we'll share some tips and tricks to get you headed in the right direction for assembling a 3D layered paper art project.
Choose Your Cardstock
Good 3d layered paper mandalas always start with high quality cardstock. Check out this blog post about what may be the best Cardstock for Silhouette Cameo and Portrait (and cut settings!).
Cut Cardstock
Mandala designs are so very beautiful because of how intricate they are, and the design will really shine when you get a nice cut with your Silhouette. This one is from So Fontsy's Nautical SVG and Font Bundle.
The mandala mermaid cut cleanly on paper using the line segment overcut tool in Silhouette Studio.
Removing Paper Mandalas from a Sticky Cutting Mat
Getting the delicate mandala off the mat can be tricky, but it's not impossible to remove successfully. The key tip is just to work carefully.
You may find a paper scraping tool helpful. Gently run the thin edge of the paper scraper underneath the cardstock and slide it along the cut edge of the cardstock. Check out this paper scraper blog post that helps stop the cardstock from curling up when you remove it from the mat.
Another tip is to flip the mat over and peel the mat off the cardstock. This is helpful when you have a really sticky mat because it helps prevent the cardstock from curling.
Before flipping the mat over, lay down the non stick mat cover so your sticky mat won't pick up anything from your work surface. Use your dominant hand to "roll" the flexible mat back while you use your non dominant hand to hold down the cardstock.
Assemble the 3D Layered Paper (3 ways)
1. Liquid glue
Pros: This method is likely most accessible to all crafters because you probably already have liquid glue in your craft stash. The biggest pro with liquid glue is that it doesn't set immediately, so you actually have a little wiggle room to adjust the layers before the glue is completely set.
Cons: Application can be slow going and messy. Be careful not to apply too much glue to the cardstock, otherwise when you adhere the layers together, you'll get glue leaking out from the sides. Use a fine point tip for cleaner application and preferably use a glue that dries clear.
2. Spray Adhesive
Pros: This method is by far the quickest - seriously, you're done in seconds! Just spray and stick!
Cons: Application can be messy. Make sure to spray outside or in a well ventilated area and protect your work surface from overspray. Drying time is much quicker than liquid glue, so you don't get much "wiggle room" to move things around before they set completely.
3. Dimensional Foam Adhesive
Pros: Dimensional adhesive gives your mandala a super cool 3D effect! This can really take your layered paper mandala to the next level and get it to really pop. You can choose to adhere all the layers together this way or just some of them.
Cons: You may be limited to where you can place the foam dots or foam strips because the goal is to try to keep them hidden between the layers of cardstock. This can make dimensional application time consuming, especially if you have to do a lot of trimming to hide them.
And for extremely thin designs, you may not be able to trim them thin enough, so dimensional foam adhesives might not be a good choice for very thin designs.
Then, after assembly, display your paper layered mandala proudly! This may not be the quickest project out there, but the time is definitely worth it. They turn out spectacular!
Note: This post may contain affiliate links. By clicking on them and purchasing products through my links, I receive a small commission. That's what helps fund Silhouette School so I can keep buying new Silhouette-related products to show you how to get the most out of your machine!
Get Silhouette School lessons delivered to your email inbox! Select Once Daily or Weekly.


.png)


This comment has been removed by the author.
ReplyDeleteThank You!!! Super helpful!!!
ReplyDelete