When it comes to cutting cardstock with your Silhouette CAMEO, don't feel like you are limited to the size of cutting mat or even the size of the cardstock!
Using the Tiling feature in Silhouette Studio Business Edition, you can create impressive, larger-than-life cardstock projects. Here's how to do it!
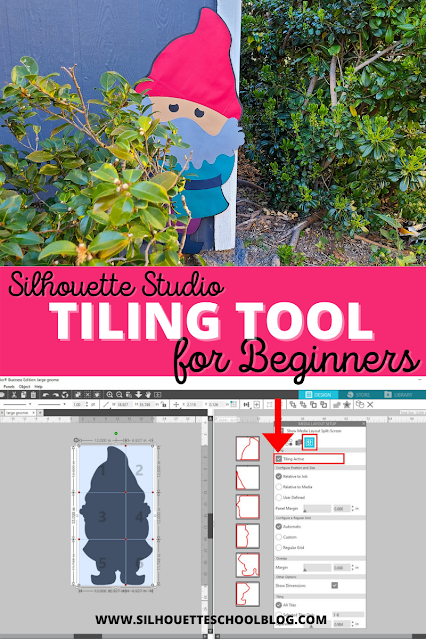
This guy is more than three feet tall and cut on multiple sheets of 12x12" cardstock!
Open Silhouette Studio Business Edition and set-up your page like you're cutting on a 12x12-inch piece of cardstock. Set cutting mat to 12x12 and Media size to 12x12. Then, import your design and resize it for your project. This design is approximately 19 inches wide and 36 inches tall.
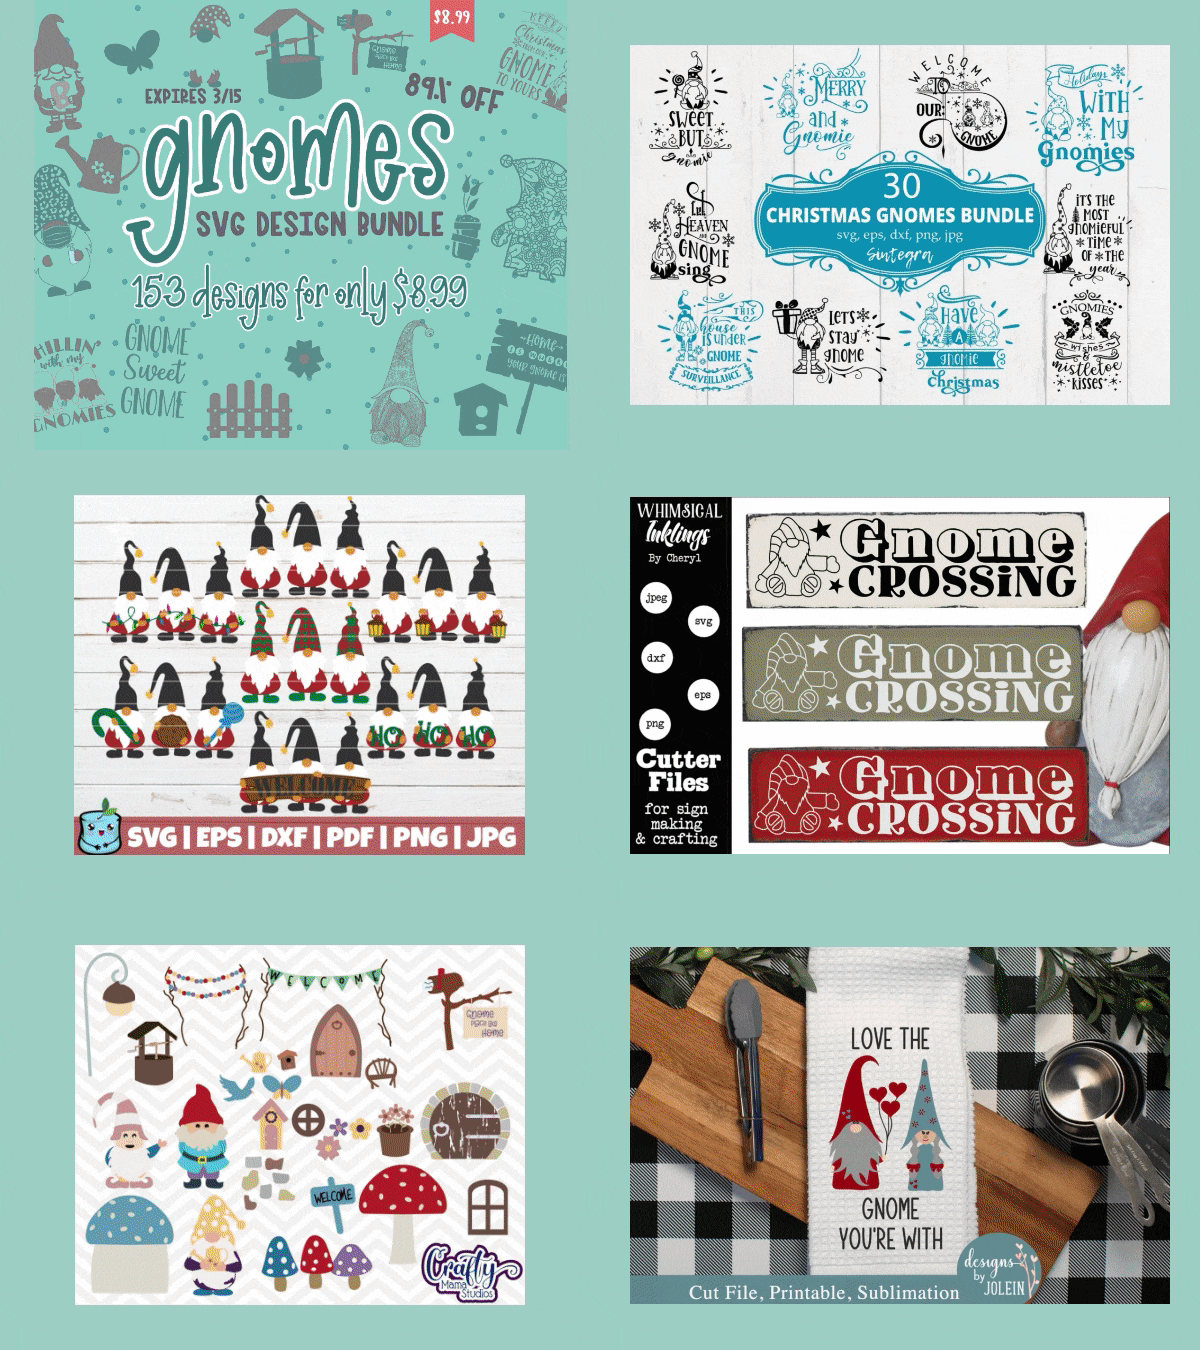
This is the shadow/base layer of the most adorable gnome from So Fontsy's Gnome SVG Design Bundle. These gnomes may be small, fortunately they are mighty... CUTE! You'll have a gnome for every occasion with this limited time bundle - for just $8.99 for all 153 of them!
The Tiling feature is hidden in one of the right sidebar menus in Silhouette Studio.
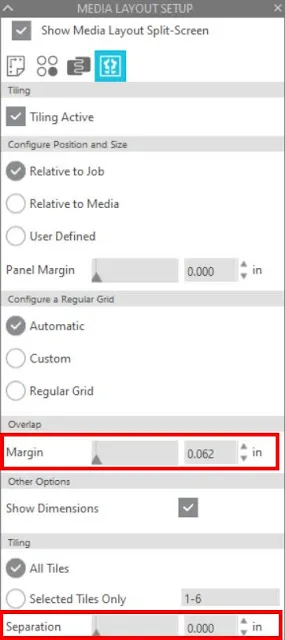
Click the Media Layout Setup Panel (you may need to reveal more icons in the menu by clicking the little triangle at the bottom in the side menu).
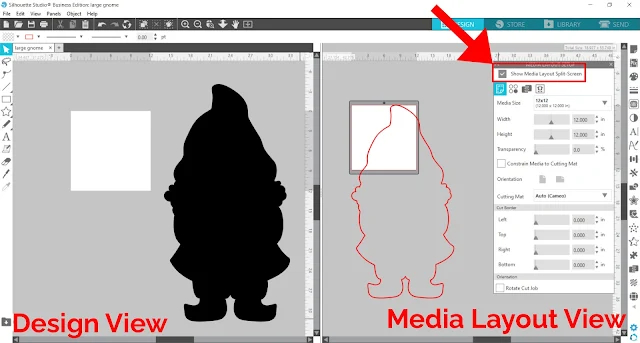
Select the box to Show Media Layout Split Screen. This divides the screen into the original layout on the left, the Design View (which we use most of the time in Silhouette Studio), and the right side is the Media Layout View. This is how your design will look when your machine cuts it out.
If the media size in the Media Layout Setup Panel is different than what you set-up in the Page Layout Panel, make sure to change the media size to 12x12. And make sure Cutting mat is set is 12x12 as well.
Click the Tiling icon and select Tiling Active. This is where the original design (on the left) will be sectioned into smaller tiles (on the right) so you can cut each section on a 12x12-inch piece of cardstock. Then, after all the pieces are cut, you can assemble them to make the complete, larger design.
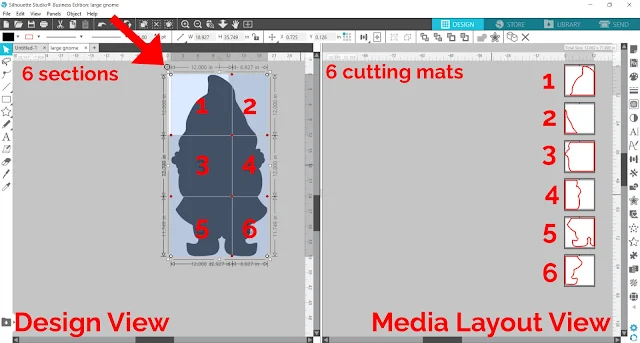
For this project, the default setting for tiling divided the gnome into 6 sections/tiles. You can see the divisions on the left in the Design View. On the right, in the Media Layout View, you can see how each of the 6 tiles are placed on their own cutting mat.
Customizing Tiles
There are lots of customization options for the tiles, but don't get overwhelmed. If this is your first tiling project in Silhouette Studio, I would suggest you leave the defaults as they are set.
We'll go more into detail on making custom changes to Tiling projects in another tutorial.
There are only two changes I would suggest you consider making in this panel. First, increase the Margin Overlap slightly. This will give you a slight overlap of the tiles. Keep in mind, this change will make some of the sections a little bigger, so check to make sure that they are still within the cutting mat.
Secondly, the default tiling also includes a Separation which, for this project is not what we want since we will join all the pieces together in the end. Change Separation to 0.
Cutting Tiles with Silhouette CAMEO
Move to the Send panel and set your cut settings appropriate to the cardstock you're using. You'll need 1 piece of 12x12-inch cardstock for each "mat" displayed in the Media Layout View. I suggest gathering your cardstock and setting it close to your machine before you send to cut so things go more quickly and smoothly.
When putting the cardstock onto the cutting mat, it is important to make sure that the 12x12 cardstock completely covers the cutting area (especially if the design is positioned right along the edge of the cutting mat). Turn the mat over to check that the cardstock completely covers the gridded area.
Load the mat into your Silhouette, then hit Send.
If you receive this message, like I did, first, click No, then go back into the Design workspace to check once again that each section is within the 12x12 cutting area. Almost every section of this gnome had a line that ran along the very edge of the cutting area, but did not extend past it. But I still received this message, so I just clicked Yes to continue and the Silhouette machine cut out the shapes perfectly.
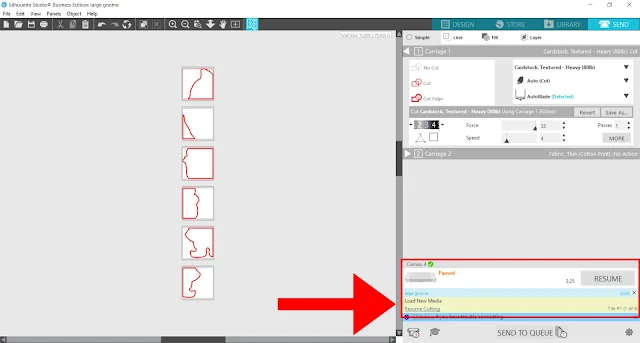
Once the first tile is done cutting, the machine will pause. At this time you can unload your cutting mat, remove the cut cardstock, put down a new piece, and load the cutting mat back into the machine.
Then, Click Resume or Resume Cutting. Don't worry about this countdown timer. The machine stays Paused even if the timer runs to zero.
I highly suggest labeling the pieces as they are cut. This will help later when you go to assemble them together.
The CAMEO will then cut the next tile. There's a counter in the bottom corner if you forget what tile it's on. Repeat these steps until each of the tiles are cut.
If you have other layers for your project that are larger than 12x12, use the same steps as described above to divide them into tiles for cutting.
Assembling a Large Cardstock Project
Temporary adhesive is incredibly helpful for allowing you to start assembling the cardstock together, but without laying down each piece permanently. This way you can make slight adjustments to the pieces.
Similarly, painter's tape is very helpful to join the bottom layers together. It holds the pieces together firmly, but if you need to make adjustments you can carefully remove the tape without ripping the cardstock.
Then, white glue is a good option to adhere the rest of the layers.
One important tip to keep in mind before gluing, is to figure out in what order you should glue down each layer. This way you can avoid gluing down a piece, then realizing you needed another piece to go under that one.
If that happens to you, instead of trying to rip it up, you could cut out the layer again and then glue it on top.
Most importantly have fun creating an oversized cardstock project like this! The gnome is an especially fun character to work with! Check out the Gnome SVG Design Bundle over at So Fontsy
Note: This post may contain affiliate links. By clicking on them and purchasing products through my links, I receive a small commission. That's what helps fund Silhouette School so I can keep buying new Silhouette-related products to show you how to get the most out of your machine!
Get Silhouette School lessons delivered to your email inbox! Select Once Daily or Weekly.











.png)


Is there a work around way to do this with Designer+?
ReplyDeleteI think you can try to divide your project for example in squares, then choose crop from the modification tools. You have to make as msnx copies of the project as many parts you want do divide it, because after cropiing you will be left with exactly that piece of your project that was inside of your square. I hope this helps.
DeleteThis is amazing! Thank you so much for sharing! Definitely going to try this out with some large sized bunnies for Easter!!!
ReplyDeleteThis is awesome and so fun looking! Thanks for the tutorial! Looking forward to the one on the various custom settings. I'm assuming this is also applicable for vinyl and/or other machines such as the Portrait. Looking forward to experimenting for Easter. Think giant bunnies!
ReplyDeleteThanks! This is very informative and easy to follow. Can registration marks be added if you are cutting vinyl instead of card stock?
ReplyDeleteThank you for sharing. Looks very easy to do.
ReplyDeleteWow! I didn't know about this and will definitely be using it soon!
ReplyDeleteCan this be used with the print function rather than cut if you are printing a larger item for sublimation?
ReplyDeleteI have everything set up correctly but it will not cut after the first panel. It pauses I change the vinyl then I hit resume the counter changes to the next page number. The blade moves, clicks like it is looking for registration marks and then does nothing.
ReplyDeleteHello there! Unfortunately it's hard to trouble shoot here. Please feel free to email us here: http://www.silhouetteschoolblog.com/p/blog-page_9.html
DeleteIf you think you would benefit from 1:1 help, please consider joining Silhouette U (www.silhouetteu.com)! Members get access to 1:1 help via priority email, chat, and a private Facebook group. Our website also has 400+ video tutorials for all skill levels plus a monthly coupon code for free designs at So Fontsy. We hope to see you soon!