There's no quicker way to make sublimation face masks than if you have the free mask template to match the mask!
It's one of the big reasons I love these sublimation-ready masks from Pro World - there's no guessing if my design is going to fit the mask. I know it will.
Read on for how to fill this mask template with a photo, pattern, or digital design so you can print and press!
White sublimation masks mean you can customize masks however you - or your customers - want. And with the help of the free sublimation mask template you can be printing sublimation prints and pressing masks very, very quickly.
These come in packs of 10 face masks and include two filters per mask. One side of the mask is 100% polyester the other is a cotton material. The cotton side goes closer to your face so it's more comfortable, while the polyester side is ready for sublimation.
Start by downloading the free sublimation mask template from Pro World. It will download as a PDF which can then be opened in Silhouette Studio.
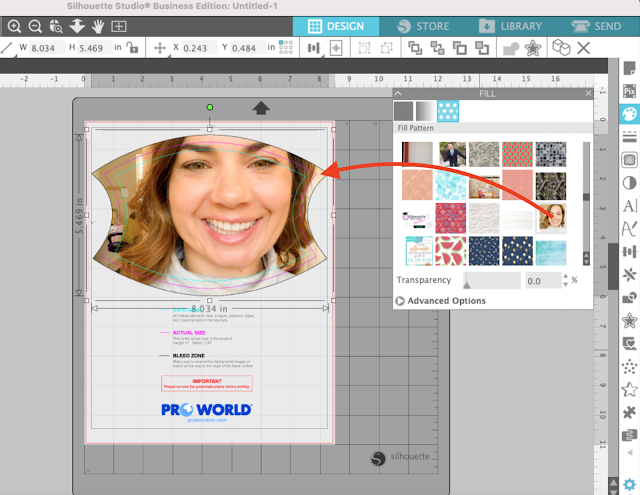
The three lines indicate the safe area, the actual mask size, and a bleed area.
It's important not to resize the face mask template at all after you open it or it will not correctly cover the actual mask when you go to sublimate.
If you are adding a logo or some other type of graphic design that will not cover the entire face mask you can open it in the same work area. Use the mask template as a size guide to help you scale the design itself so it's the right size for your mask.
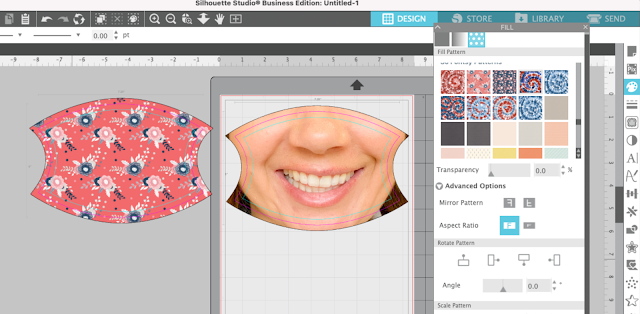
If you want to do a full sublimation print on the mask with a pattern or photo you can actually fill the entire template with the pattern or photo.
How to Fill a Shape or Template with a Photo in Silhouette Studio
First make sure the photo or pattern is in the Patterns folder of your Silhouette Studio library. This will allow them to show up in the Patterns panel of the Fill Panel.
I decided to freak my family out with a love face mask of my own face. To be honest, I love it more because of how much they hate it (or claim to).
If you want to be totally awkward or just have a funny mask like this, take a pretty close up selfie of yourself. Get the photo from your phone to your computer then drag and drop the JPEG into the Patterns folder of your library. (The same process can be done with digital patterns.)
Once the photo or pattern is in the Patterns Fill panel, select the bleed cut line of template (outermost line) and then select then double click the thumbnail preview of the pattern/photo you want to add.
This will fill the entire shape with the image. Don't worry if it's not the right orientation, position or scale. You can change all of that.
I will warn you: if you are doing a face mask of your face it's about to get awkwardly funny.
Expand the Advanced Settings of the Fill panel. With the shape selected you can now click on Scale or Pan to either scale the image or move it within the shape.
Get it just how you want it. Keep in mind the main part of your design should be inside that inner most line indicating the safe area.
The final step is to reverse the image (right click > flip horizontally) - as you want to print sublimation prints in reverse.
Make sure your Page Setup is set to Printer. If you are doing a full sublimation face mask, you'll likely only be able to fit one on a page.
How to Print a Full Patterned or Full Photo Sublimation Transfer
If you are on a MAC you'll want to export and print directly through the Sawgrass Print Manager. If you are on a PC you can print directly from Silhouette Studio to your sublimation printer.
Print out your design on your sublimation printer. I am using my Sawgrass SG400 (which is the older model of the now current Sawgrass SG500.)
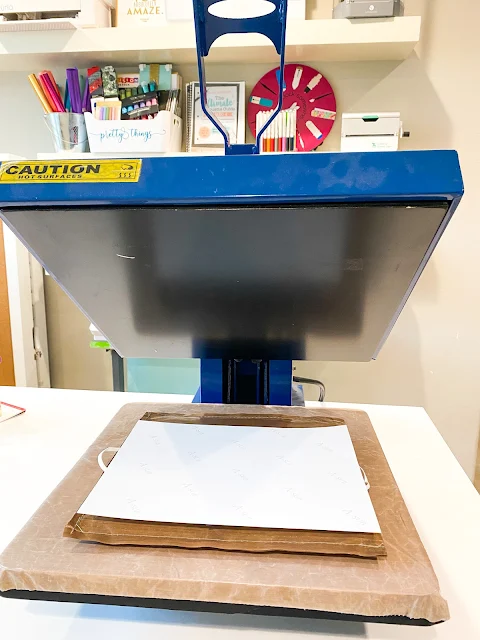
Make sure your heat press is on 400 degrees and set a 60 second timer. Have a pressing pillow nearby.
Before you press you want to make sure you're pressing onto the polyester side of the mask - not the cotton side. You won't get a vibrant press if you accidentally try to apply the sublimation print onto the cotton side of the mask.
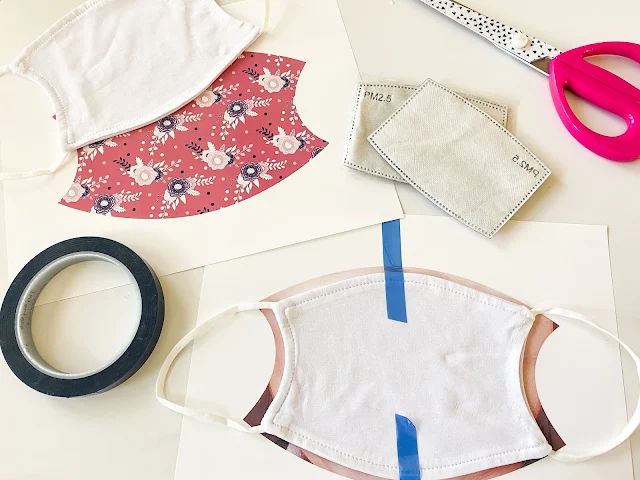
I think the easiest way to position the print on the mask is to lay the print down on a flat surface with the print facing up. Then place the mask, sublimation side down so it's touching the print, on top. Use at least two pieces of high temperature tape to keep it in position.
When the heat press is up to temperature, put a pressing pillow onto the heat press and then place the mask and printed sheet onto the heat press. The sublimation paper should be on top so it will get direct heat from the top platen.
Press with medium to high pressure for 60 seconds...and then carefully remove the mask from the press.
When you're done pressing, you can slide in one of the filters.
That's it! You've made a totally custom face mask and turned a white sublimation mask into a totally goofy oversized smile ...
...or something a little more subtle that doesn't involve an awkwardly large nose which your kids refuse to let you wear out of the house, but secretly find funny enough to wear themselves in the house!
Get Silhouette School lessons delivered to your email inbox! Select Once Daily or Weekly.


.png)


No comments
Thanks for leaving a comment! We get several hundred comments a day. While we appreciate every single one of them it's nearly impossible to respond back to all of them, all the time. So... if you could help me by treating these comments like a forum where readers help readers.
In addition, don't forget to look for specific answers by using the Search Box on the blog. If you're still not having any luck, feel free to email me with your question.