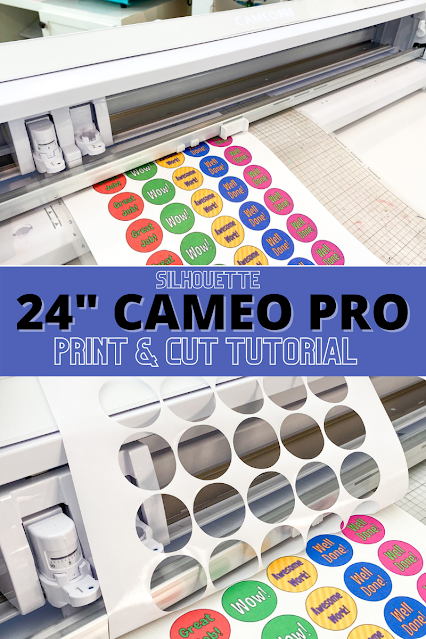
It's possible to print and cut on the Silhouette CAMEO 4 Pro just like all other Silhouette CAMEO and Portrait machines.
However, there are some things to keep in mind to get the best possible and most accurate cut around your design.
The Silhouette CAMEO 4 Pro makes it possible to print and cut larger sheets - limited only by the size of the printer you are using. This means it's possible to print on wider and longer format sticker sheets, for example, and then cut on the CAMEO Pro.
To keep this simple for a Silhouette CAMEO 4 Pro print and cut beginner we are going to focus on printing and cutting with an 8.5" x 11" piece of sticker paper from Online Labels. I highly recommend you cut with a 12" wide cutting mat if you can.
Silhouette Studio Setup for Print and Cut with CAMEO 4 Pro
Start in the Send panel by selecting the CAMEO 4 Pro from the machine list.
Move to the Design area and from the Page Setup panel adjust the page settings. The machine and cutting mat should be automatically selected based on your machine selection. Change the mat selection to "CAMEO 12 x 12".
Change the media size to "Letter (8.5" x 11")".
From the Page Setup Panel check the box to Show Print Border and turn on the registration marks by clicking "M" on your keyboard or by going to the Registration Marks tab of the Page Setup Panel and selecting "On".
Open or merge in your designs. I'm using a set of pre-designed sticker templates from Online Labels.
Make sure no part of the designs is in the hashed area or outside of the safe print and cut areas.
Print and Cut with Silhouette CAMEO Pro
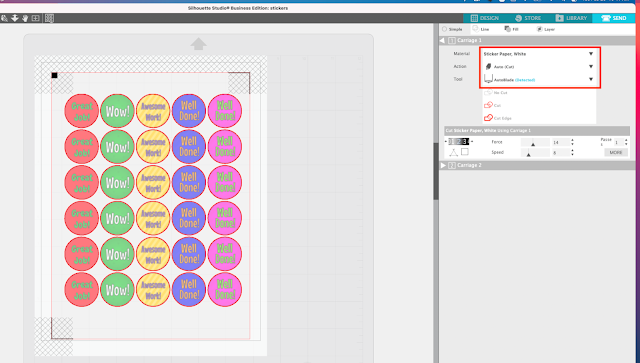
When your design is set, move to the Send area. Ensure that the cut line is where you want it - in this case around just the outside of the design.
Change the material. Since I am using Online Label's Matte Printable Sticker sheets, I am selecting Sticker Paper, White.
Now you're ready to print.
As always, I'm using Online Labels sticker paper. Place the sheet in your printer. From Silhouette Studio go to the File menu and click "Print". The print preview box will open. Click "Print" to make your printer selections.
CAMEO 4 Pro Setup for Print and Cut
On the CAMEO Pro move the right roller to the 8" mark.
Take your printed sheet, place it on the 12" cutting mat and load it into the CAMEO Pro. The left edge of the mat should be aligned with the right gray line.
From Silhouette Studio's Send panel click "Send".
The machine will first look for the registration marks then begin the cutting. Make sure you have enough light, but not shadows or a glare when you are looking for registration marks. If you have shadows or a glare, pull out the top of the CAMEO 4 Pro lid slightly.
When the cutting is complete carefully try to lift one of the stickers to make sure you got a good cut. If you didn't, click "Send" again to cut another pass around the stickers.
Get Silhouette School lessons delivered to your email inbox! Select Once Daily or Weekly.


.png)


Hi Melissa, thank you for your tutorial!
ReplyDeleteBut I have one question - why do you recommend setting the roller to the 8"-mark, instead of the 13"-mark (where it would be one the border of the cutting mat)?
Hi there! This is set to the width of the material.
DeleteSo if I'm doing this correctly I should get the cuts EXACTLY where they should be on my designs? Every time I do it, It's always off by a small margin, some do it perfect others are off by a large margin, All on the same sheet. I've calibrated everything and it seems to be fine but It happened on the Cameo 4 and the Cameo 4 Pro now. Are you supposed to add an inset to the design?
ReplyDeleteCheck out this video on troublshooting: https://www.youtube.com/watch?v=6rkONiJhmts&list=PLT9hB3BOKb_iorQC7CsuuwtMsBhneX4yW&index=3&t=56s
DeleteI received my Pro today. My machine is not detecting the registration marks. I have tried everything- thinking the machine is the problem, and not me.
ReplyDeleteHi there! Check out this troubleshooting video on print and cut: https://www.youtube.com/watch?v=6rkONiJhmts&list=PLT9hB3BOKb_iorQC7CsuuwtMsBhneX4yW&index=3&t=56s
DeleteWhat's the largest size you can do for a print cut with the cameo 4 pro
ReplyDeleteHi there! This is only really limited by the size that you can print!
DeleteWhat’s the largest print and cut you are able to do with cameo pro 24 inch
ReplyDeleteHi there! This is only really limited by the size that you can print!
DeleteSo far my mat slides in the machine. What gives? I’ve tried everything.
ReplyDelete