If freehand painting on canvas makes you just a little bit nervous, don't worry, you can still create beautiful painted canvas art worthy of home display - just use the "cheater's" method - a stencil!
But there are few tricks to getting it just right - so follow along with this tutorial to learn how to get perfect, no-bleed paint lines with vinyl stencils on canvas!
As a crafter, you're probably familiar with the agony of a project gone wrong (perhaps even epic fail wrong!). This happened to me when I first used Oracal 651 as a stencil to paint on a wrapped canvas - take a look at those bleed lines... 😭
Now, it's not a terrible paint job, but definitely not my best work, for sure! So, after some trial and error, here is the method to achieve crisp, clean paint lines using a vinyl stencil on canvas.
Cut & Weed Vinyl; Apply transfer tape
Because you're making a stencil, remember that after you import your design into Silhouette Studio, it's helpful to draw a shape around it like a rectangle, or because I'm using a round canvas, I drew a circle around it.
The design I'm using for this monogrammed canvas art comes from the Mandala SVG Bundle 4.0 at So Fontsy! Mandalas are consistently one of the most widely sought designs, and for good reason, they are absolutely gorgeous! So, our friends over at So Fontsy came through again with another spectacular Mandala SVG Bundle. This one is filled with 224 SVGs and 11 single line files (hello Foil Quill!) and it's all for 87% off!
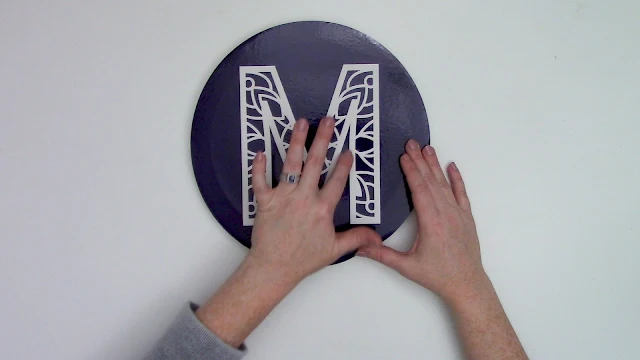
Next, cut out the design and when you go to weed your design, remember to weed out the design itself, not the excess vinyl around it. The shape you created in Silhouette Studio (the rectangle or circle) stays in place, that's why we cut it in the first place - as a reminder that this is stencil and not a decal.
Next, apply transfer tape over the weeded stencil and set aside for now.
Prep the Canvas
Vinyl will not stick to a bare canvas - not without A LOT of patience and headache, and even then, the vinyl just doesn't want to stay put and can slide around. So, you NEED to prep the canvas before applying the vinyl stencil.
One way to do that would be to paint the entire canvas with acrylic paint before applying the vinyl stencil. But if you want the look of a painted design on a bare canvas, all you need to grab is your handy dandy Mod Podge! Is there anything it can't do?
Use a foam brush to paint a thin coat of Mod Podge over the entire canvas. I used a matte finish Mod Podge, but glossy would work as well. Then, set aside to dry.
Apply Vinyl to Canvas
Once the canvas is dry, it's now time to apply the vinyl stencil to your canvas. Apply it as you would apply vinyl to just about any other surface, the only thing to keep in mind is that you don't want to press too hard on the canvas as you burnish the vinyl because you could stretch out the fabric.
So, flip the canvas over and burnish from the backside. You could also find a book or other flat object to place underneath the canvas frame that will give you resistance when you apply the vinyl.
Then, carefully and slowly peel off the transfer tape from the vinyl. Do this by rolling the transfer tape back instead of just lifting it straight up off the vinyl.
That thin layer of Mod Podge applied to the canvas makes transferring this vinyl stencil onto the canvas SO much easier compared to applying it to bare fabric. However, still work carefully as you remove the transfer tape to spot any vinyl areas that may be lifting so you can hold them down while you remove the transfer tape.
Gently burnish the vinyl again with your finger.
Note: If you have trouble lining up the vinyl stencil on the canvas, you may try removing the vinyl backing and replacing it with parchment paper.
(Almost) Ready for Paint
Before you start painting, grab the Mod Podge again and apply a very, very thin layer of it over the stencil. Even if you painted your canvas first with paint, you still want to apply the Mod Podge over the stencil because it helps seal around the edges of the stencil which prevents paint from bleeding underneath it.
You don't need to use much, just enough to lightly coat the entire inside of the stencil. And be extra gentle with your brush as to not lift any of the vinyl pieces.
Let the Mod Podge dry. A second ultra-thin coat of Mod Podge is optional.
It's Painting Time
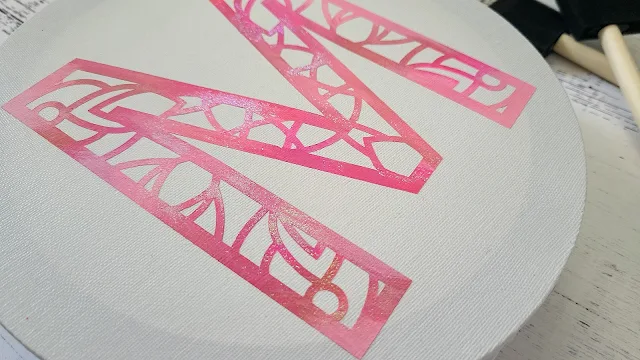
Now things get really fun because here you get to be as creative as you want! Take one or more colors of acrylic paint and apply them in between the stencil with a foam brush or paint brush.
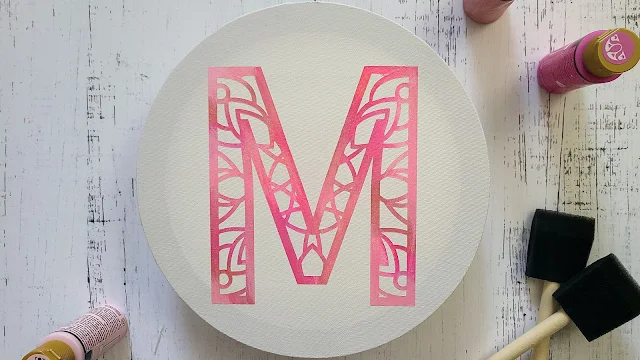
Multiple, thin coats of paint work best. You can really get creative here - like using three shades of pink and only one foam brush to get a "hot mess canvas" type of look to the paint. You could even add glitter over the wet paint.
Let the paint dry completely.
Remove stencil
Remove the outer piece of the vinyl stencil just like you removed the transfer tape, by rolling it back upon itself.
To remove the inner pieces of vinyl, use a sharp tool like a craft knife to "stab and grab" the pieces. Just be sure to not dig too deep with the knife or you could pierce the canvas underneath. I accidently did that, but the hole in the canvas was so tiny and it's hardly noticeable on the finished project.
Admire your handy work, particularly those super sharp and clean paint lines! Oh yeah! Much sharper this time around compared to when I first tried this!
You can grab the full mandala alphabet design (plus much, much more!) as part of the Mandala SVG Bundle 4.0 over at So Fontsy! Check it out!
Note: This post may contain affiliate links. By clicking on them and purchasing products through my links, I receive a small commission. That's what helps fund Silhouette School so I can keep buying new Silhouette-related products to show you how to get the most out of your machine!
Get Silhouette School lessons delivered to your email inbox! Select Once Daily or Weekly.


.png)


Would this work with a canvas shopping bag as well?
ReplyDeleteIt should! The heavier/stiffer the canvas bag, the better off you will likely be.
DeleteThere has to be a better way, my vinyl did not stick at all to the canvas after modge podge and then some lettering pulled completely off along with the top modge podge!!
ReplyDeleteHi there! It sounds like you needed to let the Modge Podge dry longer.
DeleteCan you share what brand of transfer tape and vinyl you use? I am having no luck getting the vinyl to stick well enough to the (Mod-Podged) canvas to be able to peel off the transfer tape. Thanks!
ReplyDeleteHi there! The key (regardless of what transfer tape you're using) is to make sure that your Mod-Podge is super dry and that you've done thin coats versus one heavy coat.
Delete