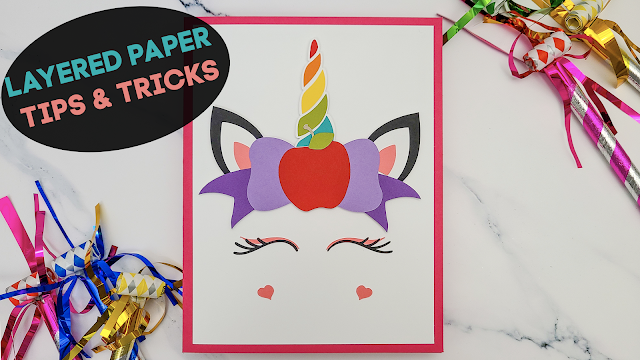
Here's a tutorial for all you paper crafters out there! If you've ever wanted to cut an SVG out of paper, but found it tricky to put all the paper pieces together, well here's a couple little tricks that'll make it SO much easier and help make sure you get everything all lined up!
The trick is to create a base layer and use that to not only support the entire design, but also help you align all the pieces!
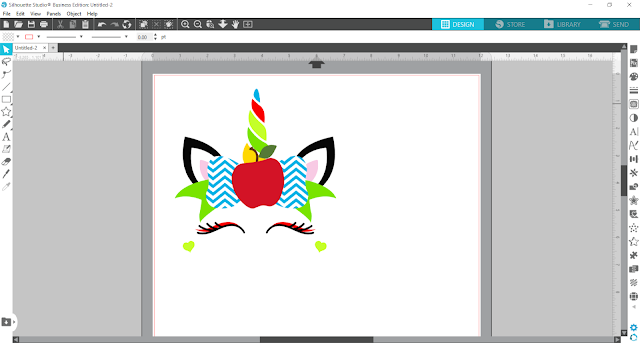
First, start by opening the file in Silhouette Studio. Did you know there are 8 ways to open or import designs into Silhouette Studio?
This adorable Unicorn design is from the Unicorns & Mermaids Fonts and Design Bundle! The folks over at So Fontsy have taken all the best mermaid fonts and unicorn designs and pulled them together into one big magical bundle that is only $9.99. That's 91% off! But this deal isn't around long so dash over to So Fontsy to grab it before it's gone.
Back to this unicorn design.
You can see that if you ungroup the design after you import it into Silhouette Studio, all the elements of the unicorn are all separate pieces. While you could cut out all these pieces from cardstock as is, putting the unicorn back together again can be a little tricky.
Wouldn't it be so much easier if you had a base layer to adhere them to? Well, here's how to do it!
So before you ungroup the design, first make a copy and move it to the side (you'll need it later). Then ungroup the original design (if it wasn't ungrouped already).
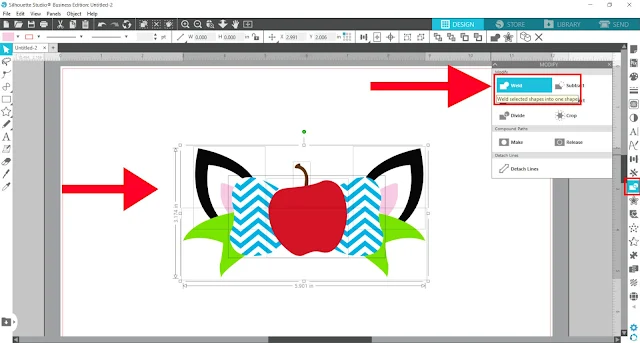
Decide which pieces of your design will become the base layer of your paper project. These are the pieces that overlap each other. It's important that these pieces touch or overlap each other for this next step because we'll be which combining them all together into one big shape.
Select all the overlapping elements > right click > Weld (or open the Modify panel and select Weld).
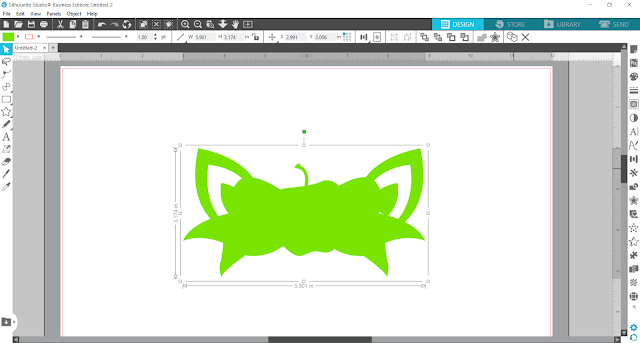
Boom!! One complete shape!
Now, if there are any "holes" within the shape that you want to remove so your base is solid, all you need to do is right click >>> Release Compound Path.
Here I added a black outline to the design elements so you can better see the design. After releasing the compound path of the new shape, deselect just the outermost shape by holding Shift on your keyboard and clicking on it. Then, only the inner parts of the design should be selected, and you can now either hit Delete on your keyboard or right click >>> Delete.
What about pieces of the design that don't overlap?
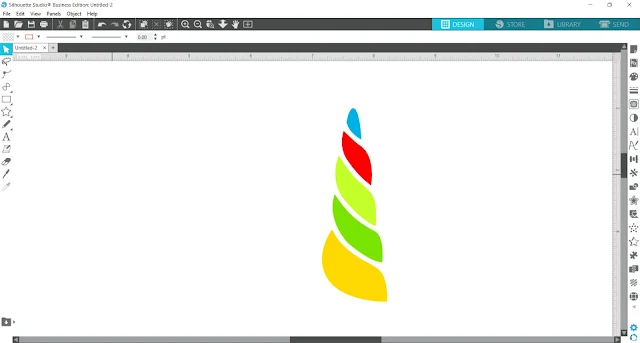
For shapes that are near to each other, but don't overlap, like the parts that make up the unicorn's horn, here's a little trick you can use.
Select all the elements of the horn, then open the Offset panel.
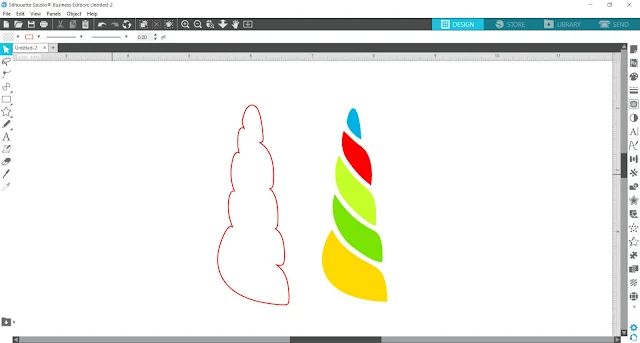
Click the Offset button, then use the up and down Distance arrows to adjust the offsets small enough so that they just barely overlap one another. Then, click Apply.
The offsets will be applied and because the pieces were overlapping, the software will automatically weld them together. Now, what you have is one complete base layer you can then glue the pieces of horn onto after you've cut them out of cardstock.
Cut the two base pieces on the cardstock color of your choice. I went with white.
Next, decide which colors of cardstock you want to use for the rest of your design.
Arrange the designs on your mat in Silhouette Studio. Now is when you'll need to go back to that first copy of the design you made to separate the individual pieces of it to cut them each out.
Place your cardstock in the same spots on your cutting mat. Then, just send to cut out and continue until you've cut out all the pieces of the designs. Remember to also cut out the new base layers you created.
Assembly
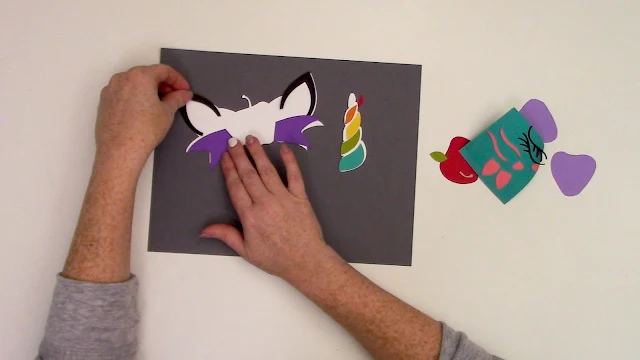
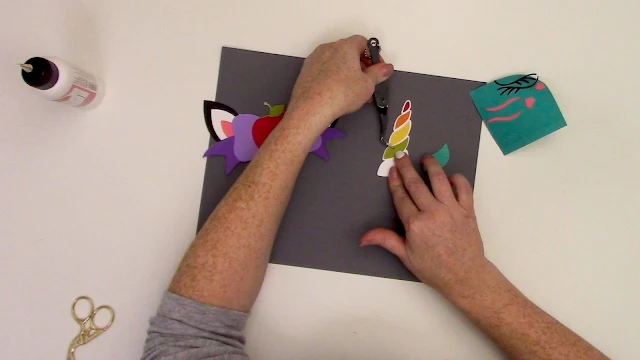
Start with one of the base layers by adhering the little pieces to it, starting with the bottom pieces first and working your way to the pieces in the front.
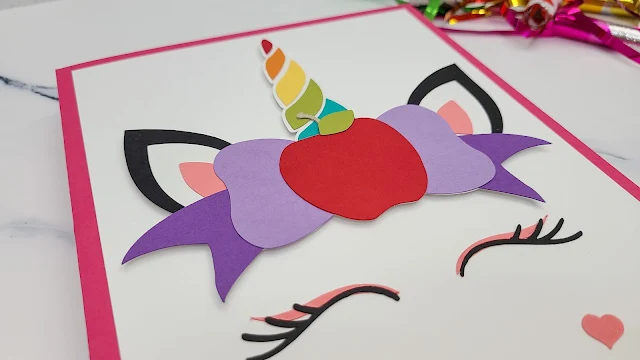
When you glue the little pieces of the horn on to its base layer, there will be a small white border around each little piece from the base layer. This is because this piece was created using an offset of the smaller pieces.
With all the pieces glued to the base layers, you can adhere it to your project using foam adhesive to give it some dimension off the page.
Here's a quick video of how this paper unicorn was assembled.
Doesn't this paper layered unicorn make the perfect center piece for a giant card. Grab this unicorn design and make your own whimiscal projects using the Unicorns and Mermaids Fonts and Design Bundle over at So Fontsy.
Get Silhouette School lessons delivered to your email inbox! Select Once Daily or Weekly.












.png)


No comments
Thanks for leaving a comment! We get several hundred comments a day. While we appreciate every single one of them it's nearly impossible to respond back to all of them, all the time. So... if you could help me by treating these comments like a forum where readers help readers.
In addition, don't forget to look for specific answers by using the Search Box on the blog. If you're still not having any luck, feel free to email me with your question.