If you're a Silhouette CAMEO Pro beginner and are looking a step by step tutorial to walk you through your first cut, you've come to the right place.
In this beginner tutorial you'll learn how to set up Silhouette Studio and your Silhouette CAMEO 4 Pro to make your first cut..without a cutting mat!
This tutorial assumes you have already unboxed your Silhouette CAMEO Pro and have established the initial bluetooth connection and software installation. If you haven't gone through those steps yet, check out the unboxing and CAMEO Pro setup tutorial.
For this first Silhouette CAMEO Pro Cut we are going to cut 24" vinyl off a roll using the roll feeder using the Autoblade that comes with the machine.
Machine and Roll Feeder Setup
Start by powering on your Silhouette CAMEO Pro and connecting it to your computer either by the USB cable or by pressing the Bluetooth icon on the front of machine.
Place the Autoblade in the left carriage making sure it's fully in the carriage without a gap. Lock it into place by pushing the lock in and catching the teeth in the lock.
Optional: You can do the below steps either now or immediately before you send your design to cut. It's up to you.
24" CAMEO Pro Roll Feeder Setup
Set up the 4-piece roll feeder by connecting the two cradle pieces and the narrow right end piece by hooking in under the front of the machine.
The long crossbar connects all three.
Depending on the length of the vinyl roll you may need to adjust the roller extensions by turning the know and pulling out the extender.
The shorter the roll of vinyl, the longer the extenders on the left and center piece of the roll feeder need to be. Make sure the extenders are the same length and then twist the knob to lock them into place.
Roller Positioning
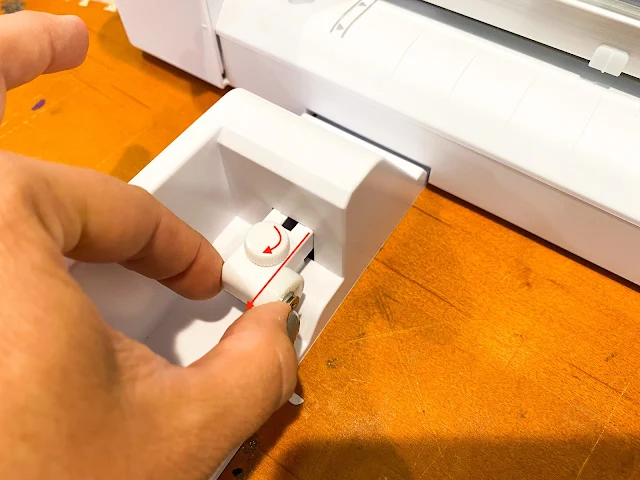
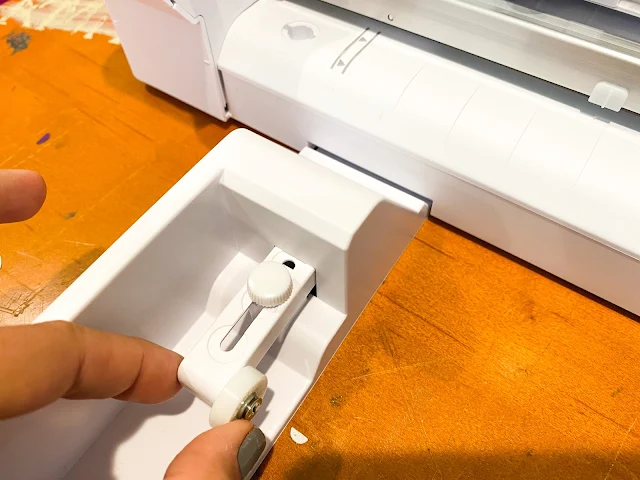
On the machine itself, make sure the right side roller is lined up with the 24" mark.
To do so, flip the lever bar down and slide the white roller to the last mark on the roller bar. Lock it into place by flipping the lever bar back up which will push the roller bar down.
With the vinyl roll sitting in the roll feeder cradle, pull out the front edge of the vinyl from the roll and get ready to load it into the machine.
Loading Material
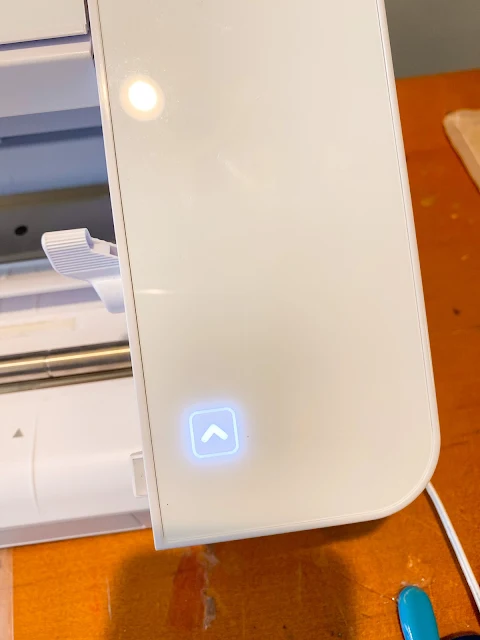
On the front panel of the Silhouette CAMEO Pro click the up arrow.
The load button will flash for about 3 seconds giving you time to hold both sides of the vinyl so while you place the top edge so it gently touches the rollers. The rollers will then begin feeding the material in when the material covers the mat/material sensor on the front of the machine.
If you need additional help on how to use the mat detection feature on the Silhouette CAMEO 4 series of machines you can really the full tutorial here.
TIP: My suggestion is to feed the material in slightly further which can be done by pressing the down arrow of the four navigational arrows. This prevents the edge from getting caught feeding in an out of the machine as it cuts.
Silhouette Studio Software Setup and Machine Connection
With the CAMEO 4 Pro set up and ready to go, now it's time to move to Silhouette Studio.
Send Panel Setup
In the Send panel of Silhouette Studio open the Machine list and select the CAMEO Pro machine. If it's connected correctly, the CAMEO Pro status should be listed as "Available", "Load Media", or "Ready".
Once the machine is selected from the Send panel it will show on the Send panel either saying "Load Media" or "Ready."
Select the material as Vinyl, Glossy or Vinyl, Matte depending on the type of vinyl you are cutting. I would suggest you make one change to the default settings - adjust the blade depth to 2 (up from default of 1).
Thanks to the tool sensor on the back of the Autoblade, the AutoBlade should be automatically detected and selected as the tool.
Design Setup
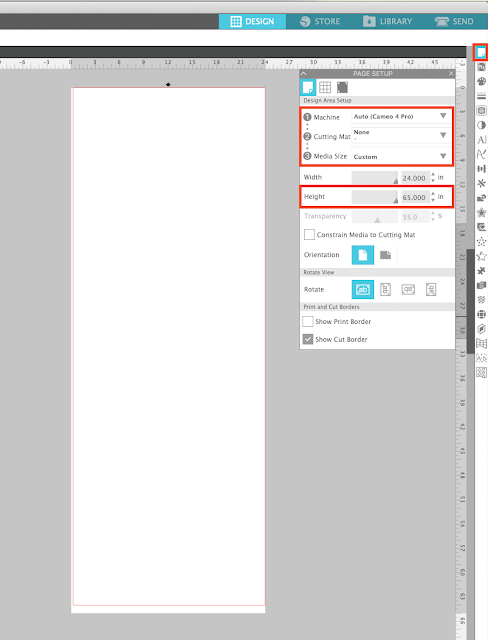
Move to the Design area of the software and open the Page Setup panel from the right sidebar. Because the machine is powered on and already selected in the Send panel, the machine should already be selected in Step 1.
Change the Cutting Mat to "None" and the Media Size to "Custom". Then adjust Width and Height of your material. The Height doesn't have to be exact to your design if you are cutting off a roll, which is why I just entered 65"
For this example I am cutting a vinyl design that will be used as a stencil for an 18" wood round. If you want to follow along this exact project you can download the Joy to the World Star Frame design free from our sister site, So Fontsy. Use the code PRONEWBIE to get it free.
Drag and drop your design into the work space or use the File > Merge option. Scale the design as needed. In this example, the design is about 17" wide and I added a larger circle around (Draw an Ellipse Tool on the Left Sidebar) so I could weed it as a stencil after it's cut.
When you're ready return to the Send panel. Double check your settings are all still correct from your previous selections and then click "Send" to begin the cutting process.
Check out how the cutting portion of this first Silhouette CAMEO 4 Pro project turned out in this Facebook Live Video I did on Silhouette School Facebook Page.
Get Silhouette School lessons delivered to your email inbox! Select Once Daily or Weekly.


.png)


No comments
Thanks for leaving a comment! We get several hundred comments a day. While we appreciate every single one of them it's nearly impossible to respond back to all of them, all the time. So... if you could help me by treating these comments like a forum where readers help readers.
In addition, don't forget to look for specific answers by using the Search Box on the blog. If you're still not having any luck, feel free to email me with your question.