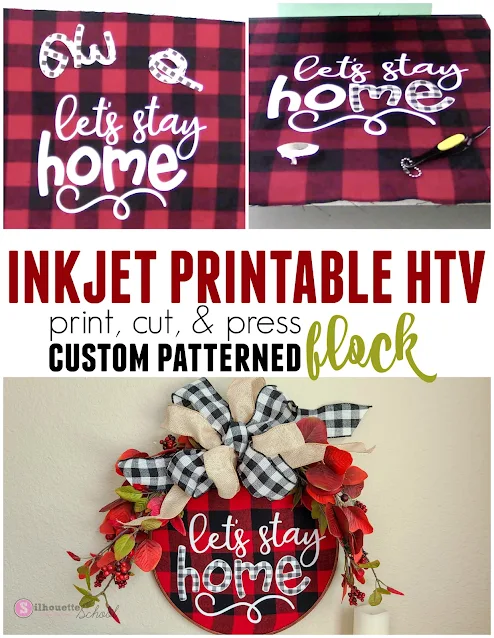
Inkjet printable HTV is one of my favorite products because of how quick, easy, and versatile it is!
While it's marketed mostly as an alternative to sublimation for clothing you can do so much more with it - including applying to wood, canvas, flock, and glitter HTV. Here are five of my favorite - and mind blowing - ways to use Inkjet Printable HTV. Read this and you'll see why I say it's a must have in every craft room!
Starcraft Inkjet Printable HTV is my favorite and the one I use the most often for both lights and darks. I used the inkjet printable for lights for all of the examples below!
Inkjet Printable on Wood
If you're like me and you hate painting but you have multi-color designs you need to put onto wood which would require a lot of layers of HTV - use printable inkjet instead! The process is as simple as print then press.
Inkjet Printable HTV on Canvas (Flat, Framed, Stretched..all of them!)
Inkjet Printable HTV as Faux Stain
Skip the mess of paint on stain by applying printable heat transfer vinyl directly to wood to get a faux stain look!
Inkjet Printable Heat Transfer on Flock HTV
We tested transferring a printed pattern from inkjet printable HTV onto flocked HTV and it works - opening up the possibilities to make your own patterned flock heat transfer vinyl!
Inkjet Printable HTV on Glitter HTV
Don't feel like layering glitter heat transfer vinyl or don't have every color glitter HTV on hand? You're in luck because this hack using printable heat transfer and white glitter HTV is perfect!
Get Silhouette School lessons delivered to your email inbox! Select Once Daily or Weekly.


.png)


Can a Cricut Easy Press be used or would it not be enough pressure?
ReplyDeleteCan a Cricut Easy Press be used or would it not be enough pressure?
ReplyDeleteDo you have to have a heat press to make it adhere securely?
ReplyDeleteHello Everyone!
ReplyDeleteI am trying to discover a way to use the WHOLE sheet of paper when using print and cut.
I have been seeing people use their cricuts to bypass using registration marks, allowing them to use the whole sheet of paper. However, when I import an image into Silhoutette studio, it usually cuts about a cm or so off to the left, as if I placed it too far to the center of the mat.
I sincerely DESPISE using registration marks because it forces me to shrink my image, and puts a stupid amount of space that I can't use with those checkerboard zones.
If anyone can think of a method to do this, PLEASE let me know, contact me or something. I am even willing to PAY to be taught how to do this. I simply cannot fathom paying the prices of "EasySubli" then throwing away pieces of it because this cutter doesn't want to cut an actual 8.5 x 11 sheet...
Hi there! Check out this tutorial: https://www.silhouetteschoolblog.com/2021/12/silhouette-print-and-cut-without.html
ReplyDelete