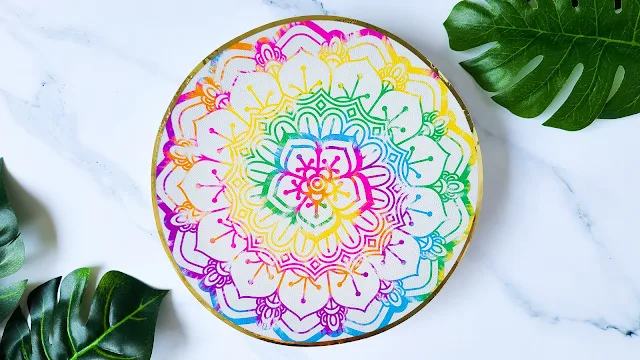
What if I told you that you could create stunningly beautiful and intricate mandala art on canvas without spending hours cutting and weeding vinyl or HTV?
Yes, it's true- with this Silhouette Mandala Silhouette project hack!
 |
| This is a sponsored blog post but all opinions are my own. |
Yes, it's true- with this Silhouette Mandala Silhouette project hack!
Here's an awesome mandala design found in So Fontsy's September Fonts and SVG Design Bundle. Turning it into a piece of canvas art is as simple as using your printer and one sticker paper from my favorite: Online Labels! Forget cutting and weeding vinyl, just print your mandala on clear sticker paper and apply it directly to the canvas for a really easy mandala Silhouette project!
Open and Color Mandala in Silhouette Studio
Open a mandala SVG design in Silhouette Studio and size it appropriately for your project. Keep in mind that because you're printing this design, you'll have to scale it to fit within a standard letter sized piece of paper - 8.5 by 11 inches - unless you have a wide format printer. If you turn on borderless printing you can get a little extra print area!
Add a desired fill color or pattern to your mandala design from the Fill panel. This part is exciting because you can print any color or pattern you wish; you're not limited to the vinyl colors you have in your stash! I used this really bright and colorful tie dye pattern from the Tie Dye Digital Patterned Papers set.
How to Print from Silhouette Studio
Load your printer with clear sticker paper. You guys know me, I always use Online Labels and today I'm using their clear glossy inkjet sticker paper. It's available for both laser and inkjet printers so make sure you get the right one for your printer or the ink will not dry correctly.
When printing sticker paper, especially glossy paper, I would suggest remove everything else from your printer tray.
Click the Printer icon on the top tool bar or go to File > Print. In the print settings window, change the material to one of the glossy options and "Best" print quality. Then send your design to print!
Transferring a Clear Sticker
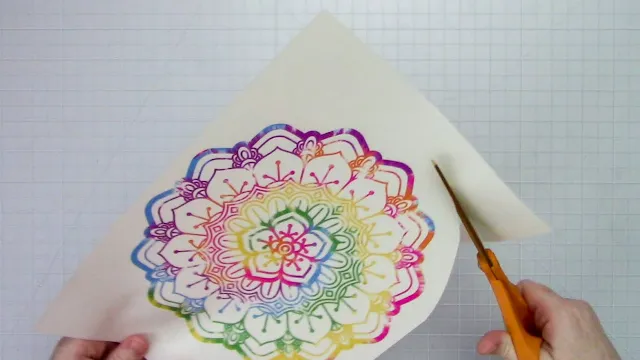
Use a pair of scissors and trim around the outside edge of the mandala. Or in this case, since it's going on an 8-inch circular canvas, trim a roughly 8-inch circle around the mandala (it's okay if it's a little bigger).
Note: You could use the Print and Cut feature to have your Silhouette cut out your design, but it's such a basic shape and the cut doesn't have to be perfect so using scissors wasn't a big deal. Print and cut requires registration marks which will limit the print and cut safe areas as well.
This next step is optional but may help you more easily align the mandala onto the canvas.
The backing on the sticker paper isn't translucent so you can't see through it. But, if you peel the mandala sticker off its backing and transfer it to a piece of parchment paper, then you can more easily see through it to align the mandala on the canvas. Just trim down the parchment after transferring the sticker so it's about the same size and shape of the mandala sticker.
Now we're ready to transfer the sticker mandala onto the canvas, and the hinge method works great for this.
The only adjustment you may want to consider is strategically placing the tape on just the edges of the mandala sticker. That way, if your tape is really tacky, you reduce the chance of it removing a lot ink from the sticker paper.
Peel up one half of the sticker mandala and cut away the parchment (or sticker backing).
Press the sticker paper onto the canvas.
Repeat on the other side and burnish the sticker paper really well onto the canvas. For a stretched canvas piece like this, try flipping it over and burnishing from the back side for more resistance without stretching out the canvas.
Trim away any sticker paper that overhangs the canvas (if any).
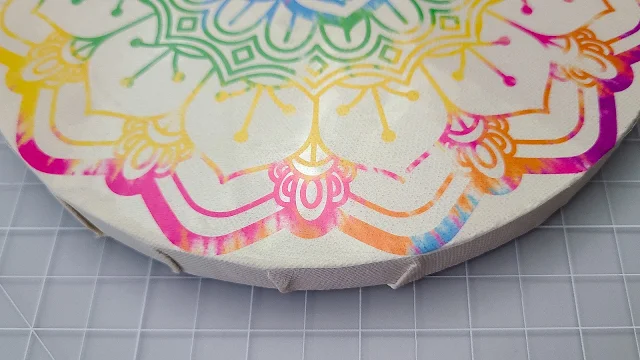
You should be able to see the texture of the canvas through the clear sticker paper which helps with the illusion that this design was cut and weeded in vinyl.

The edge of the sticker paper actually blends very seamlessly into the edge of the canvas so you could leave it as is or add a vinyl border around the edge.

The edge of the sticker paper actually blends very seamlessly into the edge of the canvas so you could leave it as is or add a vinyl border around the edge.
Add a Decorative Border (Optional)
Return to Silhouette Studio to create a border around the mandala design. Depending on the design, you could do this with the tools in the Offset panel. Take a look at this blog post on how to create borders in Silhouette Studio.
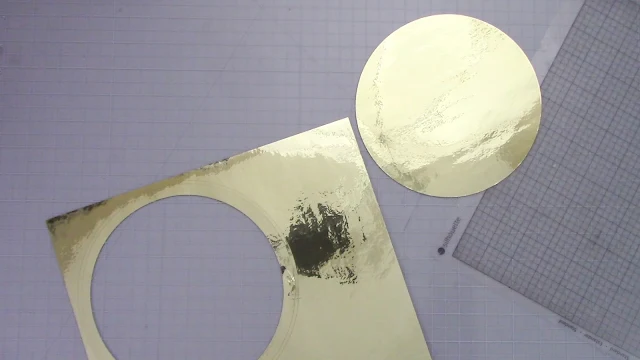
For this particular project on a circular canvas, just draw one circle around the edges of the mandala and then a second one slightly inset from the first.
Cut this border from adhesive vinyl.
When cutting a border for a large mandala like this, you'll probably have a large area of vinyl inside the border that should be weeded away. You can actually save that vinyl inside the border by cutting out the excess to save for a future project - check out this blog post for this vinyl saving hack!
Transfer the border to your canvas like normal with transfer tape. If you're concerned your sticky transfer tape may remove ink from the sticker paper, you can simply peel the vinyl border off its backing (like you would a sticker) and apply by hand.
Lay the vinyl border around the edge of the mandala. This adds more decoration to the piece and helps conceal the edges of the sticker paper which furthers the illusion that you spent hours cutting and weeding a mandala to create this piece of art! (We won't tell if you won't!)
Using transfer tape did left some of the ink, off the clear sticker paper, but it was minimal.
Using transfer tape did left some of the ink, off the clear sticker paper, but it was minimal.
That's it. A beautiful piece of mandala art and no weeding! The mandala designs in this post are part of the September Fonts and SVG Design Bundle over at So Fontsy. Each month a new bundle is release that features popular commercial free fonts and designs! The 2020 September Bundle is the perfect summer send off - but it's only available for one month so check it out!
Note: This post may contain affiliate links. By clicking on them and purchasing products through my links, I receive a small commission. That's what helps fund Silhouette School so I can keep buying new Silhouette-related products to show you how to get the most out of your machine!
Get Silhouette School lessons delivered to your email inbox! Select Once Daily or Weekly.


.png)


Thank you for this valuable info.
ReplyDeletewe also have some needful info. of cursive handwriting
pls visit our website :http://www.penkraftonline.in
Facebook :https://www.facebook.com/Penkraft555
Youtube : https://www.youtube.com/channel/UCAjyWA4FuBf6i1sOgiwQB1w
Thank you for this valuable info.
ReplyDeletewe also have some needful info. of Mandala Art
pls visit our website :http://www.penkraftonline.in
Facebook :https://www.facebook.com/Penkraft555
Youtube : https://www.youtube.com/channel/UCAjyWA4FuBf6i1sOgiwQB1w
Do you think you could do this on canvas and needlepoint or embroider it?
ReplyDeleteTracy
Http://www.lettercreate.com