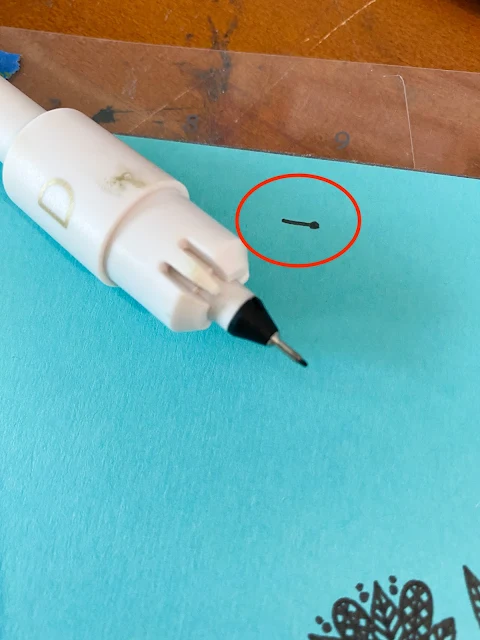
The ink pool, which can lead to ink bleeds and smears, is caused by the pen or marker just sitting stationary at the end of the sketch for a good 3-5 seconds before returning to the starting position. This quick Silhouette Studio trick can save your sketch projects.
This tutorial assumes you already know how to use sketch pens with the Silhouette CAMEO...and our now realizing this issue with the ink bleed. If you need a full step by step tutorial on how to use sketch with Silhouette CAMEO read more here.
Open your design in Silhouette Studio. Remember any cut file or font can be sketched, but if the sketch pen will draw exactly where the cut lines are. For that reason, many Silhouette users prefer single line sketch fonts and designs. The floral sketch design I am using is from this Kelly Creates Design set and the phrase is from this WRMK Foil Quill design and phrases set.
I added the tag shape as a cut line so I can cut out my design after it's sketched.
Once your design is open in Silhouette Studio select the Draw a Line tool on the left sidebar. Draw a very small line away from your design. It's important it's outside of where your design will be either sketched or cut. It's also important the line is added AFTER the rest of the design so it's on it's own layer.
Now select the line and the rest of the design (or the second to last shape added.. in this case the "thinking of you" and Group.
I'm using the WRMK cutting machine pens in my CAMEO 4 and the D adapter is best. You can use these pens in the other Silhouette machines with the A adapter. If you are sketching with a Silhouette sketch pen you can use the blue Silhouette adapter or you can use the Sketch Pen Holder.
Once you have the pen and mat and material loaded in the machine click Send from the Silhouette Studio Send panel to begin the sketching.
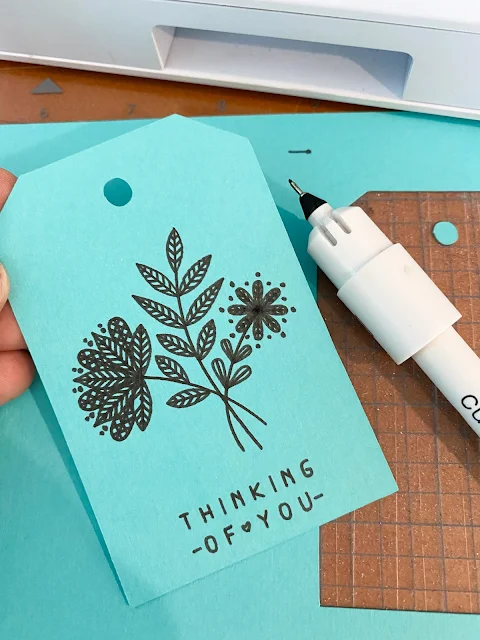
The small line you drew will be the last element sketched so the long pause at the end of the sketching will leave the pen resting (and pooling ink) at the end of the line rather than somewhere on your actual sketched design.
The line is so important because, had I not added the line, that circle of pooled ink would have resulted in this...
Instead, by adding that one little line I am left with a perfectly sketched (and cut) tag with no ink bleeds.
And in case you're wondering, I did a sketch and cut by adding the tag cut line around the sketched design and then sketched and cut by color swapping the pen out for the blade after the sketch portion of the design was complete.
A step by step tutorial on how to sketch and cut with Silhouette CAMEO 4 can be found here.
Get Silhouette School lessons delivered to your email inbox! Select Once Daily or Weekly.


.png)


Great tip!! Thanks!
ReplyDeleteI think you mean the "American Crafts Cutting Pens". I searched high and low for WRMK pens that weren't fabric pens. :)
ReplyDeletei love it
ReplyDelete