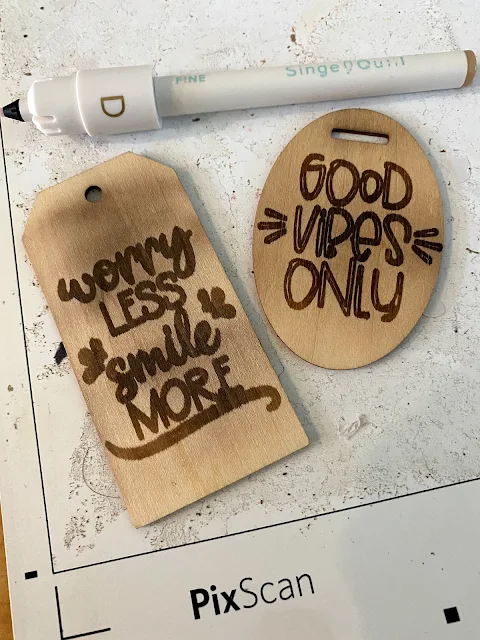
The Silhouette Pixscan mat is used for two main purposes: to accurately and preciously cut pre-printed materials (like a print and cut for pre-printed materials) and also to sketch, etch or cut with extreme accuracy on very small craft blanks or vinyl scraps.
What is the Silhouette Pixscan Mat?
The Silhouette Pixscan mat is a cutting and scanning mat that keeps the object or material on the mat in its exact proportions when brought into Silhouette Studio.No matter how you plan to use the Pixscan the first few steps are the same.
Setting up Silhouette Pixscan Mat with CAMEO 4
Remove the cover sheet from the Pixscan mat and place your object on the adhesive area within the boundaries of the safe cutting area.
In this example I'm using a wooden shape that I want to draw on with the WRMK singe quill.
Make sure the object is firmly stuck on the mat.
From directly overhead take a straight on picture of the entire cutting mat. The key is you want to avoid all shadows so turn off any lights if you need to.
Once you take the picture of your Pixscan mat do NOT move the object on the mat at all.
Transfer the photo to your computer by airdrop, email or some other method.
Importing Silhouette Pixscan Photo into Silhouette Studio
Open Silhouette Studio and click the second tool on the right sidebar to open the Pixscan panel.
You'll likely get a calibration error...click "Continue Without Calibration". Depending on the size of your image it could take a few minutes for your image to be imported.
Once the photo is in Silhouette Studio it will appear like a cutting mat. In the Page Setup panel do NOT select a cutting mat.
Cutting or Etching with the Silhouette Pixscan Mat
Now you have two options depending on how you will be using your cutting mat. If you are cutting out an area of a pre-printed material, you will need to trace the area to create cut lines.
If you are following this exact tutorial for sketching on a wood blank with Silhouette CAMEO 4, you will open your design in the same work area by either merging or dragging it in.
Size the design and position it directly on over the blank.
The Pixscan mat keeps the image of the wood piece the exact same size so placing the design over it will mean the design will sketch in the exact spot! No trying to figure out grid lines to hit your blank!
Make sure the Pixscan mat and tool are loaded in the Silhouette CAMEO 4 and the machine is powered on and connected to your computer.
Move to the Send panel and select the tool and material. In this case I am using a custom material setting that I have found to work well with the scorch pen on wood blanks which obviously are a thicker material.
When you're ready click "Send" to begin in the sketching process. Just like a print and cut the machine will first look for the registration marks on the Silhouette Pixscan mat then the CAMEO 4 will begin sketching directly on the blank with amazing precision!
Check out this video for the full reveal!
Get Silhouette School lessons delivered to your email inbox! Select Once Daily or Weekly.


.png)


Can this work with the Cameo 3?
ReplyDeleteI second that. Late to the game with a 3, not in the market for a 4 just yet.
DeleteYes
DeleteNice Post!! I came across your blog, and I found information about carpet cleaning. It’s fascinating and beneficial information for us. Thanks for sharing this information.
ReplyDeleteCan you use a normal cutting mat instead?
ReplyDeleteWe are using the PixScan to make sure that it is aligned properly.
DeleteWhat I did before, is scanning the objects, place them on the correct size on the mat, let it cut out of paper, don't move the paper, place the objects.
DeleteI have a love/hate relationship with my PixScan mat. When it works, I love it but usually the Cameo can’t detect the registration marks so it won’t work. I try loading the mat slightly different and there is plenty of light over the machine so I don’t know what else I can do. It’s infuriating and makes me want to throw the PixScan mat away.
ReplyDeleteHi there! Make sure that your lighting is not creating shadows over the registration marks. This can be an issue as well.
DeleteI love the pixscan mat but I had to add tape to the bottom corners of my mat to extend the mat slightly. When the mat registers it keeps feeding to far and the registration fails. With the tape it works. Does anyone else have the problem? Is there a way to fix it without the tape? I have the cameo 4.
ReplyDeleteHey there, we'd really need to see a picture of your set up to see what might be happening. Drop us an email or reach out on social media so we can help guide you!
Delete