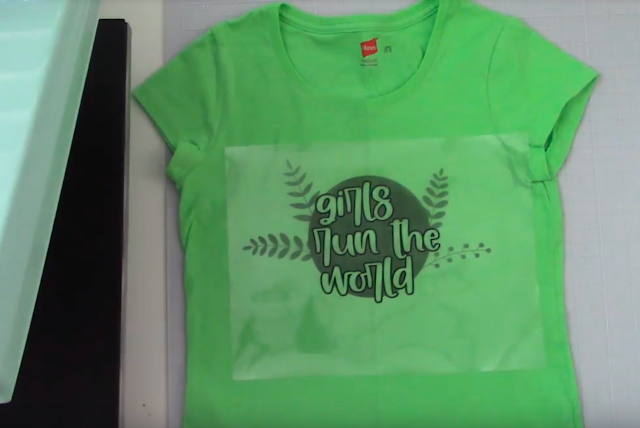
We’ve talked a lot about this when it comes to putting the multicolor HTV design on a white shirt and some hacks that can help you with alignment but what about when you have a darker shirt?
In this tutorial I’ll give you a quick trick on how you can create your own template so that you are able to line up your designs on dark shirts.
You will need a clear transparency that can be printed on your home printer.
Start in Silhouette Studio by filling your entire 'assembled' design with color - any color is fine and the entire design can be filled with the same color.
Place a transparency into your printer and from Silhouette Studio click the printer icon. Print a copy of your design. You can now use this to line up your design once all of your pieces are cut. Set the transparency aside for now.
Return to Silhouette Studio and break up your design so that you can cut each of the individual pieces on each of the correct colors of HTV. Before you cut don’t forget to flip the pieces horizontally so they cut in reverse. If you need help with how to cut a multi color design you can follow this tutorial.
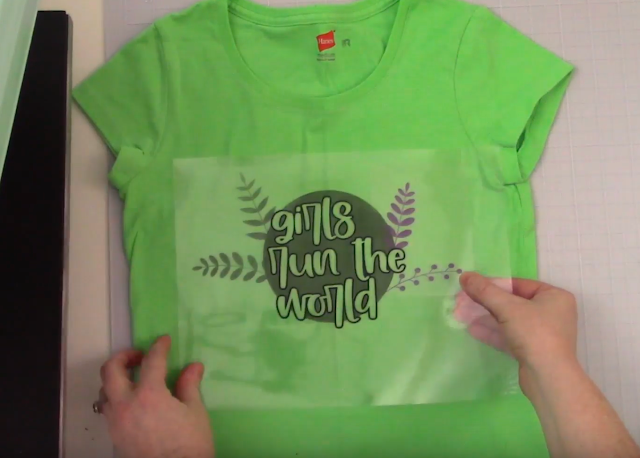
Once all of your HTV pieces are cut and weeded, grab your transparency and ONE of your pieces of HTV. Using the transparency as a guide place the HTV piece UNDER the transparency so the clear transfer sheet is touching the transparency.
Now position both on the shirt.
When you get it in the right position, press the HTV piece down. The sticky side of the clear carrier sheet will make it stick on the shirt. Move the transparency as you tack down the HTV piece with a heat press or iron.
Remove the carrier sheet from the piece of HTV and repeat the process now with a second piece of HTV.
As you position the piece on the shirt, use the transparency sheet to line up against the piece that's already on the shirt.
Continue this process with any pieces of the design that need to be positioned exactly.
Note: This post may contain affiliate links. By clicking on them and purchasing products through my links, I receive a small commission. That's what helps fund Silhouette School so I can keep buying new Silhouette-related products to show you how to get the most out of your machine!
Get Silhouette School lessons delivered to your email inbox! Select Once Daily or Weekly.


.png)


No comments
Thanks for leaving a comment! We get several hundred comments a day. While we appreciate every single one of them it's nearly impossible to respond back to all of them, all the time. So... if you could help me by treating these comments like a forum where readers help readers.
In addition, don't forget to look for specific answers by using the Search Box on the blog. If you're still not having any luck, feel free to email me with your question.