I get a lot of questions about how to create a stencil with Silhouette CAMEO. It's pretty easy to do - as long as you understand where to weed.
Single use stencils can be made using stencil material or adhesive vinyl.
For this tutorial we will be making a stencil to be used on chalkboard vinyl with a chalkboard marker. But you could also use this same stencil to paint.
Creating A Chalkboard Stencil
To create a
stencil for your chalkboard sign, open the design in Silhouette Studio and draw a box around it making sure the box is an inch away from the design on all sides. The box will be the edge of your stencil and that extra inch will serve to protect your surface from paint or chalkboard marker!
Cut your design into stencil material like Oramask 813.
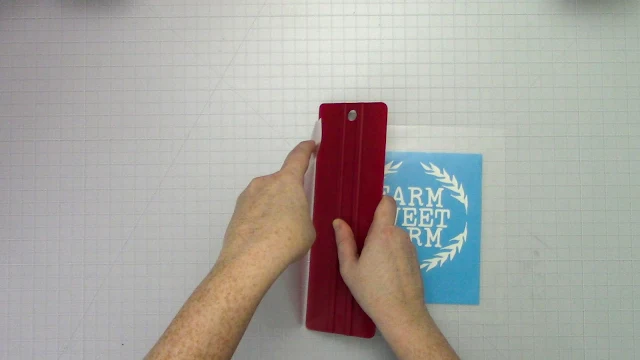
One of the keys to cutting a perfect stencil is to make sure the stencil material lays flat against its backing and lays flat on your cutting mat. So, use a brayer or scraping tool to smooth out the stencil material, making sure there aren’t any bubbles in it.
Best Silhouette Cut Settings for Oramask 813 Stencil Material
Next, load your Silhouette machine and send to cut. Test cutting is always recommended before starting any project, and I found the follow Silhouette cut settings work perfect on Oramask 813.
Blade: 2
Force: 5
Speed: 7
Passes: 1
Also, test weed the stencil before unloading your mat from the Cameo. This way you can really check to see that you achieved a nice cut and that weeding will be a breeze.
Next, you want to weed two places: 1) the area OUTSIDE the box and 2) weed out the design from the stencil material exposing the areas where you want to paint or use the chalk marker. Because this is a
stencil,
not a decal, remove the design itself and not the excess vinyl around
it.
If any stencil material pulls away from the backing, it may cause bubbling under the stencil material. Just smooth it out again with your finger or a scraping tool to push out the bubbles.
If any stencil material pulls away from the backing, it may cause bubbling under the stencil material. Just smooth it out again with your finger or a scraping tool to push out the bubbles.
Apply transfer tape over the stencil. Use your
scraping tool to press the transfer tape as smooth as possible over the
stencil – trying to avoid any bubbles or wrinkles in the transfer tape
and stencil material. Burnish the transfer tape really well onto the
stencil.
Next, flip over the entire thing and roll the stencil backing off the
stencil material.
With
the stencil backing removed, use your
scraping tool to press the stencil smoothly onto the chalkboard vinyl. By the way, if you don't have chalkboard vinyl you can make your own as explained in this DIY chalkboard vinyl tutorial.
Next, remove the transfer tape by rolling it back on itself.
Next, remove the transfer tape by rolling it back on itself.
Fill in the stencil with a chalk marker, like this Marvy Uchida Bistro Chalk Marker. You may need
to apply the marker in layers to get even and solid coverage. These
markers are available in so many different colors so you can really have
a lot of fun coloring in your stencil.
Once
the stencil is completely filled in and dry, begin removing the stencil
by peeling up one of the edges.
You may need to use a pair of tweezers to lift the stencil edge and pick up parts of the stencil from the chalkboard. Just be careful not to press down too firmly with the tweezers or you could scratch the chalkboard finish on the vinyl. Also, try not to touch any part of the chalked areas because you could smear the design.
You may need to use a pair of tweezers to lift the stencil edge and pick up parts of the stencil from the chalkboard. Just be careful not to press down too firmly with the tweezers or you could scratch the chalkboard finish on the vinyl. Also, try not to touch any part of the chalked areas because you could smear the design.
Since
chalk markers are water soluble, when you're ready for a change, simply
use a damp cloth to wipe away the design.
So, while your sign is on display, it may be a good idea to keep it in a dry area where it won't get wet. But, if you did want to make this chalk design permanent, just spray it with a few light coats of a clear matte spray to seal in the design.
So, while your sign is on display, it may be a good idea to keep it in a dry area where it won't get wet. But, if you did want to make this chalk design permanent, just spray it with a few light coats of a clear matte spray to seal in the design.
Note: This post may contain affiliate links. By clicking on them and purchasing products through my links, I receive a small commission. That's what helps fund Silhouette School so I can keep buying new Silhouette-related products to show you how to get the most out of your machine!
Get Silhouette School lessons delivered to your email inbox! Select Once Daily or Weekly.


.png)


What brand is the transfer tape?
ReplyDeleteGreat share. Any good alternative of Oramask 813?
ReplyDeleteHey there! You could try removable vinyl as well, but I really recommend the Oramask.
Delete