Mind = Blown! The Rhinestone Tool in
Silhouette Studio isn’t just for rhinestones!
We've used it for string art and faux rhinestones cut on HTV..but did you know you can also turn your SVG designs into dot mandala painting patterns?! This Silhouette rhinestone tutorial will walk you through!
We've used it for string art and faux rhinestones cut on HTV..but did you know you can also turn your SVG designs into dot mandala painting patterns?! This Silhouette rhinestone tutorial will walk you through!
What are Dot Mandala Patterns?
Dot mandala art features the beautiful intricacy of the popular mandala design but in the form of a series of colored dots to create the pattern. While it may look intimidating, it’s actually very easy to design a dot mandala template to use to create your own dot art.
You just need the Rhinestone Tool in Silhouette Studio (available in Silhouette Studio Designer Edition and up).
You just need the Rhinestone Tool in Silhouette Studio (available in Silhouette Studio Designer Edition and up).
This tutorial will show you how to create a dot mandala
template for a standard A2 sized card. But, imagine all the other project
possibilities you could create when you see how easy it is to make your own dot mandala templates in
Silhouette Studio?! Just search Pinterest for "dot mandala art," and you will be blown
away!!!
Setting Up Your Card Template
Start by opening Silhouette Studio. Draw a rectangle using the Draw a Rectangle tool that measures 4 x 5.25 inches and just set it aside for now.
Then, go to File, click "Merge," and select a mandala SVG from your computer.
Alternatively, you could also go into your Silhouette Studio library, find your mandala design, then right-click it, and select the “Merge” option from the drop-down menu. By selecting "Merge", you open the design in the current window instead of opening a new one.
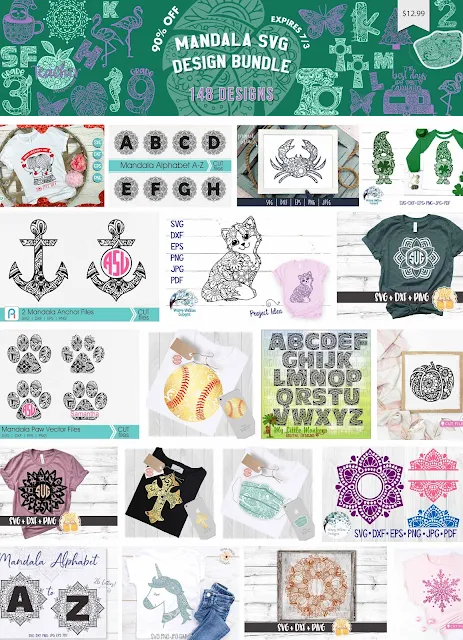
The design used for this mandala card comes from the
fabulous Mandala SVG Design Bundle from So Fontsy. Have you ever seen 148
exquisite mandala designs?
I found this technique worked best if the mandala was
kept relatively large and not scaled down too small. This Flower Monogram
mandala opened at about 9 inches wide which worked really well for this
project.
Converting Designs to Rhinestone Templates
Next, open the Rhinestone Panel (the icon looks like a little gemstone). If you don’t see it in your right-hand menu, make sure you have at least Designer Edition, and you may need to click the left facing arrow at the bottom of the right-hand menu to open additional features that couldn’t all fit in the side toolbar.
Select the mandala then click the "Edge Fill" rhinestone effect
option. This will change the lines in the mandala design to circles for which you would normally cut in rhinestone template material. Instead, we’ll be printing the circle design to use as a
template for dot mandala art.
Editing Your Template
You have a lot of creative freedom at this point to transform the mandala design to a dot mandala template. For example, there are other fill options you can play around with like the "Liner Fill" and "Radial Fill" - see what one you like best. You can also change the size of the rhinestones (circles) in the template.
You can also adjust the spacing between stones (circles) to make them
closer together or further apart. You can even adjust the spacing all the way down to 0.0 inches if you want because this won’t actually be cut out of rhinestone template
material.
You can experiment with the "Release Rhinestones" option which makes it so that each circle can be moved individually. I didn't find it very helpful for this project, but it is another tool at your disposal to edit the mandala template.
If you do release rhinestones and/or release compound paths in your design, it is very important to put the compound paths back together again. So, after all your edits to the mandala template, select the entire design, right-click and select "Make Compound Path." You need the whole mandala design to be one complete compound path, otherwise this next step will not work correctly.
Crop, Print, & Create Art
Arrange the mandala rhinestone template to your liking within the rectangle you drew earlier.
Many of the stones will fall outside the rectangle, which is okay, we’ll end up getting rid of those. Anything inside the rectangle will be printed and become the finished template for your dot mandala.

Select both the mandala rhinestone template and the rectangle.
Open the Modify panel and click Crop. The mandala template will now be cropped down to the size of the rectangle.
Many of the stones will fall outside the rectangle, which is okay, we’ll end up getting rid of those. Anything inside the rectangle will be printed and become the finished template for your dot mandala.

Select both the mandala rhinestone template and the rectangle.
Open the Modify panel and click Crop. The mandala template will now be cropped down to the size of the rectangle.
You want to group all of those dots together so click and drag across the template to select the entire
thing and group the dots together.
Now, using the Draw a Rectangle tool again draw and center a rectangle around the mandala template that measures 4.25 by 5.5 inches. This line is going to be the edge of the template. But for this project we are not actually going to use the Silhouette machine to cut anything, we are just using the software to print a template.
Now, using the Draw a Rectangle tool again draw and center a rectangle around the mandala template that measures 4.25 by 5.5 inches. This line is going to be the edge of the template. But for this project we are not actually going to use the Silhouette machine to cut anything, we are just using the software to print a template.
Printing the Dot Mandala Template
Select the mandala template and the rectangle and from the Quick Access Tool Bar, give them a line weight of 0.25 point and a line color of light gray - this is very important because they won't print on your home printer without a line weight.Change the fill color to white or “transparent.”
Next, using the Printer icon from the top toolbar or File > Print, you’re going to print this design on white 80lb
cardstock.
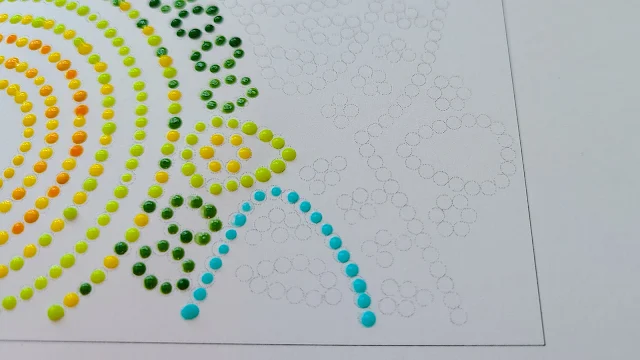
The light gray lines of the dot template and the edge should be very faint when printed so they are easily covered up by whatever medium you choose to do your dotting.
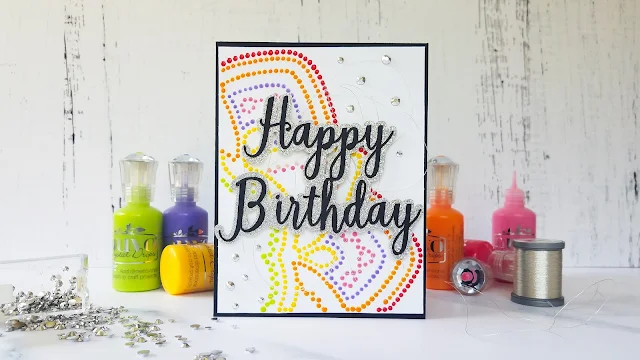
You could use markers, or paint pens or enamel drops, like the Nuvo Drops I used, in whatever color scheme you like. There are so many possibilities!

Once the template is filled out and dry, use a paper cutter to cut just barely inside the rectangle line of the template edge.
Adhere it to a folded note card that measure 4.25 x 5.5 inches. Add a sentiment and/or more embellishments. A dot mandala design is the perfect background for a card of any occasion.
Now, dotting a mandala template like this may take a little bit of time, but just look at the results – it’s totally worth it! And you'll see that even if you’re not into rhinestones, the Rhinestone Tool in Silhouette Studio can still be a useful tool.
If you liked the design used in this card, grab it from the
Mandala SVG Bundle from So Fontsy. It’s part of a MASSIVE bundle of mandala
designs that is sure to help you find your inner Zen!
Note: This post may contain affiliate links. By clicking on them and purchasing products through my links, I receive a small commission. That's what helps fund Silhouette School so I can keep buying new Silhouette-related products to show you how to get the most out of your machine!
Get Silhouette School lessons delivered to your email inbox! Select Once Daily or Weekly.


.png)


Nice article and thanks for sharing your knowledge. I really appropriate your views.
ReplyDeleteOffer On Kids Designer Wear
Brilliant!
ReplyDelete