With this hack you can now use up every last square inch (and make these adorable mini monster succulent pots)!
Setting Up Silhouette Studio for Printing on Scraps
So, start by firing up your printer, and setting up your Silhouette Studio workspace for printing. For my printer, that means changing the media size to "Printer" in the Page Setup panel.
Then, measure your scrap piece of printable vinyl. I am using Oracal 1917 which is an inkjet printable vinyl.
In Silhouette Studio use the Draw a Rectangle tool to draw the same size rectangle as your scrap piece.
Make sure to position the rectangle on the page so that it fits within the Print and Cut area.
In Silhouette Studio use the Draw a Rectangle tool to draw the same size rectangle as your scrap piece.
Make sure to position the rectangle on the page so that it fits within the Print and Cut area.
If you turned on registration marks temporarily to make sure your scrap piece rectangle guide is within the safe print area, turn them off now.
Now open your design into the same work area. You can do this by dragging and dropping or by using File > Merge.
By the way, these cute monsters I'm using are part of the Kid's Craft Bundle at So Fontsy. With 84 SVG files and 1 font, you can keep the kids crafting for hours! It's available for a limited time at $9.99 at So Fontsy.
Arrange your design(s) that you want to print within the center of the rectangle and leave some space between the design and the edges of the rectangle.
From the File > Print option, go ahead and print this page on regular printer paper. DO NOT PRINT ON on your printable vinyl yet and ensure registration marks are OFF.
Also, since you’re not going to be using this printed page in your finished project, you can print in black and white or your printer's "draft mode."
Stay with me...
Using a Draft Print to Print and Cut on Scraps
Now it's time to grab your scrap piece of printable vinyl and tape it down onto the page you just printed.You want to make sure that the scrap piece is positioned right on top of the previously printed area. Make sure the tape is very securely stuck down and that the vinyl lays flat against the paper.
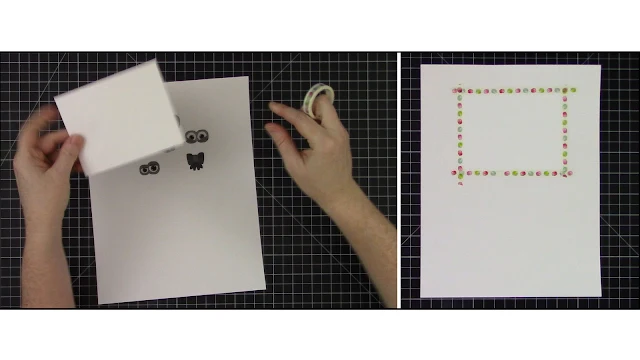
You should also make sure not to cover up too much of the vinyl with the tape (so it doesn't interfere with your design).
Just put tape around the very edges of the printable vinyl. That's why we left space around the design in Silhouette Studio - to account for this tape around the edge.
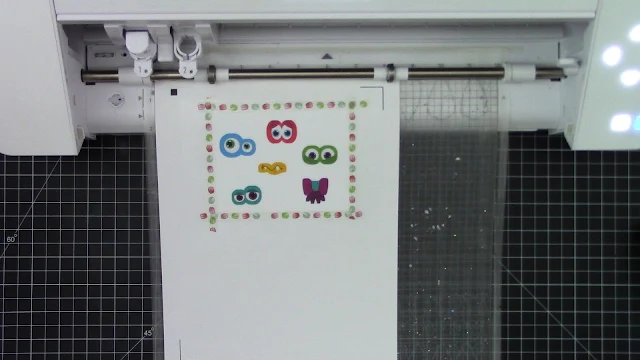
Next, load this paper back into your printer's feed tray. But you MUST load the paper in such a way that when you print the design on this page again, it will print in the same spot as it did last time. Since the printable vinyl now occupies that spot, the design will be printed on the vinyl instead!!! Cool, huh?!
For my printer, this means loading the feed tray with the paper face down and bottom sticking out, but yours may be different so just check your printer to be sure. But don't print on the vinyl just yet!
Go back into
Silhouette Studio and turn ON registration marks from the Page Setup panel (or by clicking "M" on your keyboard).
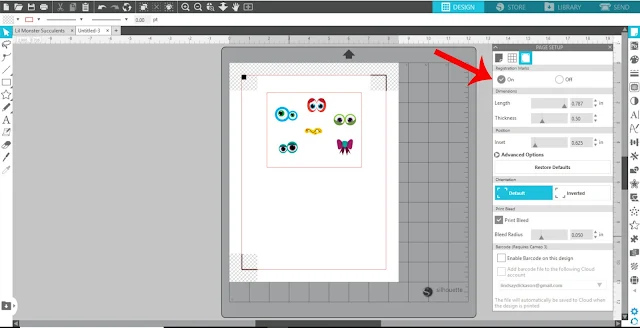
You can now send the design to print on your printer a second time. Make sure to change the print settings from draft mode if you need to because this print will be used on your finished project.

You can now send the design to print on your printer a second time. Make sure to change the print settings from draft mode if you need to because this print will be used on your finished project.
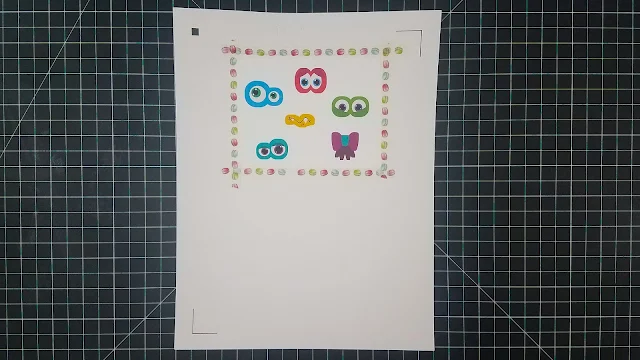
See how you just printed on the small scrap of printable vinyl rather than using up an entire piece?! Talk about a money and material saver!
Read more about why you should laminate printable vinyl and how to apply it in this blog post.
Add Laminate Over Printable Vinyl
Place a sheet of clear UV Oracal laminate over the designs on the printed vinyl. This step is optional, but I highly suggest you do not skip it.Read more about why you should laminate printable vinyl and how to apply it in this blog post.
Cut the laminate film to cover just the printed designs. Do not cover the registration marks with the laminate film (it could interfere with your machine reading the registration marks correctly).
Cutting Print Printable Vinyl with Silhouette CAMEO
Place the printed sheet on your cutting mat, load your machine, and send to cut in Silhouette Studio.
The Silhouette cut settings I used for printable vinyl were:
Blade: 1
Force: 20
Speed: 5
Passes: 1
To transfer the cut pieces from the scrap piece to your project, you can peel it off and apply it like a sticker. Or, if your design has multiple pieces
that need to stay together, use transfer tape to pick up
all the pieces and transfer to your project (just like you would with regular adhesive vinyl).
These monster parts are super fun for kids to create their own
lil monster succulents to take care of.
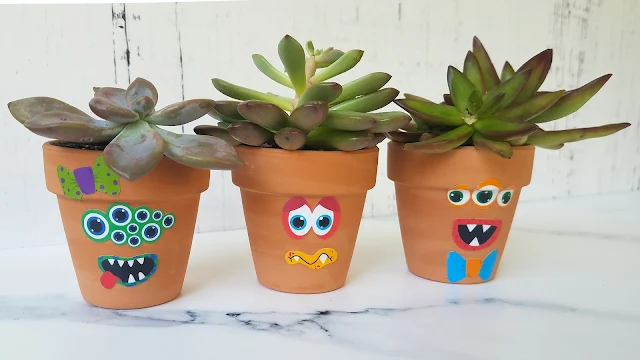
Find these designs (and much, much more) in the Kid's Craft Bundle at So Fontsy.
This is such a fun way to create with your kids!
Note: This post may contain affiliate links. By clicking on them
and purchasing products through my links, I receive a small commission.
That's what helps fund Silhouette School so I can keep buying new
Silhouette-related products to show you how to get the most out of your
machine!

Find these designs (and much, much more) in the Kid's Craft Bundle at So Fontsy.
This is such a fun way to create with your kids!
Get Silhouette School lessons delivered to your email inbox! Select Once Daily or Weekly.




.png)


Hi! I did similarly pasting scraps on copy paper but my curio is cutting the design out of alignment! It keeps cutting a few mm towards the right of my design. This is almost always consistent no matter how many times i tried, and even with a super sticky mat. What is wrong with my machine?
ReplyDeleteHi there! In your send panel, there is a calibration tool. You may want to try that.
DeleteThank youfor your reply. I had already tried that yesterday but everything seemed to be calibrated fine. Cuts were on the lines as they should be. Any other ideas?
ReplyDeleteHi there! If that's not the issue, we'd really need to be able to interact a bit closer for troubleshooting. You may want to check out our membership where you can get 1:1 help with Melissa https://silhouetteu.com/
ReplyDelete